
Scheppach HS105
Scheppach HS105 Table Saw Instruction Manual
Model: HS105 (430450)
Brand: Scheppach
1. Important Safety Instructions
Always read and understand all safety warnings, instructions, illustrations, and specifications provided with this power tool. Failure to follow all instructions listed below may result in electric shock, fire, and/or serious injury.
General Power Tool Safety Warnings
- Work Area Safety: Keep work area clean and well lit. Cluttered or dark areas invite accidents. Do not operate power tools in explosive atmospheres, such as in the presence of flammable liquids, gases, or dust.
- Electrical Safety: Power tool plugs must match the outlet. Never modify the plug in any way. Do not use any adapter plugs with earthed (grounded) power tools. Avoid body contact with earthed or grounded surfaces.
- Personal Safety: Always wear eye protection, hearing protection, and a dust mask. Dress properly. Do not wear loose clothing or jewelry. Keep hair and clothing away from moving parts.
- Power Tool Use and Care: Do not force the power tool. Use the correct power tool for your application. Disconnect the plug from the power source and/or remove the battery pack, if detachable, from the power tool before making any adjustments, changing accessories, or storing power tools.
- Service: Have your power tool serviced by a qualified repair person using only identical replacement parts. This will ensure that the safety of the power tool is maintained.
Table Saw Specific Safety Warnings
- Keep hands and fingers away from the saw blade.
- Always use the blade guard and splitter.
- Ensure the workpiece is firmly supported and guided.
- Never reach over or behind the rotating saw blade.
- Use a push stick or push block when making narrow cuts.
- Do not perform freehand cuts. Always use the fence or miter gauge.
- Before starting the saw, ensure the blade is clear of the workpiece and all adjustments are secure.
- Regularly check the saw blade for damage or dullness. Replace as necessary.
2. Product Overview
The Scheppach HS105 Table Saw is a powerful and versatile tool designed for precise cutting of wood and similar materials. It features a robust 2000W motor, a 255mm saw blade, and a stable chassis for reliable operation.

Figure 2.1: Overall view of the Scheppach HS105 Table Saw with its integrated stand.
Key Features:
- Powerful Motor: 2000W for efficient cutting.
- Large Saw Blade: 255mm diameter for various cutting tasks.
- Adjustable Cutting Height: Up to 80mm at 90° and 55mm at 45°.
- Pivoting Blade: Blade can be tilted up to 45° for bevel cuts.
- Table Extension: Expandable table surface for larger workpieces.
- Precision Guides: Includes a miter gauge and parallel stop for accurate cuts.
- Integrated Chassis: Provides stability and an ergonomic working height of 910mm.
- Mobility: Equipped with wheels for easy transport.
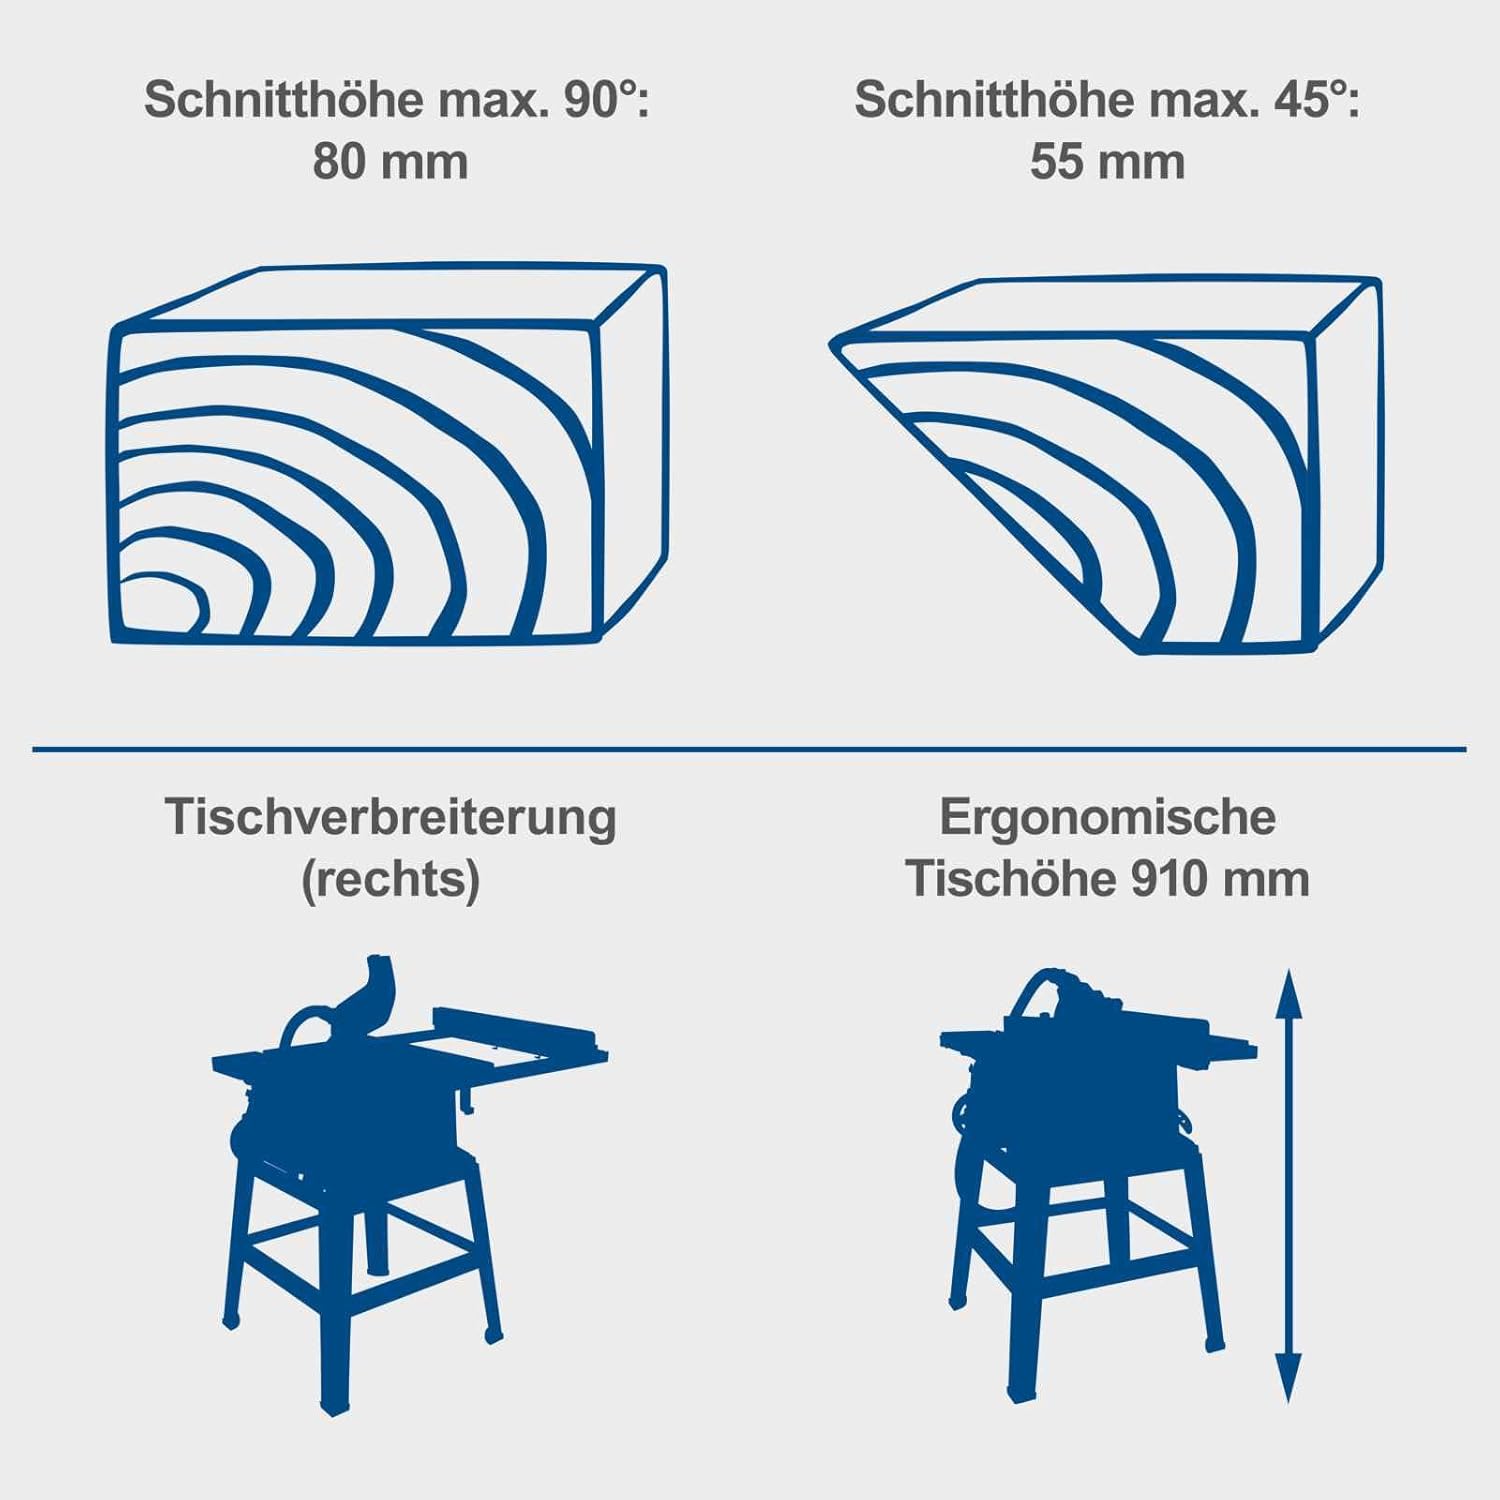
Figure 2.2: Diagram illustrating maximum cutting heights (80mm at 90°, 55mm at 45°), right table extension, and ergonomic table height (910mm).

Figure 2.3: Diagram showing saw blade specifications (255mm x 30mm x 2.8mm) and the blade's pivot range (0-45°).
3. Setup and Assembly
Before operating the Scheppach HS105 Table Saw, ensure it is properly assembled and all components are securely fastened.
3.1 Unpacking and Inspection
- Carefully remove all components from the packaging.
- Inspect for any shipping damage. Do not operate the tool if damage is found.
- Verify all parts listed in the packing list are present.
3.2 Stand Assembly
Assemble the stand according to the diagrams provided in the separate assembly guide. Ensure all bolts and nuts are tightened securely to provide a stable base for the saw. The stand provides an ergonomic working height of 910mm.

Figure 3.1: The table saw positioned at an ergonomic working height, facilitating comfortable operation.
3.3 Installing the Saw Blade
- Ensure the saw is unplugged from the power source.
- Remove the throat plate.
- Use the provided wrenches to loosen the arbor nut and remove the outer flange.
- Place the new 255mm saw blade onto the arbor, ensuring the teeth are pointing towards the front of the saw.
- Reinstall the outer flange and arbor nut, tightening securely.
- Replace the throat plate.
3.4 Attaching the Blade Guard and Splitter
The blade guard and splitter are crucial safety components. Ensure they are correctly installed and aligned with the saw blade. The splitter helps prevent kickback, and the guard protects against accidental contact with the blade.
3.5 Table Extensions
The table saw features a right-side table extension that can be pulled out to accommodate larger workpieces, extending the table width up to 1045mm.
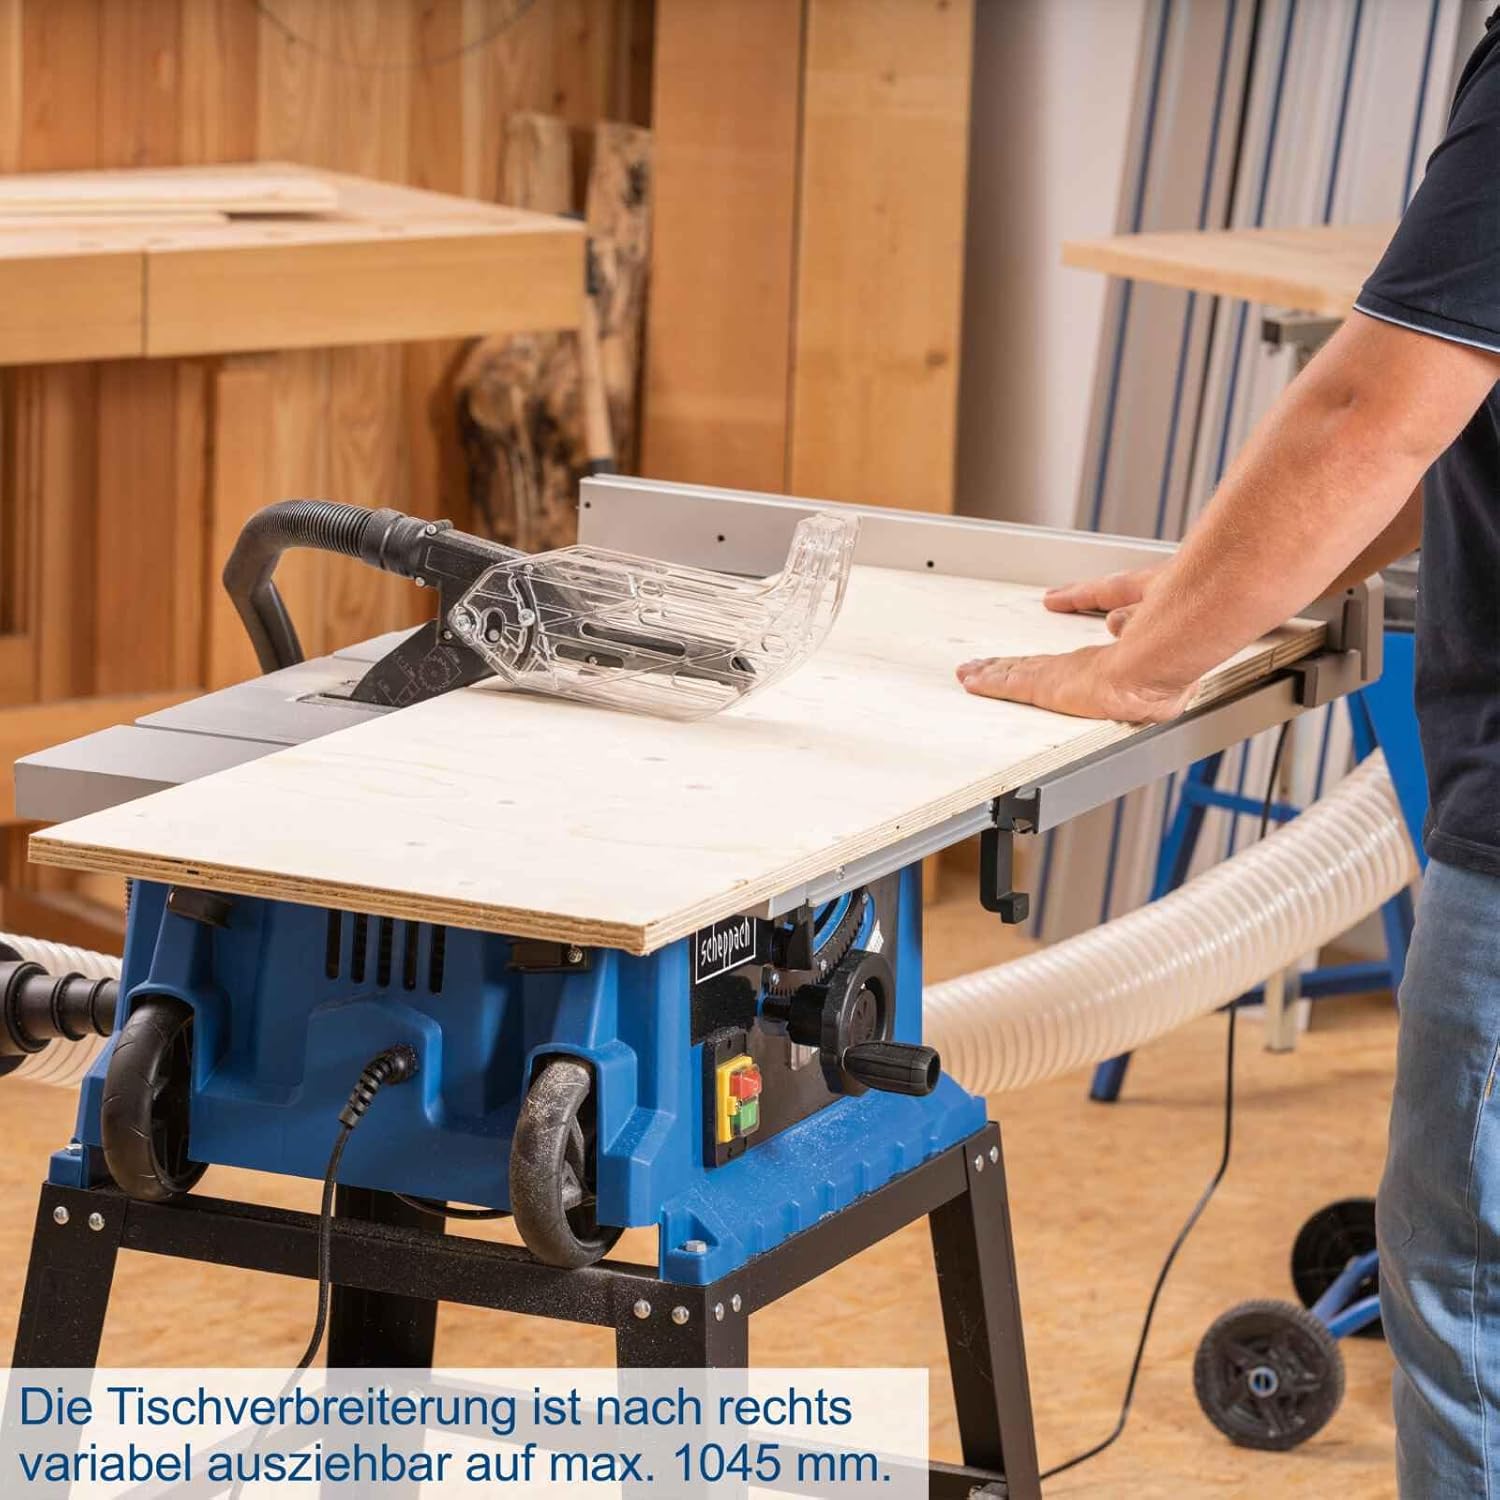
Figure 3.2: The right table extension pulled out, providing additional support for wider materials.
3.6 Connecting Dust Extraction
For a cleaner and safer working environment, connect a dust extraction system to the saw's dust port. This machine allows for direct dust extraction from the housing or the saw blade guard.

Figure 3.3: The table saw with a dust extraction system connected, demonstrating dust management capability.
4. Operating Instructions
Always ensure all safety precautions are followed before operating the table saw.
4.1 Power On/Off
- To turn on the saw, press the green "ON" button.
- To turn off the saw, press the red "OFF" button.
- In case of emergency, press the large red emergency stop button if available.
4.2 Adjusting Cutting Height
The cutting height can be adjusted using the handwheel located on the front of the saw. Rotate the handwheel to raise or lower the saw blade. For optimal safety and cut quality, the blade should extend approximately 3-6mm above the workpiece. The maximum cutting height is 80mm.

Figure 4.1: Demonstrating the maximum cutting height of 80mm for the HS105.
4.3 Adjusting Bevel Angle
To make bevel cuts, the saw blade can be tilted from 0° to 45°. Loosen the bevel locking knob, adjust the blade to the desired angle using the angle scale, and then securely tighten the locking knob.
4.4 Using the Parallel Stop (Rip Fence)
The parallel stop is used for making accurate rip cuts (cutting along the grain). Position the fence to the desired width of cut and lock it securely. The dual-clamped parallel stop ensures precise and repeatable cuts.

Figure 4.2: Detail of the dual-clamped parallel stop, designed for precise and repeatable rip cuts.
4.5 Using the Miter Gauge
The miter gauge is used for making accurate cross-cuts and miter cuts (angled cuts across the grain). Insert the miter gauge into the T-slot on the table, adjust to the desired angle, and secure it.
4.6 Making a Cut
- Ensure the workpiece is free of nails, screws, or other foreign objects.
- Position the workpiece against the parallel stop or miter gauge.
- Turn on the saw and allow the blade to reach full speed.
- Slowly and steadily feed the workpiece into the blade. Use a push stick for narrow pieces.
- Once the cut is complete, turn off the saw and wait for the blade to stop before removing the workpiece or off-cuts.
5. Maintenance
Regular maintenance ensures the longevity and safe operation of your Scheppach HS105 Table Saw. Always disconnect the saw from the power supply before performing any maintenance.
5.1 Cleaning
- After each use, clean sawdust and debris from the table, blade guard, and motor housing.
- Use a brush or compressed air. Do not use solvents that could damage plastic parts.
- Ensure the dust extraction ports are clear of blockages.
5.2 Saw Blade Care
- Regularly inspect the saw blade for sharpness, cracks, or missing teeth.
- A dull blade can cause kickback and poor cut quality. Replace dull or damaged blades immediately.
- Clean resin and pitch buildup from the blade using a suitable blade cleaner.
5.3 Lubrication
Periodically lubricate moving parts such as the blade height adjustment mechanism and bevel adjustment mechanism with a dry lubricant or silicone spray to ensure smooth operation.
6. Troubleshooting
Before attempting any repairs, always disconnect the saw from the power supply.
| Problem | Possible Cause | Solution |
|---|---|---|
| Saw does not start | No power supply; faulty switch; thermal overload activated. | Check power connection and circuit breaker; inspect switch; allow motor to cool down. |
| Blade binds or stalls during cut | Dull blade; improper feed rate; workpiece pinching blade; misaligned fence. | Replace or sharpen blade; reduce feed rate; ensure workpiece is supported; check fence alignment. |
| Excessive vibration | Loose blade; damaged blade; unstable stand; worn bearings. | Tighten blade arbor nut; replace damaged blade; ensure stand is stable; contact service for bearing issues. |
| Inaccurate cuts | Misaligned fence or miter gauge; dull blade; incorrect blade height. | Calibrate fence and miter gauge; replace blade; adjust blade height correctly. |
7. Technical Specifications
| Specification | Value |
|---|---|
| Model Number | 430450 |
| Voltage | 230 Volts |
| Power (Motor) | 2000 W |
| Saw Blade Diameter | 255 mm |
| Blade Bore Diameter | 30 mm |
| Blade Kerf | 2.8 mm |
| Max. Cutting Height (90°) | 80 mm |
| Max. Cutting Height (45°) | 55 mm |
| Blade Tilt Range | 0 - 45° |
| Table Dimensions (L x W) | 92 x 91 cm |
| Table Extension (Right) | Up to 1045 mm |
| Ergonomic Table Height | 910 mm |
| Product Dimensions (L x W x H) | 92 x 91 x 71 cm |
| Item Weight | 30.6 Kilograms |
| Blade Material | High-speed steel |
| Power Source | Corded Electric |
| Special Feature | Depth adjustment |
| Included Components | 1 HS105 Professional Table Saw, with stand |
8. Warranty and Support
Scheppach products are manufactured to high-quality standards. In the unlikely event of a defect, please refer to your purchase documentation for warranty details. For technical support, spare parts, or service inquiries, please contact your authorized Scheppach dealer or visit the official Scheppach website.
Keep your proof of purchase (receipt or invoice) for any warranty claims.
9. Mobility and Transport
The Scheppach HS105 Table Saw is designed with integrated wheels for convenient transport and mobile use.
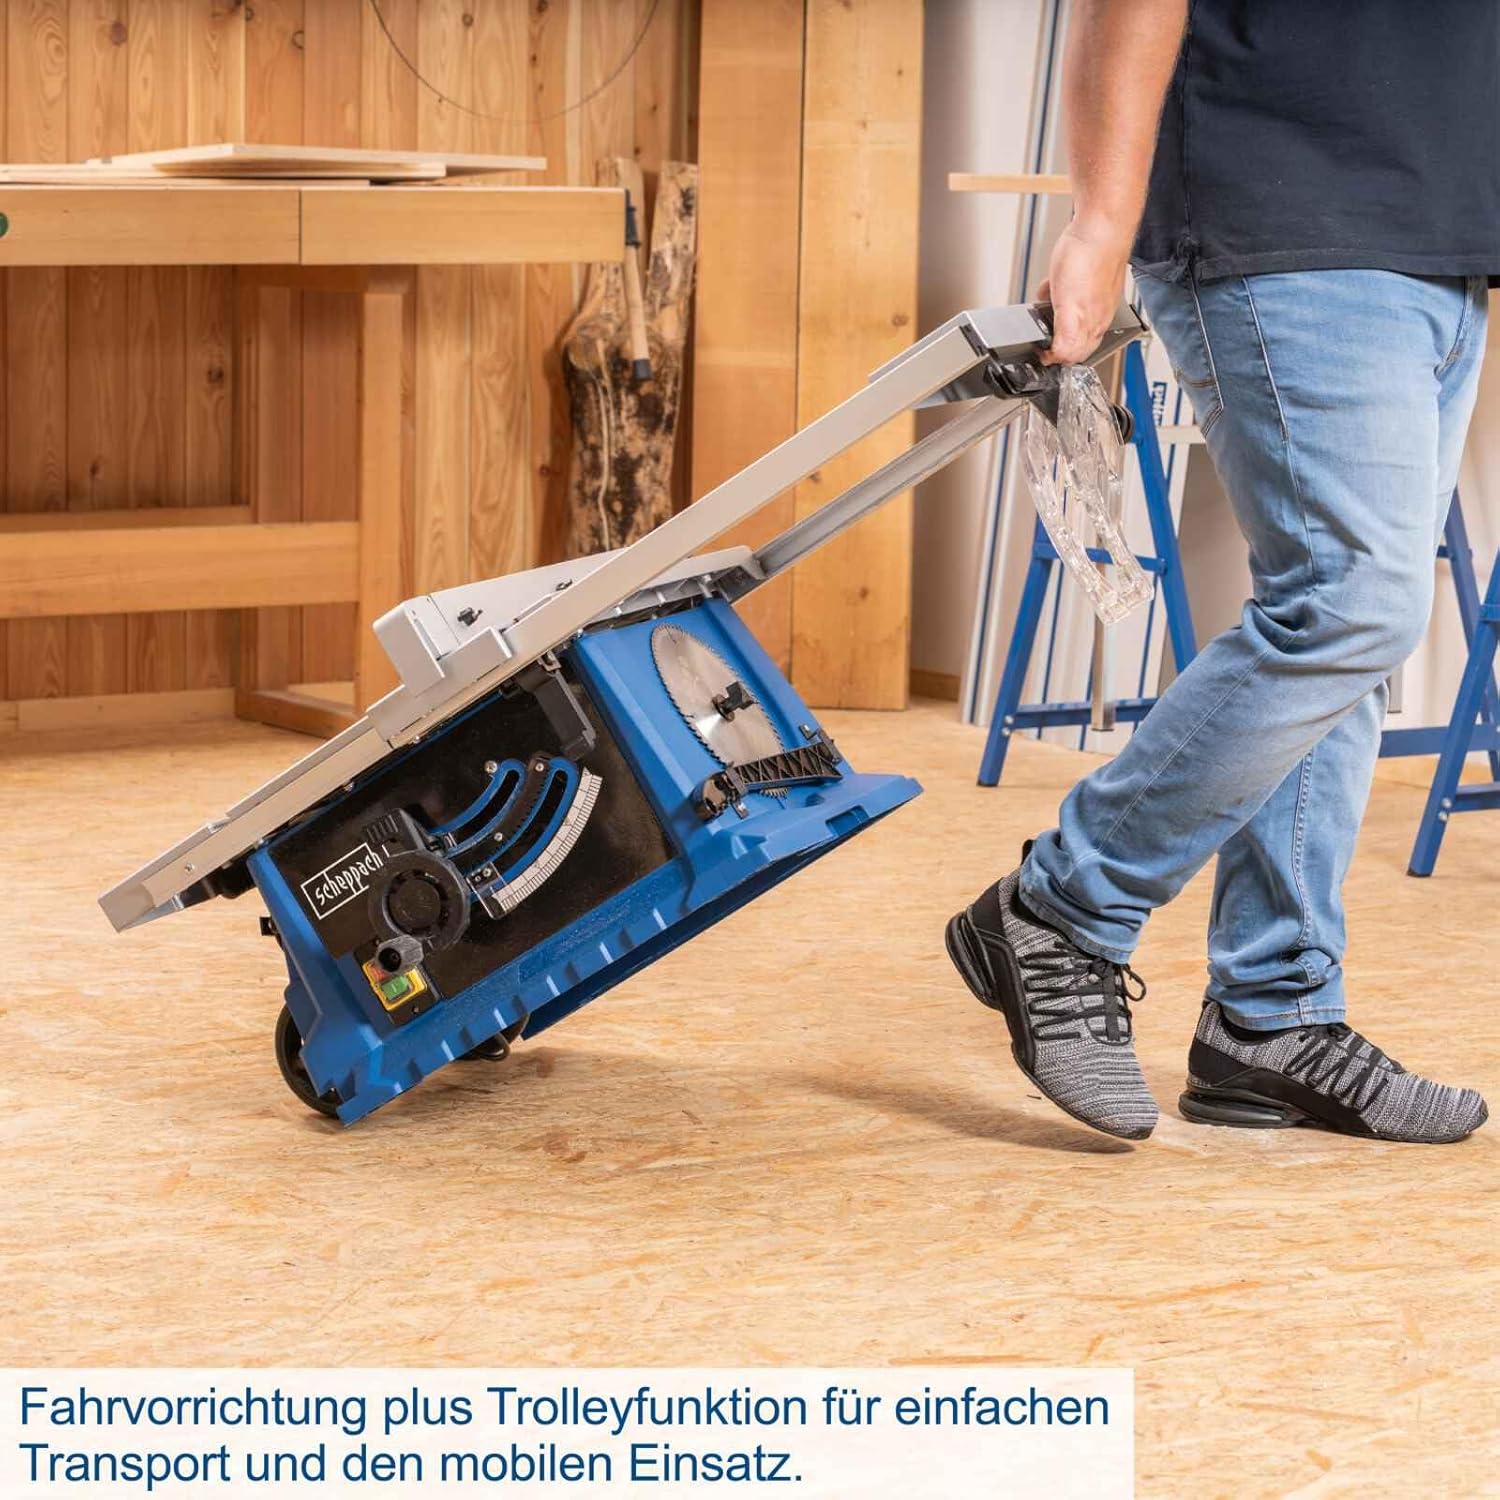
Figure 9.1: The table saw being transported using its integrated wheels, highlighting its portability.
- Before transporting, ensure the saw is unplugged and the blade is fully retracted and secured.
- Use the handles provided to tilt the saw onto its wheels and move it to the desired location.
- Exercise caution when moving the saw over uneven surfaces.
Related documentsHS105


Ask a question about this manual
Ask about setup, troubleshooting, compatibility, parts, safety, or missing instructions. Manuals+ will review the question and use this page’s manual context to help answer it.