
Plumeet EMAU-8002-WH
Plumeet Kids Alarm Clock - User Manual
Model: EMAU-8002-WH
1. Product Overview
The Plumeet Kids Alarm Clock is a compact and user-friendly digital alarm clock designed for easy readability and portability. It features a large LCD display, a soft backlight, an ascending alarm sound, and an 8-minute snooze function. Its durable silicone cover provides shock protection, making it suitable for children and travel.

Figure 1: Front view of the Plumeet Kids Alarm Clock, showing the large digital LCD display.
Package Contents:
- 1 x Plumeet Digital Alarm Clock
- 1 x User Manual
- 1 x Thanks Card
2. Setup
2.1 Battery Installation
The clock requires 3 AAA 1.5V batteries (not included). Follow these steps to install them:
- Locate the battery compartment cover on the back of the clock.
- Slide the cover downwards to open the compartment.
- Insert 3 AAA batteries, ensuring the correct polarity (+/-) as indicated inside the compartment.
- Replace the battery compartment cover by sliding it upwards until it clicks into place.
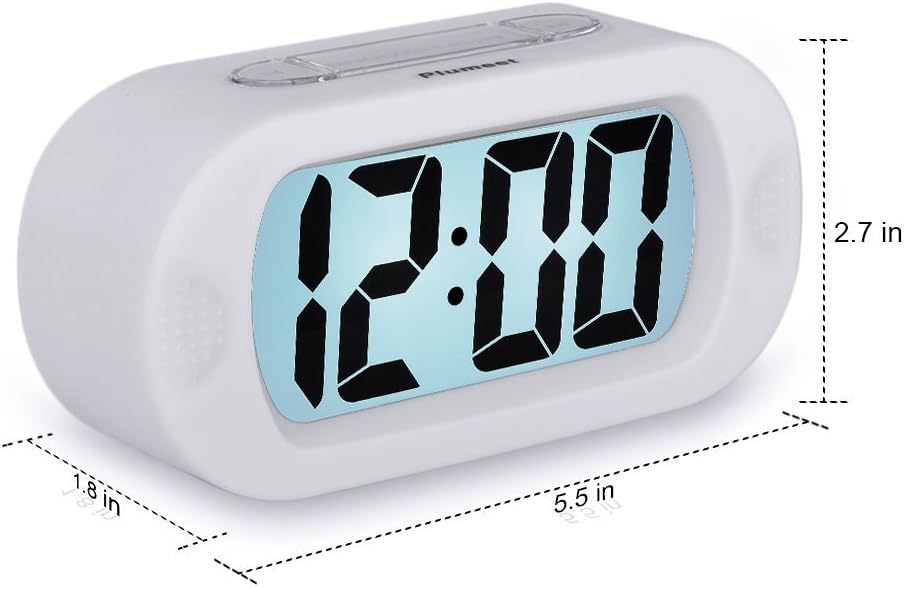
Figure 2: Rear view of the clock showing the battery compartment with the cover removed.
2.2 Setting the Time
To set the current time on your Plumeet alarm clock:
- Press the TIME SET button located on the back of the clock. The hour digits will begin to flash.
- Press the HOUR button to adjust the hour. Note the AM/PM indicator for 12-hour format.
- Press the TIME SET button again. The minute digits will begin to flash.
- Press the MINUTE button to adjust the minutes.
- Press the TIME SET button one more time to confirm the time setting and exit time setting mode.

Figure 3: Diagram illustrating the location of Hour, Minute, and Time Set buttons.
3. Operating Instructions
3.1 Setting the Alarm
To set an alarm time:
- Press the ALARM SET button (often labeled "SET" on the side). The alarm hour digits will flash.
- Press the HOUR button to adjust the alarm hour.
- Press the ALARM SET button again. The alarm minute digits will flash.
- Press the MINUTE button to adjust the alarm minutes.
- Press the ALARM SET button one more time to confirm the alarm setting.
Figure 4: Location of the Alarm Setting button on the side of the clock.
3.2 Activating/Deactivating the Alarm
To turn the alarm on or off, use the ON/OFF switch/button, typically located on the side or back of the clock. When the alarm is active, an alarm icon (often a bell) will appear on the display.
Figure 5: Location of the Alarm ON/OFF button.
3.3 Snooze Function and Night Light
When the alarm sounds, press the large SNOOZE-LIGHT button on top of the clock to activate the snooze function. The alarm will pause for approximately 8 minutes and then sound again. This button also activates the soft backlight for about 6 seconds, allowing you to view the time in the dark without disturbing sleep.

Figure 6: Top view highlighting the SNOOZE-LIGHT button.
3.4 Ascending Alarm Sound
The alarm features an ascending beep sound. When the alarm is activated, the beeping sound will gradually increase in volume and speed over 60 seconds, ensuring a gentle yet effective wake-up experience.

Figure 7: Visual representation of the ascending alarm sound feature.
4. Maintenance
4.1 Cleaning
To clean your alarm clock, gently wipe the surface with a soft, dry cloth. Do not use abrasive cleaners, solvents, or immerse the clock in water.
4.2 Battery Replacement
Replace the batteries when the display becomes dim or the alarm sound weakens. Always replace all three AAA batteries at the same time with new ones. Dispose of old batteries responsibly according to local regulations.
5. Troubleshooting
- Clock not turning on or display is blank:
Ensure batteries are installed correctly with the right polarity. Replace with fresh AAA batteries.
- Alarm not sounding:
Check if the alarm is set to the correct time. Verify that the alarm ON/OFF switch is in the "ON" position. Ensure batteries are not depleted.
- Backlight is not working:
The backlight only illuminates for 6 seconds when the SNOOZE-LIGHT button is pressed. If it doesn't light up, check battery levels.
- Time or alarm setting is difficult:
Refer to sections 2.2 and 3.1 for detailed instructions. Ensure you are pressing the correct buttons in sequence.
6. Specifications
| Brand | Plumeet |
| Model Number | EMAU-8002-WH |
| Product Dimensions | 14.22 x 6.86 x 4.06 cm (5.6 x 2.7 x 1.6 inches) |
| Weight | 150.25 g (0.33 lbs) |
| Power Source | 3 x AAA 1.5V Batteries (Not Included) |
| Display Type | LCD |
| Special Features | Snooze, Ascending Alarm, Night Light |
| Material Type | Plastic with Silicone Cover |

Figure 8: Product dimensions of the Plumeet Kids Alarm Clock.
7. Warranty and Support
7.1 Warranty Information
For detailed warranty information regarding your Plumeet Kids Alarm Clock, please refer to the warranty card included in your product packaging or your purchase documentation. Warranty terms and conditions may vary by region and retailer.
7.2 Customer Support
If you encounter any issues or have questions not covered in this manual, please contact Plumeet customer support. Contact details can typically be found on the product packaging, the official Plumeet website, or through your retailer's support channels.
Ask a question about this manual
Ask about setup, troubleshooting, compatibility, parts, safety, or missing instructions. Manuals+ will review the question and use this page’s manual context to help answer it.