1. Introduction
Thank you for choosing the La Crosse Technology WS9162IT-SIL Wireless Temperature Station. This device provides accurate indoor and outdoor temperature readings, featuring a quartz clock and 24-hour time format. It utilizes 868 MHz IT+ technology for reliable wireless transmission up to 100 meters in open fields. This manual will guide you through the setup, operation, and maintenance of your temperature station.
2. Safety Information
- Read all instructions before operating the device.
- Do not expose the main unit to extreme temperatures, direct sunlight, or moisture.
- The outdoor sensor is designed for outdoor use but should be protected from direct rain and snow for extended longevity.
- Use only the specified battery type (AA LR6). Do not mix old and new batteries or different battery types.
- Dispose of used batteries responsibly according to local regulations.
- Keep the device out of reach of children.
3. Package Contents
- La Crosse Technology WS9162IT-SIL Main Temperature Station Unit
- Wireless Outdoor Temperature Sensor
- Instruction Manual
4. Product Overview
The La Crosse Technology WS9162IT-SIL consists of a main display unit and a wireless outdoor sensor. The main unit features an LCD screen displaying indoor and outdoor temperatures, as well as the current time. It can be mounted on a wall or placed on a tabletop. The outdoor sensor transmits temperature data wirelessly to the main unit.
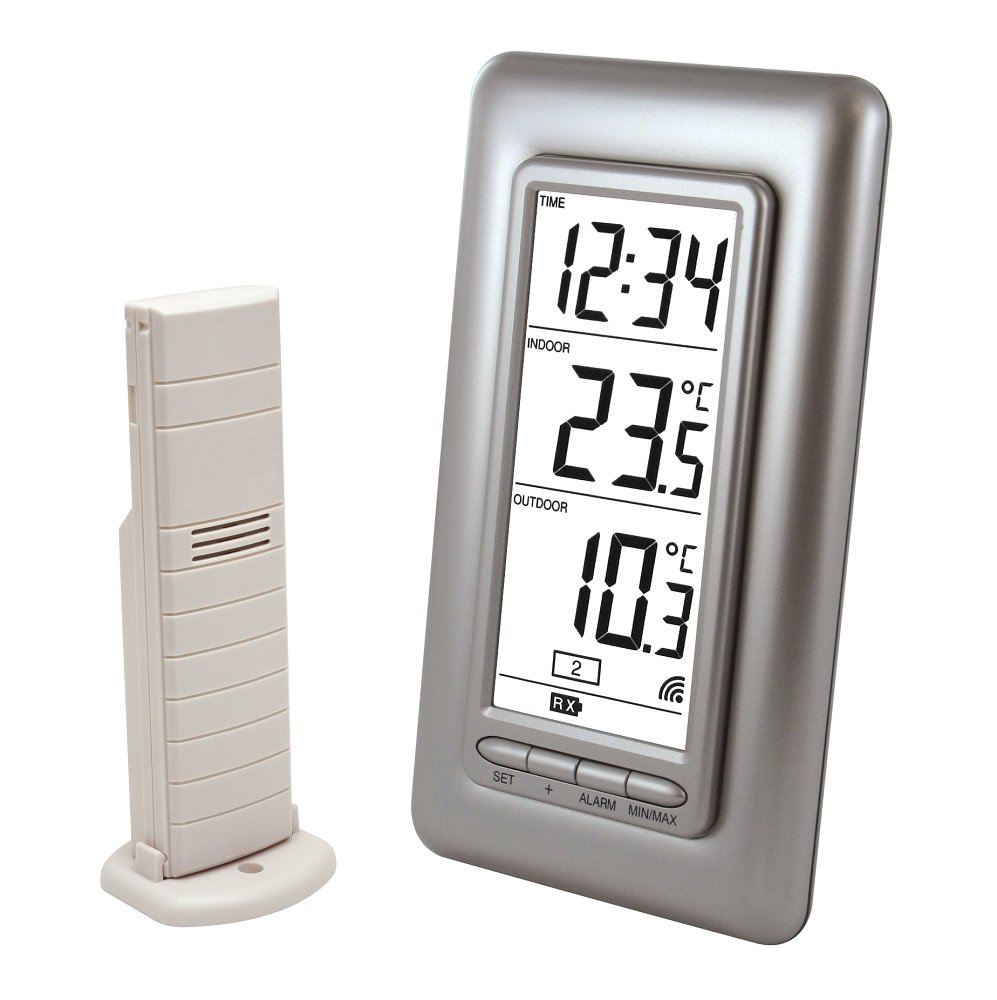
Image 1: La Crosse Technology WS9162IT-SIL Wireless Temperature Station. This image shows the main display unit and the accompanying wireless outdoor sensor, both in a silver finish. The main unit has an LCD screen for displaying temperature and time information.
5. Setup
5.1 Battery Installation
- For the Wireless Outdoor Sensor: Open the battery compartment on the back of the outdoor sensor. Insert the required batteries (typically 2 x AA LR6, not included) according to the polarity markings (+/-). Close the compartment securely.
- For the Main Temperature Station Unit: Open the battery compartment on the back of the main unit. Insert 2 x AA LR6 batteries (not included) according to the polarity markings (+/-). Close the compartment securely.
Important: Always insert batteries into the outdoor sensor before inserting them into the main unit to ensure proper synchronization.
5.2 Sensor Placement
- Place the outdoor sensor in a shaded area, away from direct sunlight and heat sources, to ensure accurate temperature readings.
- Ensure the sensor is protected from direct rain and snow.
- Position the sensor within 100 meters (328 feet) of the main unit, ensuring there are minimal obstructions (e.g., thick walls, metal objects) that could interfere with the 868 MHz wireless signal.
5.3 Initial Synchronization
After inserting batteries into both units, the main station will automatically search for the outdoor sensor. This process may take a few minutes. Once connected, the outdoor temperature will appear on the main unit's display. If the outdoor temperature does not appear, refer to the Troubleshooting section.
6. Operating Instructions
6.1 Display Information
The LCD display shows the following information:
- Current Time: Displayed in 24-hour format.
- Indoor Temperature: The temperature measured by the main unit.
- Outdoor Temperature: The temperature transmitted from the wireless sensor.
- Low Battery Indicators: Icons will appear to indicate low battery for either the main unit or the outdoor sensor.
6.2 Temperature Unit Selection (°C/°F)
To switch between Celsius (°C) and Fahrenheit (°F), locate the °C/°F button (usually on the back or side of the main unit) and press it. The display will update to the selected unit.
6.3 Minimum/Maximum Temperature Display
The station records the minimum (MIN) and maximum (MAX) indoor and outdoor temperatures. Press the 'MIN/MAX' button (or similar, refer to specific button labels on your unit) to cycle through the current, minimum, and maximum temperature readings. To reset the MIN/MAX records, press and hold the 'MIN/MAX' button for a few seconds.
6.4 Time Setting
The time is typically set automatically via a quartz clock. If manual adjustment is needed, refer to the buttons on the back of the unit (e.g., 'SET', 'MODE', '+', '-') to enter time setting mode and adjust the hours and minutes. The time format is 24-hour.
7. Maintenance
7.1 Battery Replacement
When the low battery indicator appears on the display, replace the batteries in the respective unit (main station or outdoor sensor). Always replace all batteries in a unit at the same time with new, fresh batteries of the specified type (AA LR6). Follow the battery installation steps in Section 5.1.
7.2 Cleaning
Clean the display and casing of the main unit and sensor with a soft, damp cloth. Do not use abrasive cleaners or solvents, as these may damage the device.
8. Troubleshooting
| Problem | Possible Solution |
|---|---|
| No outdoor temperature display or '---' shown. |
|
| Inaccurate temperature readings. |
|
| Display is dim or blank. |
|
| Outdoor sensor stops working after some time. |
|
9. Specifications
- Model: WS9162IT-SIL
- Time: Quartz clock, 24-hour format
- Indoor Temperature Range: -9.9°C to +59.9°C (14.2°F to 139.8°F)
- Outdoor Temperature Range: -39.9°C to +59.9°C (-39.8°F to 139.8°F)
- Temperature Resolution: 0.1°C (0.2°F)
- Indoor Temperature Reading Interval: Every 15 seconds
- Frequency: 868 MHz
- Transmission Range: Up to 100 meters (328 feet) in open field
- Technology: IT+
- Display Type: LCD
- Power Source (Main Station): 2 x AA LR6 batteries (not included)
- Power Source (Outdoor Sensor): Batteries (type not specified, typically 2 x AA LR6, not included)
- Low Battery Indicator: Yes
- Mounting Options: Wall mountable or tabletop placement
- Station Dimensions: 80 x 150 x 29.4 mm (3.15 x 5.91 x 1.16 inches)
- Product Weight: 260 g (0.57 lbs)
10. Warranty and Support
La Crosse Technology products are designed for reliability and performance. For specific warranty information, please refer to the warranty card included with your purchase or visit the official La Crosse Technology website. For technical support or further assistance, please contact La Crosse Technology customer service through their official channels.


