
1. Introduction
This manual provides essential information for setting up, operating, and maintaining your Polycom VVX 101 Business 1-Line PoE IP Media Phone. Please read these instructions carefully before using the device to ensure proper functionality and to maximize your user experience.
Package Contents
- Polycom VVX 101 console
- Handset with handset cord
- Network (LAN) cable - CAT-5E
- Quick Start Guide (this document serves as a detailed guide)
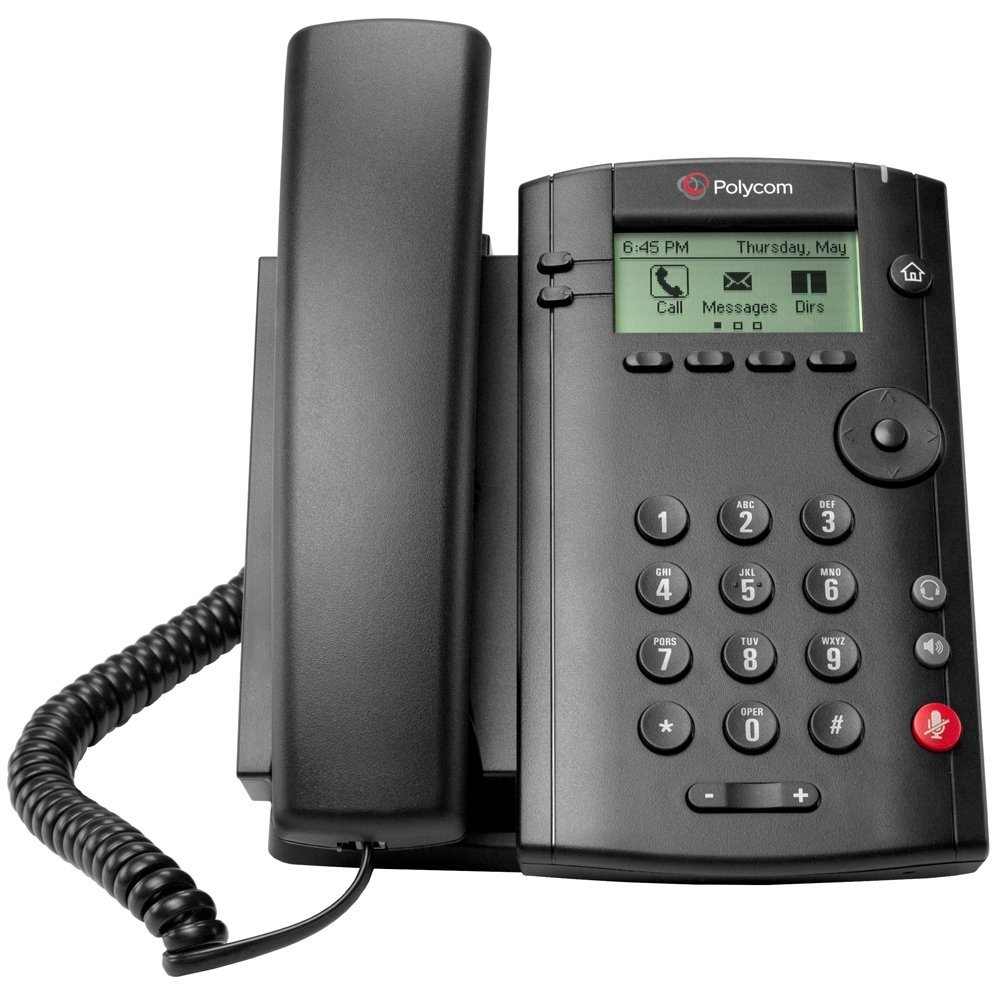
Figure 1: Polycom VVX 101 IP Media Phone. This image displays the main unit, including the display screen, keypad, and connected handset.
2. Setup
2.1 Connecting the Handset
Connect the coiled handset cord to the handset jack on the side of the phone console and to the handset itself. Ensure a secure connection at both ends.
2.2 Network and Power Connection
The Polycom VVX 101 supports Power over Ethernet (PoE). This means the phone can receive both power and network connectivity through a single Ethernet cable connected to a PoE-enabled switch or router.
- Connect one end of the provided CAT-5E network cable to the LAN port on the back of the VVX 101 phone.
- Connect the other end of the network cable to a PoE-enabled port on your network switch or router.
- If PoE is not available, an external power adapter (sold separately) is required. Connect the power adapter to the phone's power port and then to a wall outlet.
The phone will power on automatically once connected to a power source. Initial configuration may be performed via a web-based configuration tool or through Zero Touch Provisioning, depending on your network setup.
3. Operating Instructions
3.1 Basic Call Functions
- Making a Call: Pick up the handset or press the Speaker button. Dial the desired number using the 12-key dialpad and press the Dial soft key (if displayed) or wait for the call to connect.
- Answering a Call: When the phone rings, pick up the handset or press the Speaker button.
- Ending a Call: Hang up the handset or press the Speaker button again if using speakerphone.
3.2 Audio Controls
- Volume Adjustment: Use the Volume buttons (up/down) to adjust the listening volume during a call or the ringer volume when idle.
- Mute: Press the Mute button to mute your microphone during a call. Press it again to unmute.
- Speakerphone: Press the Speaker button to activate or deactivate the speakerphone.
- Headset: Connect a compatible headset to the headset port. Press the Headset button to use the headset for calls.
3.3 Navigation and Menu Access
Use the 4-way navigation cluster with the center select key to navigate through menus and options displayed on the basic LCD screen. The Home button typically returns you to the main idle screen.
4. Maintenance
4.1 Cleaning the Phone
To clean the phone, gently wipe the surfaces with a soft, damp cloth. Avoid using abrasive cleaners, solvents, or harsh chemicals, as these can damage the phone's finish and electronic components. Ensure the phone is disconnected from power before cleaning.
4.2 Software Updates
Software updates are typically managed by your IT administrator or service provider. These updates ensure optimal performance, security, and access to new features. Do not attempt to manually update the phone's firmware unless instructed by your administrator.
5. Troubleshooting
If you encounter issues with your Polycom VVX 101 phone, refer to the following common troubleshooting steps:
- No Power:
- Verify the network cable is securely connected to a PoE-enabled port.
- If using an external power adapter, ensure it is properly connected to the phone and a working power outlet.
- No Dial Tone:
- Check network cable connections.
- Confirm that your VoIP service is active and registered. Contact your service provider if necessary.
- Poor Call Quality:
- Ensure a stable internet connection.
- Check for network congestion.
- If using a headset, ensure it is properly connected and functioning.
- Display Issues:
- Restart the phone by disconnecting and reconnecting the power/network cable.
For more complex issues or persistent problems, contact your IT department or VoIP service provider for assistance.
6. Specifications
| Feature | Detail |
|---|---|
| Brand | Polycom |
| Model Number | VVX 101 (129996) |
| Telephone Type | Corded IP Phone |
| Line Support | 1 Line (Single-Line Operation) |
| Ethernet Port | 1/100 Ethernet Port |
| Power Source | Power over Ethernet (PoE) |
| Speakerphone | IEEE 1329 full duplex Type 1-compliant |
| Audio Paths | G.722 support up to 7 kHz (speaker, handset, headset) |
| Display | Basic LCD screen (1-2 character rows plus icon row) |
| Hard Keys | 12-key dialpad, home, speaker, mute, headset, volume |
| Navigation | 4-way navigation cluster with center select key |
| Dimensions (L x W x H) | 6.69 x 5.91 x 7.09 inches |
| Item Weight | 0.9 kg |
| Material | Plastic |
| Compatible Devices | VoIP services, various PBX systems, SIP call control platforms, home/office networks |
7. Warranty and Support
7.1 Product Warranty
Polycom products typically come with a standard manufacturer's warranty. For specific details regarding the warranty period and terms for your VVX 101 phone, please refer to the warranty card included with your purchase or visit the official Polycom website. Keep your proof of purchase for warranty claims.
7.2 Technical Support
For technical assistance, software downloads, or further documentation, please visit the official Polycom support website. You may also contact your VoIP service provider or IT administrator, as they often manage support for business communication systems.
Online Resources: Polycom Support Website


