
1. Introduction
This manual provides essential information for the safe installation, operation, and maintenance of your ECO-FLO SPP33V Thermoplastic Sump Pump. Please read these instructions thoroughly before installation and retain them for future reference. This pump is designed for automatic operation in residential sump applications to remove unwanted water.

Figure 1: ECO-FLO SPP33V Thermoplastic Sump Pump, showing the main unit and vertical float switch.
2. Safety Information
WARNING: Risk of Electric Shock. Always disconnect power before servicing the pump.
This product contains chemicals known to the State of California to cause cancer and birth defects or other reproductive harm. For more information, visit www.P65Warnings.ca.gov.
- Ensure the pump is connected to a properly grounded electrical outlet.
- Do not operate the pump with a damaged cord or plug.
- Never handle the pump or its power cord with wet hands.
- Do not use this pump for flammable or corrosive liquids.
- Keep children and pets away from the sump pit area.
- Always wear appropriate personal protective equipment (PPE) during installation and maintenance.
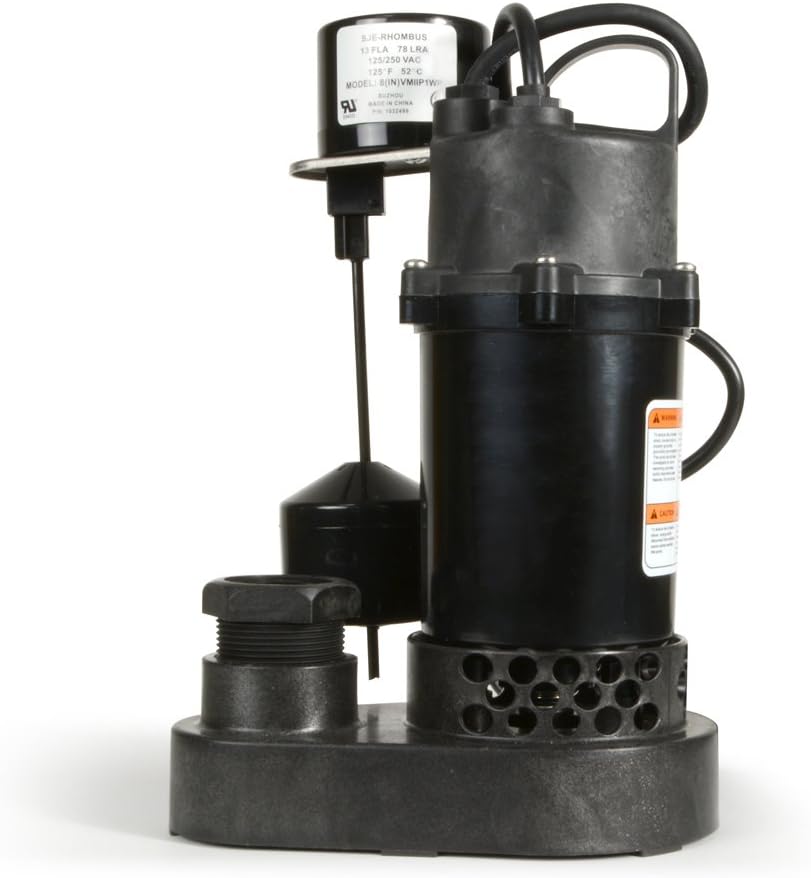
Figure 2: Side view of the pump, highlighting the caution label regarding electrical shock risk.
3. Product Features
The ECO-FLO SPP33V sump pump is engineered for reliable performance:
- Thermoplastic Construction: Provides corrosion resistance and durability.
- 1/3 HP Motor: Efficient 115V Permanent Split Capacitor (PSC) motor for continuous duty.
- Vertical Switch: Ensures automatic operation in narrow sump pits (operates in basins 11" in diameter x 24" depth).
- Semi-Open Thermoplastic Impeller: Designed to pass 3/8" solids without clogging.
- Anodized Aluminum Motor Housing: Facilitates efficient motor cooling for extended life.
- Submersible Design: Allows for quiet operation.
- 10-foot Power Cord: Provides ample reach for electrical connection.
- 1-1/2 inch Discharge: Standard connection for easy plumbing.
4. Specifications
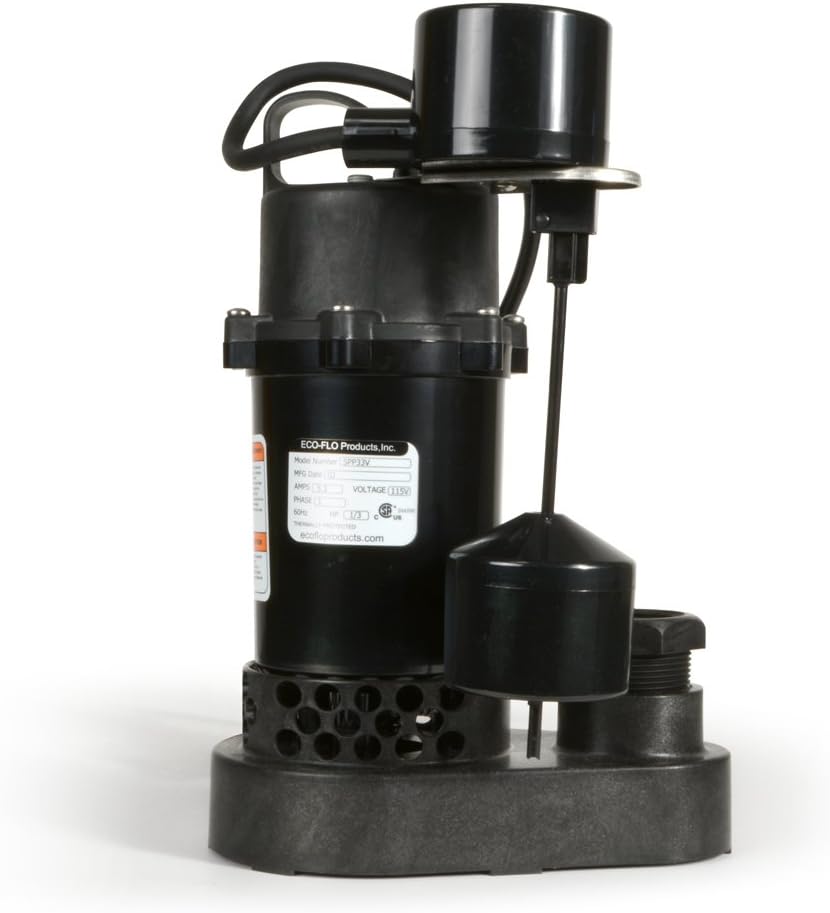
Figure 3: Side view of the pump, illustrating the model number and electrical specifications label.
| Attribute | Value |
|---|---|
| Model Number | SPP33V |
| Horsepower (HP) | 1/3 HP (0.3333) |
| Voltage | 115 Volts |
| Power Source | AC |
| Material | Thermoplastic |
| Switch Type | Vertical Switch |
| Max Flow Rate | 3600 Gallons per Hour (GPH) |
| Discharge Size | 1-1/2 inches |
| Power Cord Length | 10 feet |
| Solids Handling | Up to 3/8 inches |
| Item Weight | 9.5 Pounds |
| Product Dimensions (L x W x H) | 9.45 x 8.27 x 13.39 inches |
Performance Chart
| Total Lift (Feet) | 0 | 5 | 10 | 15 | 20 | 25 |
|---|---|---|---|---|---|---|
| GPH | 3600 | 2940 | 2280 | 1560 | 840 | 0.0 |
5. Setup and Installation
Proper installation is crucial for the efficient and safe operation of your sump pump. If you are unsure about any steps, consult a qualified electrician or plumber.
5.1 Pre-Installation Checklist
- Verify the sump pit is clean and free of debris.
- Ensure the sump pit dimensions are adequate for the pump and its vertical switch (minimum 11" diameter x 24" depth recommended).
- Confirm a grounded 115V AC electrical outlet is available within 10 feet of the pump.
- Gather necessary tools and materials: PVC pipe, check valve, pipe sealant, screwdriver, adjustable wrench.
5.2 Placement
Place the pump on a solid, level surface at the bottom of the sump pit. Ensure the intake screen is clear of any obstructions and not resting directly on mud or silt. The vertical float switch must have free movement without touching the sides of the pit or other components.

Figure 4: Side view of the pump, illustrating the power cord and vertical switch assembly.
5.3 Discharge Pipe Connection
- Connect a 1-1/2 inch discharge pipe to the pump's outlet. Use appropriate pipe sealant or thread tape for a watertight connection.
- Install a check valve in the discharge line above the pump. This prevents water from flowing back into the sump pit when the pump shuts off.
- Route the discharge pipe to an appropriate drainage area, ensuring it is sloped away from the foundation.

Figure 5: Close-up of the pump's discharge port, ready for pipe connection.

Figure 6: Top view of the pump, illustrating the electrical cord entry and discharge outlet.
5.4 Electrical Connection
- Ensure the power supply is OFF at the circuit breaker before making any electrical connections.
- Plug the pump's 3-prong grounded plug into a dedicated 115V AC grounded outlet. Do not use extension cords.
- Restore power to the circuit.
6. Operating Instructions
The ECO-FLO SPP33V sump pump operates automatically via its vertical float switch.
- Once installed and connected to power, the pump will remain off until the water level in the sump pit rises and lifts the vertical float switch.
- When the float switch reaches its activation point, the pump will turn on and begin to discharge water.
- The pump will continue to operate until the water level drops, allowing the float switch to fall to its deactivation point.
- The pump will then turn off, and the cycle will repeat as needed.
Testing Operation:
After installation, fill the sump pit with water to verify the pump turns on and off correctly. Observe the float switch movement to ensure it operates freely.
7. Maintenance
Regular maintenance helps ensure the longevity and reliable operation of your sump pump.
7.1 Monthly Checks
- Inspect Sump Pit: Remove any debris, dirt, or sediment that may have accumulated at the bottom of the pit.
- Check Float Switch: Ensure the vertical float switch moves freely and is not obstructed by wires, pipes, or the pit walls.
- Test Pump Operation: Pour water into the sump pit to activate the pump. Verify it turns on, pumps water out, and turns off automatically.
- Inspect Power Cord: Check the power cord for any signs of damage, fraying, or wear.

Figure 7: Bottom view of the pump, showing the base and potential impeller housing area.

Figure 8: Close-up of the pump's intake screen, emphasizing the need for regular cleaning.
7.2 Annual Maintenance
- Clean Impeller: Disconnect power and remove the pump from the pit. Inspect the impeller for any lodged debris and clean as necessary. The semi-open design helps prevent clogging, but periodic inspection is recommended.
- Check Check Valve: Ensure the check valve in the discharge line is functioning correctly and not allowing backflow.
8. Troubleshooting
Before performing any troubleshooting, always disconnect the pump from the power source.
| Problem | Possible Cause | Solution |
|---|---|---|
| Pump does not start or run. | No power to the pump. Float switch obstructed or defective. Motor overload protector tripped. | Check circuit breaker and electrical connection. Ensure float switch moves freely. Replace if defective. Allow motor to cool; it should reset automatically. Check for impeller obstruction. |
| Pump runs but does not pump water. | Discharge pipe clogged or frozen. Impeller clogged. Air lock. Check valve installed backward or stuck. | Clear obstruction in discharge pipe. Clean impeller (disconnect power first). Lift and lower pump several times to release trapped air, or drill a 1/8" relief hole in the discharge pipe below the check valve. Inspect and correct check valve orientation or replace if faulty. |
| Pump runs continuously. | Float switch stuck in the "on" position. Check valve leaking or faulty. Pump undersized for inflow. | Clear any obstructions around the float switch. Replace if defective. Inspect and replace check valve if necessary. Ensure pump capacity matches water inflow. |
| Pump is noisy or vibrates excessively. | Debris in impeller. Pump not sitting level. Worn bearings (internal issue). | Clean impeller (disconnect power first). Ensure pump is on a stable, level surface. Contact customer support for service. |
9. Warranty Information
The ECO-FLO SPP33V Thermoplastic Sump Pump is covered by a 1-year limited warranty from the date of purchase. This warranty covers defects in materials and workmanship under normal use and service.
To make a warranty claim, please retain your original purchase receipt. The warranty does not cover damage caused by improper installation, misuse, neglect, unauthorized repairs, or acts of nature.
10. Customer Support
For technical assistance, replacement parts, or further information regarding your ECO-FLO SPP33V sump pump, please contact ECO-FLO Products customer service.
You can also visit the official ECO-FLO Store for additional product information and options:


