
1. Introduction
This manual provides comprehensive instructions for the setup, operation, and maintenance of your Harman Kardon AVR-4500 Audio/Video Receiver. Please read this manual thoroughly before operating the unit to ensure proper use and to maximize its performance and longevity. Keep this manual for future reference.
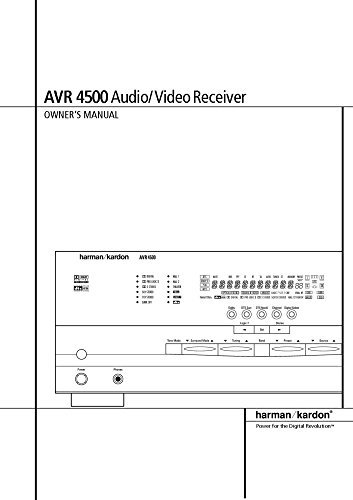
Figure 1: Front cover of the Harman Kardon AVR-4500 Owner's Manual, displaying the receiver's model name and the Harman Kardon logo.
The Harman Kardon AVR-4500 is designed to deliver high-quality audio and video performance, serving as the central hub for your home entertainment system. It integrates various audio and video sources, providing a rich and immersive experience.
2. Setup and Connections
2.1 Unpacking and Placement
Carefully remove the AVR-4500 from its packaging. Retain all packing materials for future transport. Place the receiver on a stable, level surface with adequate ventilation. Avoid placing it near heat sources or in direct sunlight.
2.2 Audio Connections
Connect your speakers to the appropriate speaker terminals on the rear panel of the AVR-4500. Ensure correct polarity (+ to + and - to -) for all speakers. Use high-quality speaker wire for optimal sound.
- Front Speakers: Connect to FRONT L/R terminals.
- Center Speaker: Connect to CENTER terminal.
- Surround Speakers: Connect to SURROUND L/R terminals.
- Subwoofer: Connect to SUBWOOFER PRE-OUT using an RCA cable.
2.3 Video Connections
Connect your video sources (e.g., DVD player, cable box) to the video input jacks on the rear panel. Connect your display device (TV, projector) to the video output jacks.
- Component Video: For high-quality analog video.
- S-Video: For improved video quality over composite.
- Composite Video: Standard video connection.
2.4 Power Connection
Once all audio and video connections are made, plug the AC power cord into the receiver and then into a wall outlet. Do not connect the power cord until all other connections are complete.
3. Operating Instructions
3.1 Basic Operation
- Power On/Off: Press the POWER button on the front panel or remote control.
- Source Selection: Use the INPUT SELECTOR knob or buttons on the front panel/remote to choose your desired audio/video source (e.g., CD, DVD, TV).
- Volume Control: Adjust the MASTER VOLUME knob or +/- buttons on the remote.
- Listening Modes: Select desired surround sound mode (e.g., Dolby Digital, DTS, Stereo) using the MODE buttons.
3.2 Advanced Features
The AVR-4500 offers various advanced features for customizing your audio experience:
- Tone Controls: Adjust Bass and Treble levels to suit your preference.
- Speaker Level Calibration: Use the test tone generator and a sound level meter to balance speaker output levels for optimal surround sound.
- Digital Audio Inputs: Connect digital audio sources (optical or coaxial) for high-fidelity sound.
- Headphone Jack: For private listening.
4. Maintenance
To ensure the longevity and optimal performance of your Harman Kardon AVR-4500, follow these maintenance guidelines:
- Cleaning: Use a soft, dry cloth to clean the exterior of the receiver. Do not use liquid or aerosol cleaners, as they may damage the finish or internal components.
- Ventilation: Ensure that the ventilation openings on the top and sides of the receiver are not blocked. Proper airflow prevents overheating.
- Power Cord: Periodically check the power cord for any signs of damage. If damaged, replace it immediately with an authorized part.
- Dust Accumulation: Over time, dust can accumulate inside the unit. If you notice significant dust, professional cleaning may be required.
5. Troubleshooting
This section provides solutions to common issues you may encounter with your AVR-4500. If the problem persists after attempting these solutions, contact customer support.
| Problem | Possible Cause | Solution |
|---|---|---|
| No Power | Power cord disconnected; Power outlet faulty; Unit in standby mode. | Check power cord connection; Try a different outlet; Press POWER button. |
| No Sound | Incorrect source selected; Volume too low; Mute engaged; Speaker wires disconnected. | Select correct input; Increase volume; Disable Mute; Check speaker connections. |
| No Video Output | Incorrect video input/output connection; TV input not selected correctly. | Verify video cable connections; Select correct input on TV. |
| Remote Control Not Working | Batteries depleted; Obstruction between remote and receiver; Incorrect remote mode. | Replace batteries; Remove obstructions; Ensure remote is in correct mode for receiver. |
6. Specifications
Below are the general specifications for the Harman Kardon AVR-4500 AV Receiver. Specific performance metrics may vary.
- Audio Decoding: Dolby Digital, DTS, Logic 7
- Power Output: (Refer to original manual for specific wattage per channel)
- Frequency Response: 20Hz – 20kHz
- Signal-to-Noise Ratio: >90dB
- Inputs: Multiple Analog Audio, Digital Coaxial, Digital Optical, Component Video, S-Video, Composite Video
- Outputs: Speaker Terminals, Subwoofer Pre-Out, Analog Audio, Video Monitor Out
- Dimensions (H x W x D): (Refer to original manual for exact dimensions)
- Weight: (Refer to original manual for exact weight)
7. Warranty Information
This manual is a reprint and does not include specific warranty information for the original product. For details regarding the warranty of your Harman Kardon AVR-4500, please refer to the original warranty card included with your purchase or contact Harman Kardon customer service directly. Warranties typically cover defects in materials and workmanship for a specified period from the date of original purchase.
8. Customer Support
For technical assistance, service, or questions regarding your Harman Kardon AVR-4500, please visit the official Harman Kardon website or contact their customer support line. Have your product model number (AVR-4500) and serial number ready when contacting support.
Harman Kardon Official Website: www.harmankardon.com
Please note that this manual is a reprint and may not contain the most current contact information. Always refer to the official Harman Kardon website for the latest support details.


