
1. Product Overview
The Telwin Drive 13000 is an ultra-compact, 12V multifunction emergency portable jump starter designed for a wide range of vehicles including motorcycles, cars, campers, and marine engines. Its small size makes it convenient for storage in a car's glove compartment.
This device utilizes high-efficiency LiPo lithium polymer cells, ensuring fast and complete recharging, with charge status monitored by LED indicators. Beyond jump starting, it functions as a versatile power bank and features integrated LED emergency lighting.

Image 1.1: Telwin Drive 13000 unit with jumper clamps.
Key Features:
- Jump Starter: Provides 1500A peak current for emergency vehicle starting.
- Power Bank: Two USB outputs (1A, 2.1A) for charging smartphones, tablets, MP3 players, and cameras. Two 12V/19V outputs for laptops and other devices.
- LED Lighting: Two high-intensity LED emergency lights with multiple modes (torch, blinking, SOS).
- Compact Design: Easily portable and storable.
- Advanced Battery Technology: High-efficiency LiPo lithium polymer cells.
2. Safety Instructions
Read all safety warnings and instructions before using this product. Failure to follow these instructions may result in electric shock, fire, and/or serious injury.
- Always wear eye protection and protective gloves when jump starting a vehicle.
- Do not allow the positive and negative clamps to touch each other.
- Do not jump start a frozen battery.
- Ensure the vehicle's ignition is off before connecting the jump starter.
- Connect the red (positive) clamp to the positive (+) terminal of the vehicle battery first, then the black (negative) clamp to a metal part of the engine block (not directly to the negative battery terminal unless specified by vehicle manufacturer).
- Disconnect the clamps in reverse order: first the black (negative), then the red (positive).
- Do not expose the unit to rain or wet conditions.
- Do not disassemble the unit. Refer all servicing to qualified personnel.
- Keep out of reach of children.
3. Package Contents
Verify that all items are present in the package:
- Telwin Drive 13000 Jump Starter Unit
- Jump Starter Cables with Clamps (Red/Black)
- Various Mobile Device Connectors
- Cigarette Lighter Plug
- AC Adapter (Wall Charger)
- Storage Case

Image 3.1: Included accessories for the Telwin Drive 13000.
4. Setup and Initial Charging
4.1 Initial Charge
Before first use, fully charge the Telwin Drive 13000.
- Connect the AC adapter to the 12V input port on the jump starter unit.
- Plug the AC adapter into a standard wall outlet.
- The LED indicators on the unit will illuminate, showing the charging progress. All LEDs will be solid when fully charged.
- Charging typically takes several hours. Disconnect the charger once fully charged.
4.2 Understanding LED Indicators
The unit features a series of LED lights that indicate the current charge level of the internal battery.
- One LED: 0-25% charge
- Two LEDs: 25-50% charge
- Three LEDs: 50-75% charge
- Four LEDs: 75-100% charge
It is recommended to keep the unit charged above 50% for optimal performance, especially for jump starting.

Image 4.1: Diagram illustrating the ports, charge level indicators, and on/off button.
5. Operating Instructions
5.1 Jump Starting a Vehicle
Use the Telwin Drive 13000 to start vehicles with a 12V battery system. Ensure the unit is sufficiently charged (at least 3-4 LEDs).
- Ensure the vehicle's ignition is off and all accessories (lights, radio, AC) are turned off.
- Connect the jump starter cables to the Telwin Drive 13000 unit.
- Connect the red (positive) clamp to the positive (+) terminal of the vehicle's battery.
- Connect the black (negative) clamp to a clean, unpainted metal part of the vehicle's engine block or chassis, away from the battery and fuel lines. Do not connect directly to the negative battery terminal unless specifically instructed by your vehicle manufacturer.
- Turn on the Telwin Drive 13000 unit by pressing the power button. All LEDs should light up, then some may turn off, indicating a system check.
- Attempt to start the vehicle. Crank the engine for no more than 3 seconds.
- If the vehicle does not start, wait approximately 2 minutes before attempting again. Do not persist in cranking for extended periods.
- Once the vehicle starts, immediately disconnect the black (negative) clamp first, then the red (positive) clamp.
- Disconnect the jump starter cables from the Telwin Drive 13000 unit.

Image 5.1: Proper connection of the jump starter to a vehicle battery.

Image 5.2: The Telwin Drive 13000 is suitable for jump starting cars, motorcycles, and marine engines.
5.2 Using as a Power Bank
The Telwin Drive 13000 can charge various electronic devices.
- USB Outputs (5V): Connect your smartphone, tablet, MP3 player, or camera using the appropriate USB cable to either the 1A or 2.1A USB output ports.
- 12V/19V Outputs: Use the provided connectors to power or charge laptops and other compatible devices requiring 12V or 19V. Ensure the correct voltage is selected if applicable, or use the appropriate adapter.

Image 5.3: The Telwin Drive 13000 functioning as a power bank for various devices.
5.3 Using the LED Light
The integrated LED lights provide illumination for emergency situations.
- Press and hold the power button for a few seconds to turn on the LED light (torch mode).
- Press the power button again to cycle through the light modes (torch, blinking, SOS).
- Press and hold the power button again to turn off the LED light.
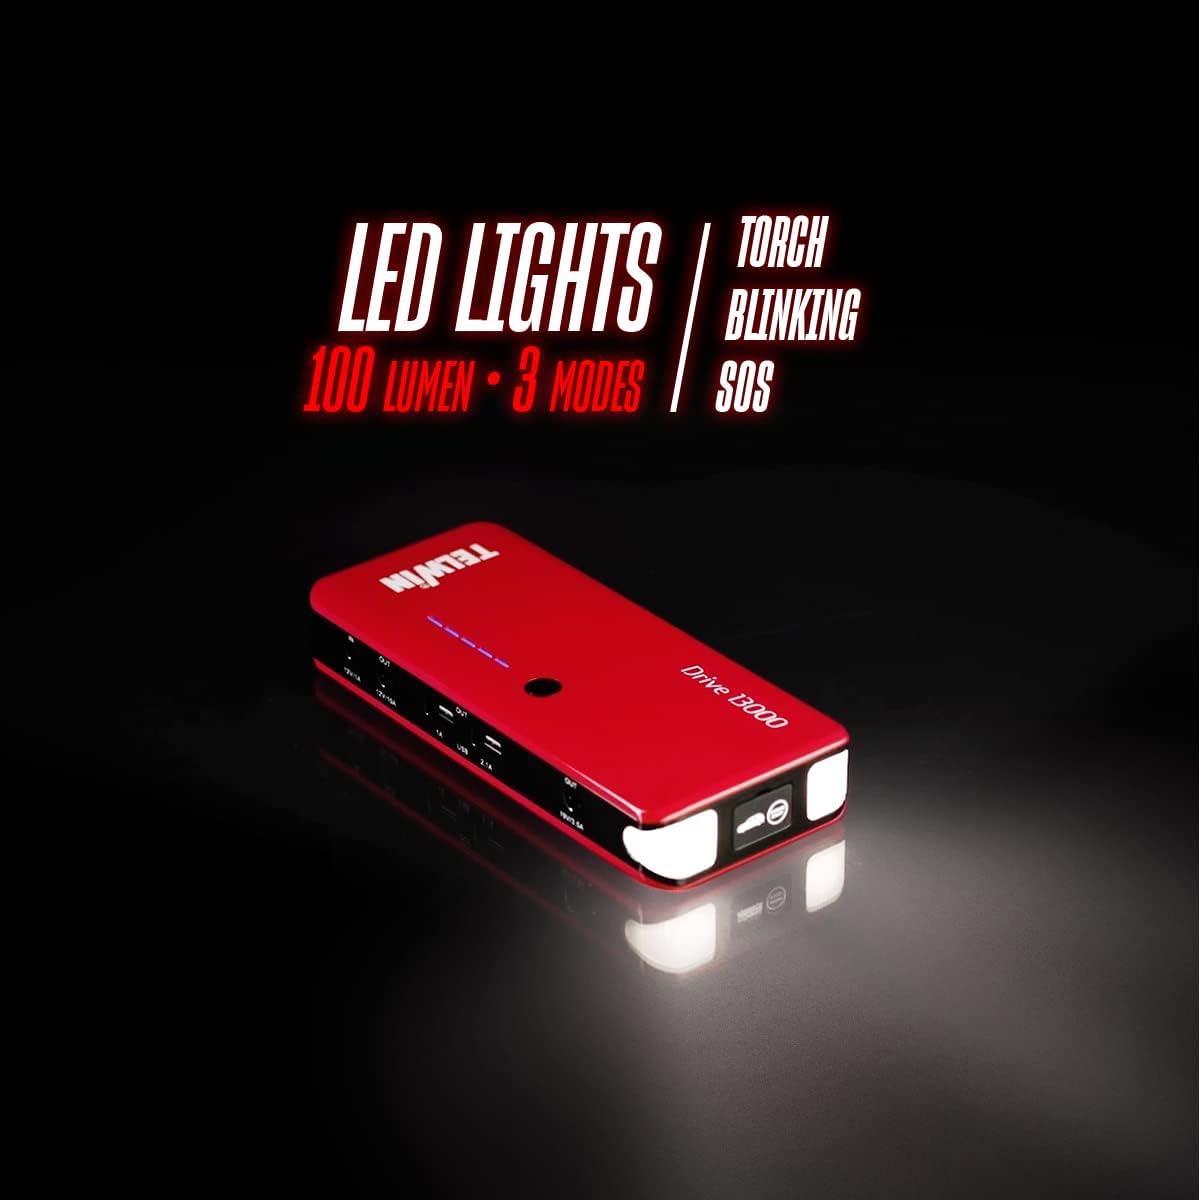
Image 5.4: The Telwin Drive 13000 with its LED emergency lights active.
6. Maintenance
6.1 Recharging
To ensure the longevity and readiness of your Telwin Drive 13000, regular recharging is essential.
- Recharge the unit after every use, especially after jump starting a vehicle.
- If not used frequently, recharge the unit every 3-6 months to maintain battery health.
- Always use the provided AC adapter or cigarette lighter plug for charging.
6.2 Storage
Proper storage helps preserve the unit's performance.
- Store the unit in a cool, dry place, away from direct sunlight and extreme temperatures.
- Keep the unit and its accessories in the provided storage case to prevent damage.
- Avoid storing the unit in a completely discharged state.
6.3 Cleaning
Clean the unit with a soft, dry cloth. Do not use harsh chemicals or abrasive cleaners.
7. Troubleshooting
| Problem | Possible Cause | Solution |
|---|---|---|
| Unit does not turn on. | Battery is completely discharged. | Charge the unit fully using the AC adapter. |
| Vehicle does not start after jump attempt. |
|
|
| Electronic devices not charging. |
|
|
| LED light not working. | Unit battery low or malfunction. | Charge the unit. If still not working, contact support. |
8. Technical Specifications
| Feature | Specification |
|---|---|
| Brand | Telwin |
| Model | Drive 13000 |
| Item Model Number | 829566 |
| Battery Type | Lithium-polymer (LiPo) |
| Battery Capacity | 12000 mAh |
| Starting Voltage | 12 V |
| Starting Current | 450 A |
| Peak Starting Current | 1500 A |
| USB Output 1 | 5 V, 1 A |
| USB Output 2 | 5 V, 2.1 A |
| DC Output 1 | 12 V, 10 A |
| DC Output 2 | 19 V, 3.5 A |
| Charging Input Voltage | 100-240 V AC (via adapter) |
| Item Weight | 500 g |
| Product Dimensions (L x W x H) | 17.5 x 13.5 x 5.3 cm |
| Compliance | CE |
9. Warranty and Support
Telwin products are manufactured to high-quality standards. For specific warranty information, please refer to the warranty card included with your product or visit the official Telwin website.
For technical support, troubleshooting assistance, or spare parts, please contact Telwin customer service through their official channels.
- Online Support: Visit the official Telwin website for FAQs, product documentation, and contact forms.
- Customer Service: Refer to your product packaging or the Telwin website for regional contact information.