1. Introduction
This manual provides detailed instructions for the installation, operation, and maintenance of your Pyle PLVW92U 9-inch In-Wall/In-Vehicle Video Monitor. Please read this manual thoroughly before using the product to ensure proper function and longevity.

Image 1: Pyle PLVW92U 9-inch video monitor with its remote control, showcasing its display capabilities with multiple camera feeds.
2. Product Features
- Full HD 1080p Support: Features a widescreen LCD display with full HD 1080p support, providing vivid and crisp picture quality. Suitable for surveillance display applications.
- Universal Mount: Designed for in-wall or in-console mounting. Includes a removable decorative frame for a clean installation and convenient access to front panel controls.
- Multiple Inputs: Equipped with HDMI, VGA, and two RCA video input connectors. Also includes RCA (L/R) audio output jacks for external sound system connection.
- Front Panel Buttons & Remote Control: Control the monitor using either the front panel buttons (mode, analog -/+, menu, power) or the included wireless remote control.
- Durable Steel Frame: Features a rugged steel monitor housing frame with cut-out holes for easy mounting. The frame is stain-resistant and paintable.
3. What's in the Box
Verify that all components are present before proceeding with installation.
- Pyle PLVW92U Flat Panel Monitor
- Remote Control
- RCA Video/Audio Cables
- HDMI Cable
- VGA Cable
- Decorative Frame Cover
- Mounting Screws
- Power Supply Cable (Note: Power supply adapter sold separately)

Image 2: Visual representation of the items included with the Pyle PLVW92U monitor. The power supply is explicitly marked as a separate purchase.
4. Setup and Installation
The Pyle PLVW92U monitor is designed for versatile installation, including in-wall or in-vehicle applications. The steel frame provides durability and features cut-out holes for secure mounting.
4.1 Mounting Options
- In-Wall Installation: The monitor can be flush-mounted into a wall. Use the provided template (if included) to mark and cut the appropriate opening. The decorative frame covers the housing for a finished look.
- In-Vehicle Installation: For vehicle use, the monitor can be integrated into the console or mounted to a headrest (ensure proper fit and secure mounting).

Image 3: The Pyle PLVW92U monitor seamlessly integrated into a wall, demonstrating its use as a surveillance display.
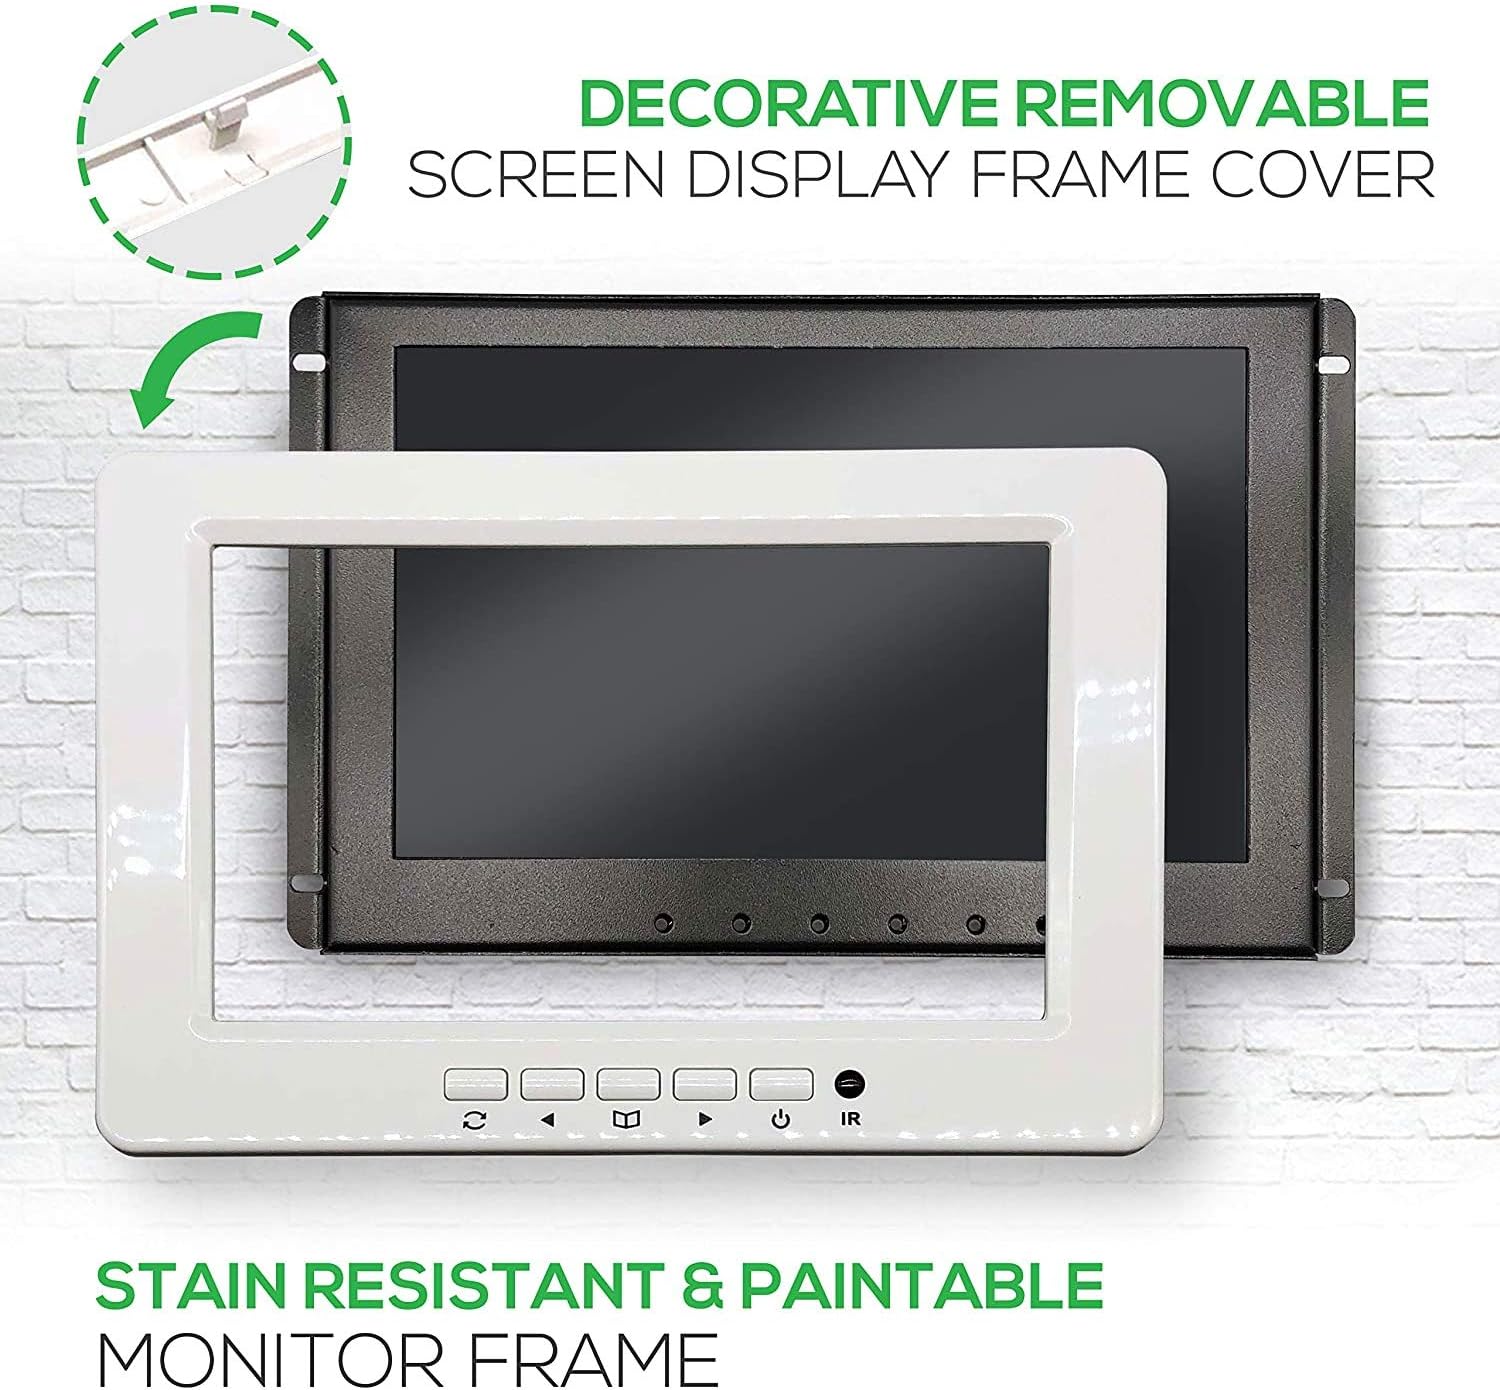
Image 4: The monitor's robust metal panel and the removable decorative frame, which can be painted to match surroundings.
4.2 Power Connection
The monitor operates on 12V DC power. For in-vehicle use, it can be wired directly to a 12V power source (e.g., cigarette lighter circuit) or an ignition-switched power line. For home use, a 12V DC power adapter (sold separately) is required.
The power cable includes an in-line fuse for protection. Ensure proper polarity when connecting: red wire for positive (+), black wire for negative (-).
4.3 Video and Audio Connections
- HDMI: Connect an HDMI cable from your video source to the monitor's HDMI input for high-definition digital video and audio.
- VGA: Use a VGA cable to connect to a computer or other VGA-compatible device for analog video input.
- RCA Video (2 Inputs): Connect composite video sources using RCA cables (yellow connector).
- RCA Audio Output (L/R): For audio, connect the RCA (red/white) audio output jacks to an external sound system or amplifier, as the monitor does not have built-in speakers.
5. Operating Instructions
The monitor can be operated using the front panel buttons or the included wireless remote control.
5.1 Front Panel Controls

Image 5: Detailed view of the front panel buttons and their corresponding functions for direct control.
- IR: Infrared receiver for the remote control.
- Power Button: Turns the unit on or off.
- Analog - (Decrease): Navigates backward through menu items or decreases analog settings.
- Menu Button: Opens the on-screen display (OSD) menu to adjust settings.
- Analog + (Increase): Navigates forward through menu items or increases analog settings.
- Mode Button: Switches between available video input sources (HDMI, RCA1, RCA2, VGA).
5.2 Remote Control

Image 6: The wireless remote control, providing convenient access to all monitor functions from a distance.
The remote control duplicates most functions of the front panel buttons, allowing for convenient operation. Point the remote directly at the IR receiver on the monitor's front panel.
- Power Switch: Turns the monitor on or off.
- Analog Increase/Decrease: Adjusts settings within the menu or changes values.
- HDMI/RCA/VGA Switch: Cycles through input sources.
- Menu: Accesses the OSD menu.
- Mode: Selects different display modes or aspect ratios.
5.3 Menu Navigation
Press the "Menu" button to access the on-screen display. Use the "Analog -" and "Analog +" buttons to navigate through options and adjust values. Press "Menu" again to exit.
6. Maintenance
To ensure optimal performance and longevity of your Pyle PLVW92U monitor, follow these maintenance guidelines:
- Cleaning: Use a soft, dry cloth to clean the screen and exterior. For stubborn marks, lightly dampen the cloth with water or a mild, non-abrasive screen cleaner. Avoid harsh chemicals.
- Ventilation: Ensure adequate airflow around the monitor, especially if it's in an enclosed space, to prevent overheating.
- Environmental Conditions: Avoid exposing the monitor to extreme temperatures, direct sunlight for prolonged periods, or high humidity.
- Cable Management: Periodically check all cables for secure connections and signs of wear or damage.
7. Troubleshooting
If you encounter issues with your Pyle PLVW92U monitor, refer to the following common troubleshooting steps:
- No Power:
- Check all power connections to ensure they are secure.
- Verify the power source is active (e.g., vehicle ignition on, wall outlet working).
- Inspect the in-line fuse on the power cable. Replace if blown.
- If using a separate power adapter, ensure it is the correct voltage (12V DC) and functioning.
- No Video Signal:
- Ensure the correct input source is selected using the "Mode" button or remote.
- Check all video cables (HDMI, VGA, RCA) for secure connections at both the monitor and the source device.
- Verify the video source device is powered on and outputting a signal.
- Try a different video cable or source device to isolate the problem.
- No Audio (from external system):
- Confirm the RCA (L/R) audio output cables are correctly connected to your external sound system.
- Check the external sound system's power and input selection.
- Adjust the volume on your external sound system.
- Poor Picture Quality:
- Check cable connections for looseness or damage.
- Adjust display settings (brightness, contrast, color) via the OSD menu.
- Ensure the video source is outputting a compatible resolution.
If the issue persists after attempting these steps, contact Pyle customer support for further assistance.
8. Specifications
| Feature | Specification |
|---|---|
| Brand | Pyle |
| Model Number | PLVW92U |
| Screen Size | 9 Inches |
| Resolution Support | Full HD 1080p, HD |
| Aspect Ratio | 1.33:1 (Displaying 16:9) |
| Input Connectors | HDMI, VGA, 2x RCA Video |
| Output Connectors | RCA (L/R) Audio |
| Power Consumption | Less than 5.5 Watts |
| Power Supply | 12V DC (Adapter sold separately) |
| Item Weight | 4 pounds |
| Product Dimensions | 12.2 x 11.1 x 17.9 inches |
| Screen Surface | Glossy |

Image 7: Visual representation of the monitor's physical dimensions and weight.
9. Warranty and Support
Pyle products are designed for reliability and performance. For warranty information, please refer to the warranty card included with your product or visit the official Pyle website. For technical support or service inquiries, please contact Pyle customer service.
Website: www.pyleusa.com
Proposition 65 Warning: This product contains chemicals known to the State of California to cause cancer and birth defects or other reproductive harm.


