1. Introduction
This manual provides essential instructions for setting up, operating, and maintaining your Apple iPod Nano 6th Generation 8 GB. Please read this guide thoroughly to ensure proper use and to maximize your device's functionality. This particular unit is a refurbished product, tested and certified to function like new.
2. Product Overview
The Apple iPod Nano 6th Generation is a compact, portable media player featuring a multi-touch display. It is designed for playing music, listening to FM radio, and tracking fitness activities.
2.1 Device Components
- Multi-Touch Display: The primary interface for navigation and control.
- Volume Buttons: Located on the side for adjusting audio output.
- Sleep/Wake Button: Located on the top for powering on/off the screen or the device.
- 30-pin Dock Connector: Located at the bottom for charging and syncing with a computer.
- 3.5mm Headphone Jack: Located at the bottom for connecting headphones.
2.2 Visual Reference

Image 1: Front view of the Apple iPod Nano 6th Generation displaying the 'Music' application icon, accompanied by white earbuds.
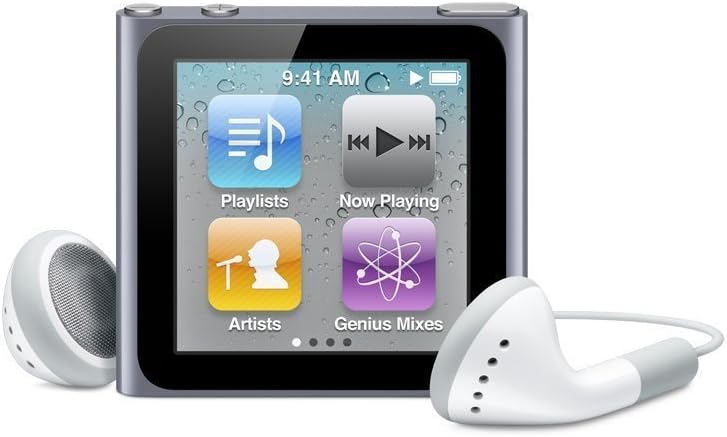
Image 2: Front view of the Apple iPod Nano 6th Generation displaying multiple application icons including 'Playlists', 'Now Playing', 'Artists', and 'Genius Mixes', with white earbuds.
3. Setup
3.1 Charging the Device
- Connect the included 30-pin USB cable to the dock connector port at the bottom of your iPod Nano.
- Plug the other end of the USB cable into a powered USB port on your computer or a compatible USB power adapter.
- The battery icon on the screen will indicate charging status. A full charge typically takes approximately 3 hours.
3.2 Connecting to a Computer and Syncing
- Ensure you have the latest version of iTunes installed on your computer.
- Connect your iPod Nano to your computer using the 30-pin USB cable.
- iTunes will automatically launch and detect your iPod Nano. Follow the on-screen prompts to set up your device, name it, and configure sync settings.
- Select the music, podcasts, audiobooks, and photos you wish to sync to your iPod Nano.
- Click 'Sync' in iTunes to transfer content to your device.
3.3 Initial Power On
Press and hold the Sleep/Wake button on the top of the device until the Apple logo appears. The device will boot up to the home screen.
4. Operating Instructions
4.1 Basic Navigation
- Tap: Select an item or open an app.
- Swipe: Move between screens or scroll through lists.
- Pinch to Rotate: Rotate the screen orientation (if enabled).
- Hold: Press and hold an icon to rearrange apps on the home screen.
4.2 Playing Music
- From the home screen, tap the 'Music' icon.
- Browse by Playlists, Artists, Songs, Albums, Genres, or Composers.
- Tap on a song or album to begin playback.
- During playback, tap the screen to reveal playback controls (play/pause, skip forward/backward, volume slider).
4.3 Volume Control
Use the physical volume up (+) and volume down (-) buttons located on the side of the device to adjust the audio output level.
4.4 Powering Off/On
- To turn off: Press and hold the Sleep/Wake button until a red slider appears. Swipe the slider to the right to power off.
- To turn on: Press and hold the Sleep/Wake button until the Apple logo appears.
4.5 Using FM Radio
Connect headphones to your iPod Nano; they act as the antenna. From the home screen, tap the 'Radio' icon. You can tune to stations manually or use the Live Pause feature.
4.6 Using the Pedometer (Fitness)
The iPod Nano includes a built-in pedometer. Tap the 'Fitness' icon from the home screen to access features for tracking steps, distance, and calories burned. You can set goals and view your activity history.
5. Maintenance
5.1 Cleaning the Device
Use a soft, lint-free cloth to clean the screen and body of your iPod Nano. Avoid abrasive materials or harsh cleaning agents. Do not expose the device to excessive moisture.
5.2 Battery Care
For optimal battery life, avoid fully discharging the battery frequently. Charge your iPod Nano regularly. If storing the device for an extended period, ensure it has at least a 50% charge.
5.3 Software Updates
Periodically connect your iPod Nano to iTunes on your computer to check for and install available software updates. Updates can provide new features, performance improvements, and bug fixes.
5.4 Storage Management
Monitor your 8 GB storage capacity through iTunes. Delete unwanted music, podcasts, or photos to free up space if needed. You can manage content directly from iTunes when connected.
6. Troubleshooting
6.1 Device Not Responding
If your iPod Nano becomes unresponsive, try a force restart: Press and hold the Sleep/Wake button and the Volume Down button simultaneously for at least 8 seconds, until the Apple logo appears.
6.2 Not Charging or Syncing
- Ensure the USB cable is securely connected to both the iPod Nano and the computer/power adapter.
- Try a different USB port or a different USB cable.
- Restart your computer and try again.
- Ensure iTunes is updated to the latest version.
6.3 Sound Issues
- Check the volume level using the physical buttons.
- Ensure headphones are fully plugged into the headphone jack.
- Try a different pair of headphones to rule out a faulty accessory.
7. Specifications
| Feature | Detail |
|---|---|
| Product Dimensions | 5 x 1 x 5 inches |
| Item Weight | 1.28 ounces |
| Model Name | iPod Nano |
| Connectivity Technology | Aux (30-pin dock connector) |
| Memory Storage Capacity | 8 GB |
| Color | Graphite (also available in White, Brown) |
| Screen Size | 1.54 Inches |
| Compatible Devices | Laptop (for syncing) |
| Supported Standards | AAC, AIFF, ALAC, MP3, WAV |
| Manufacturer | Apple Computer |
8. Warranty and Support
As a refurbished product, this iPod Nano is typically covered by a limited warranty provided by the refurbisher or seller. Please refer to your purchase documentation for specific warranty terms and duration. For technical assistance or further support, consult the official Apple support website or contact the vendor from whom the refurbished unit was purchased.


