
Intermatic HB51R
Intermatic HB51R Sprinkler Timer User Manual
Model: HB51R
1. Introduction
This manual provides detailed instructions for the safe and efficient use of your Intermatic HB51R Sprinkler Timer. Please read this manual thoroughly before installation and operation to ensure proper function and to prevent damage to the unit or property. Keep this manual for future reference.
2. Product Overview
The Intermatic HB51R is a mechanical outdoor timer designed to control sprinkler systems. It features a simple dial for setting various operational modes and durations.
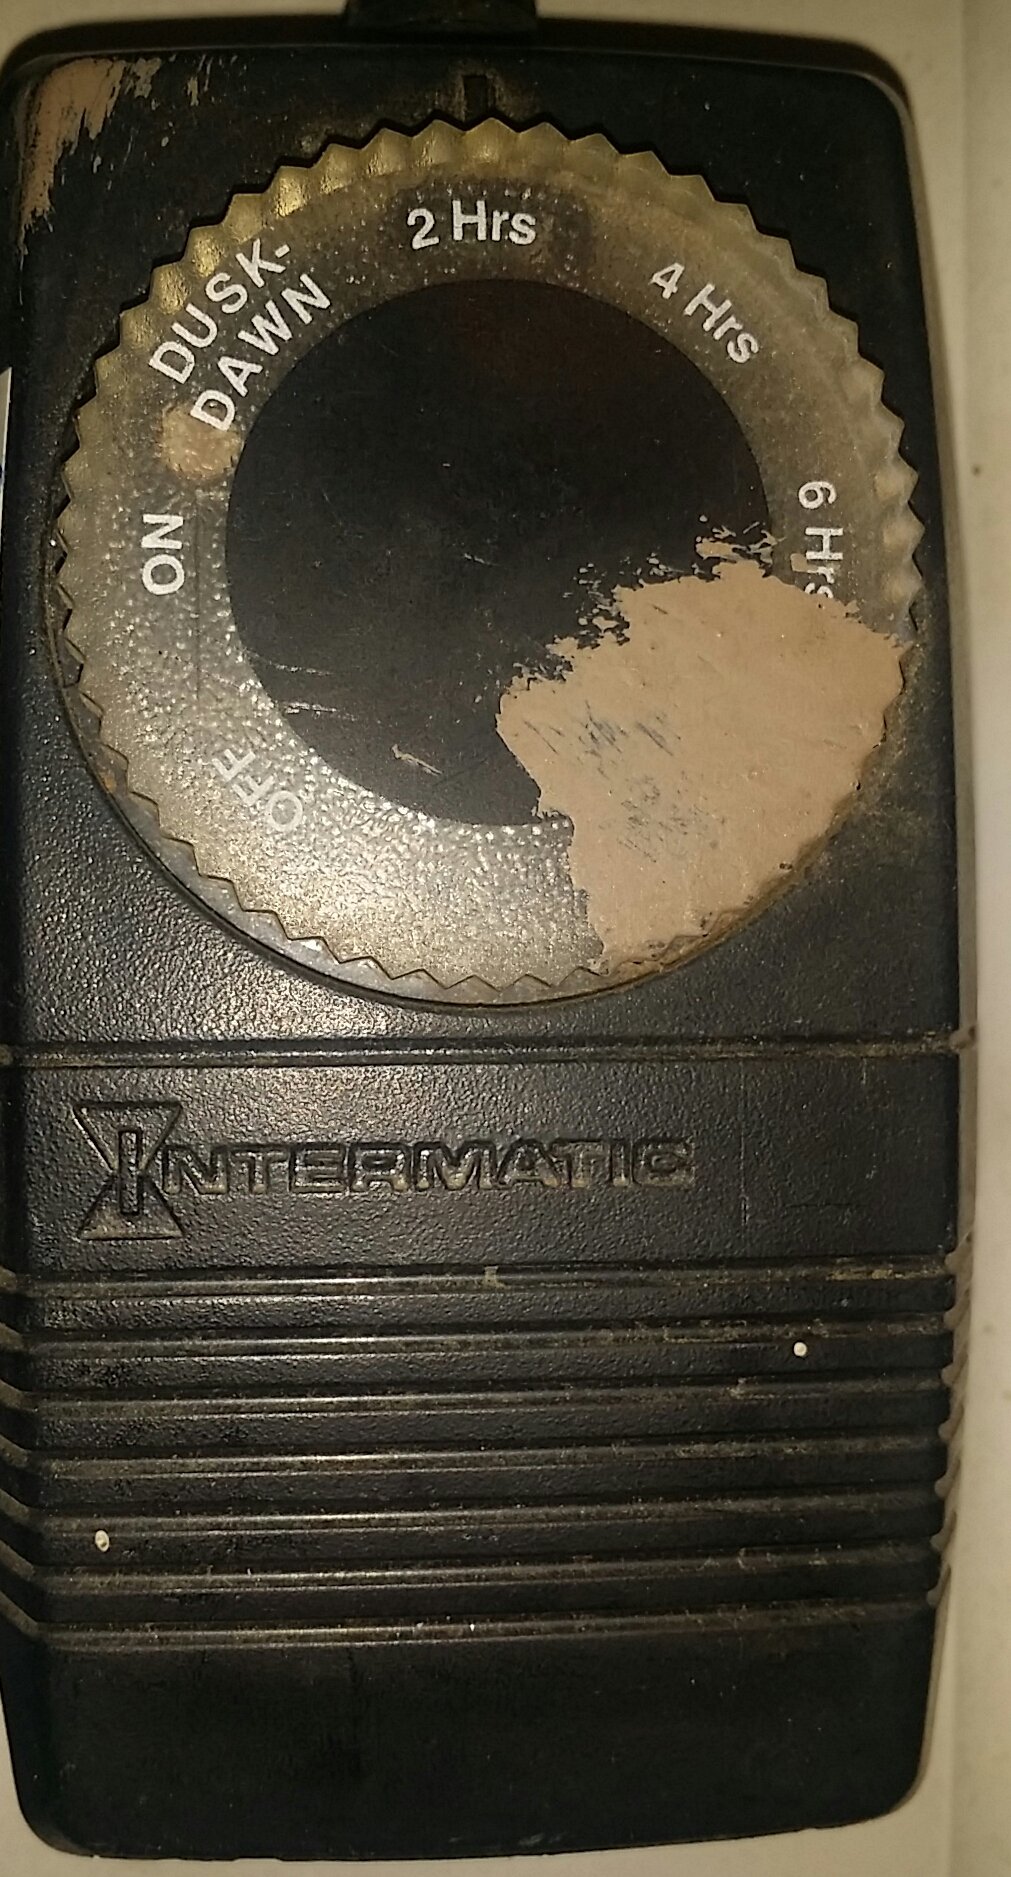
Figure 1: Front view of the Intermatic HB51R Sprinkler Timer. The timer features a large central dial with settings for 'OFF', 'ON', 'DUSK-DAWN', '2 Hrs', '4 Hrs', and '6 Hrs'. The 'Intermatic' brand name is visible below the dial.
3. Setup and Installation
The HB51R timer is designed for outdoor use and typically plugs into a standard electrical outlet. Ensure the outlet is protected by a Ground Fault Circuit Interrupter (GFCI) for safety.
- Mounting: If desired, the timer can be mounted to a wall using appropriate hardware (not included). Ensure it is mounted in a location protected from direct heavy rain and easily accessible.
- Power Connection: Plug the timer's power cord into a 120V AC, 60Hz GFCI-protected outdoor electrical outlet.
- Sprinkler Connection: Plug your sprinkler system's power cord into the receptacle located on the Intermatic HB51R timer. Ensure the sprinkler system's power requirements do not exceed the timer's maximum load capacity.
- Initial Check: Before setting, ensure the sprinkler system is functioning correctly when directly plugged into an outlet.
4. Operating Instructions
The HB51R timer is operated using the large rotary dial on its front face. Rotate the dial clockwise or counter-clockwise to select the desired operating mode.
- OFF: When the dial is set to 'OFF', the connected sprinkler system will remain off.
- ON: When the dial is set to 'ON', the connected sprinkler system will operate continuously until the dial is manually turned to another setting.
- DUSK-DAWN: In this mode, the timer will automatically turn on the connected sprinkler system at dusk and turn it off at dawn. This mode utilizes a built-in photocell sensor.
- 2 Hrs: The timer will activate the connected sprinkler system for a duration of 2 hours, then automatically turn off.
- 4 Hrs: The timer will activate the connected sprinkler system for a duration of 4 hours, then automatically turn off.
- 6 Hrs: The timer will activate the connected sprinkler system for a duration of 6 hours, then automatically turn off.
Note: For timed operations (2, 4, or 6 Hrs), the timer will begin its cycle immediately upon selection and turn off after the set duration. To repeat a timed cycle, you must manually reset the dial to the desired duration after the previous cycle completes.
5. Maintenance
The Intermatic HB51R Sprinkler Timer requires minimal maintenance to ensure long-term performance.
- Cleaning: Periodically wipe the exterior of the timer with a soft, damp cloth. Do not use harsh chemicals or abrasive cleaners. Ensure the timer is unplugged before cleaning.
- Photocell Sensor: Keep the photocell sensor (if applicable, typically a small clear dome on the unit) clean and free from obstructions (e.g., dirt, leaves) to ensure accurate Dusk-Dawn operation.
- Storage: If storing the timer for an extended period, unplug it from the outlet and store it in a dry, cool place.
6. Troubleshooting
| Problem | Possible Cause | Solution |
|---|---|---|
| Sprinkler system does not turn on. |
|
|
| Dusk-Dawn mode not working correctly. |
|
|
| Timed cycle does not complete or is inaccurate. |
|
|
7. Specifications
- Brand: Intermatic
- Model: HB51R
- Material: Plastic
- Color: Black
- Manufacturer: Intermatic
- Package Dimensions: 16.26 x 11.43 x 3.81 cm
- Item Weight: 204.11 g
- UPC: 799207151829
8. Warranty and Support
For warranty information or technical support, please refer to the warranty card included with your product or visit the official Intermatic website. Do not attempt to repair the unit yourself, as this may void the warranty and pose safety risks.
Related documentsHB51R


Ask a question about this manual
Ask about setup, troubleshooting, compatibility, parts, safety, or missing instructions. Manuals+ will review the question and use this page’s manual context to help answer it.