1. Introduction
This manual provides comprehensive instructions for the assembly, operation, and maintenance of your Yaheetech YT-424 Bike Repair Stand. Designed for both road and mountain bikes, this stand offers a stable and adjustable platform for various bicycle repair and maintenance tasks. Please read this manual thoroughly before use to ensure proper and safe operation.
2. Safety Information
- Ensure all quick-release levers and knobs are securely tightened before placing a bicycle on the stand.
- Do not exceed the maximum load capacity of 66 lbs (30 kg).
- Always position the stand on a flat, stable, and non-slip surface.
- Distribute the bicycle's weight evenly to maintain stability.
- Keep hands and clothing clear of moving parts, especially when adjusting height or rotating the clamp.
- Regularly inspect the stand for any signs of wear or damage. Do not use if damaged.
3. Package Contents
Verify that all components are present before beginning assembly:
- Main Stand Assembly (with foldable legs)
- Telescopic Support Pole
- 360° Swivel Clamp Arm
- Tool Tray
- Fixed Rod (for handlebar/front wheel stabilization)
- Assembly Hardware (screws, Allen key)
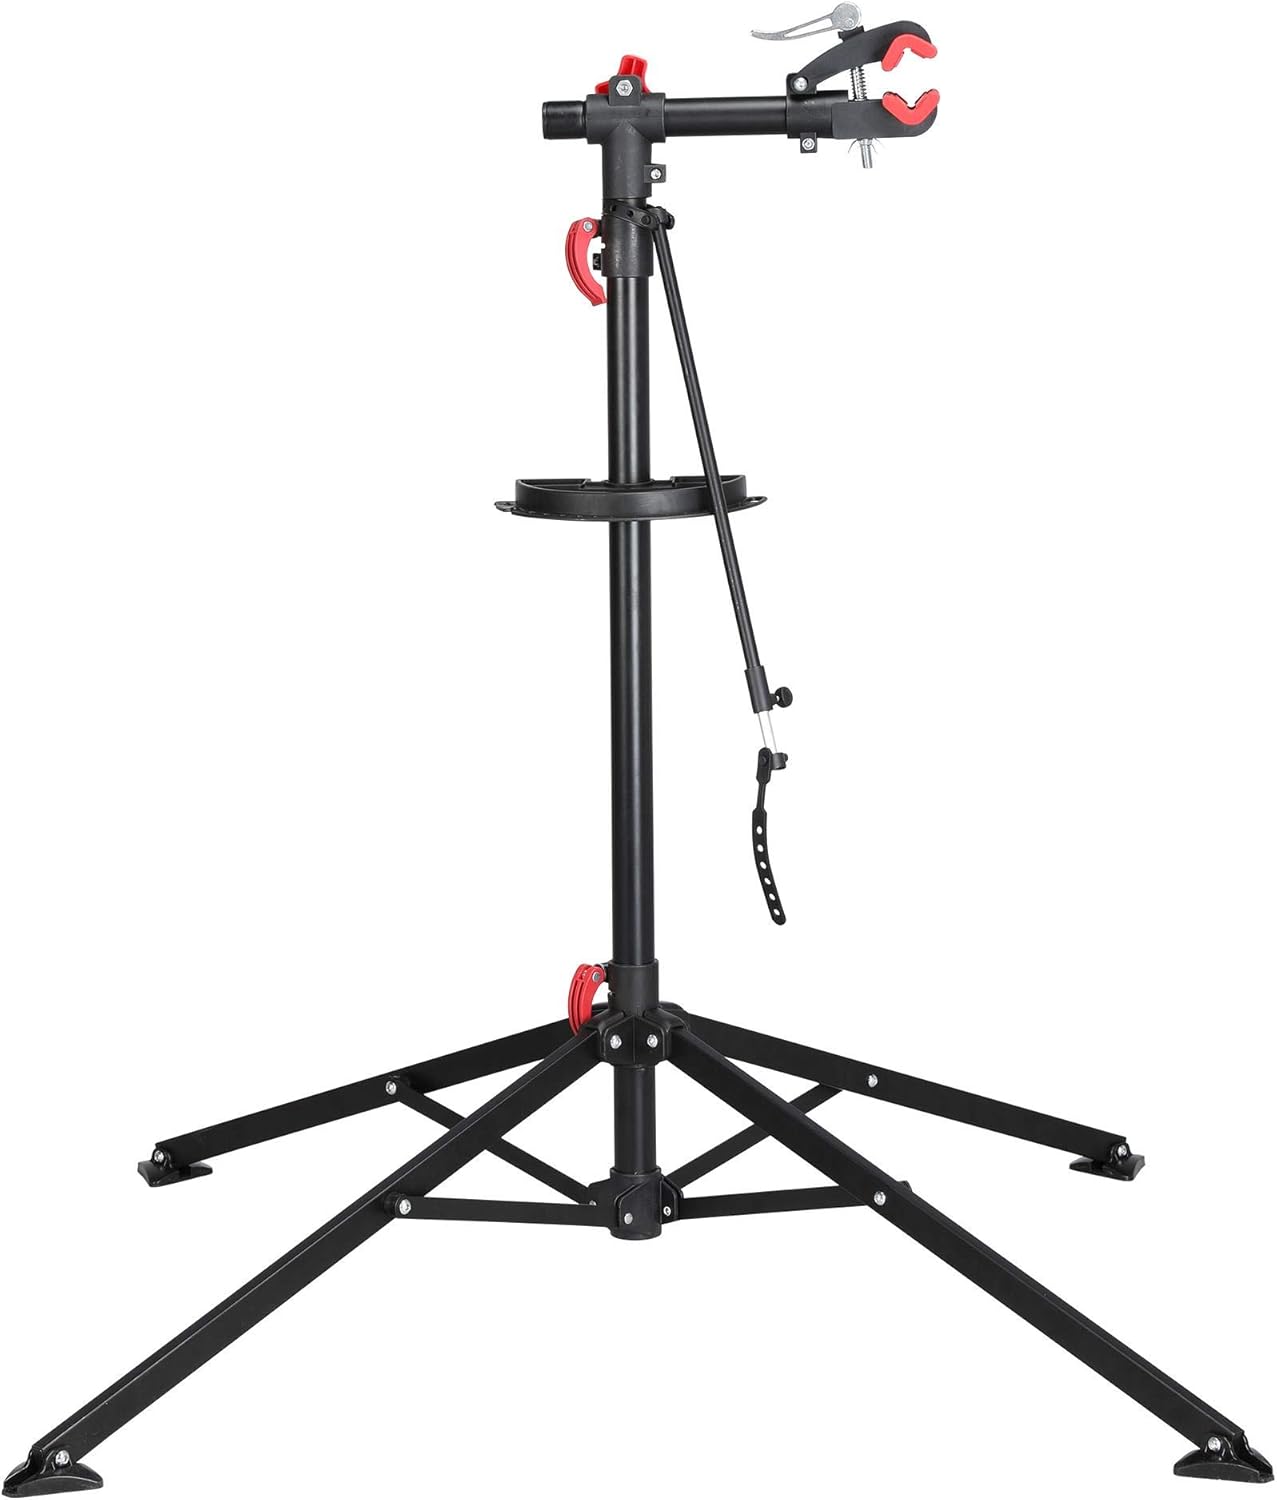
Figure 1: All main components of the Yaheetech Bike Repair Stand.
4. Setup and Assembly
Follow these steps to assemble your bike repair stand:
- Unfold the Legs: Place the main stand assembly on a flat surface. Release the quick-release lever at the base of the stand and carefully extend the four legs outwards until they are fully spread, forming a stable base. Secure the quick-release lever.
- Insert the Telescopic Pole: Insert the telescopic support pole into the main stand's central column. Secure it using the quick-release lever on the main stand.
- Attach the Tool Tray: Slide the tool tray onto the telescopic support pole at your desired height. Secure it by tightening the provided screw.
- Mount the Clamp Arm: Insert the 360° swivel clamp arm into the top of the telescopic support pole. Tighten the red knob to secure it.
- Attach Fixed Rod: Assemble the fixed rod by connecting its two parts. Attach the rubber straps to the clamp arm and the bicycle's handlebar or front wheel for stability during repairs.
Video 1: Visual guide to assembling the Yaheetech Bike Repair Stand and its key features.

Figure 2: Detailed assembly diagram showing how components fit together.
5. Operating Instructions
5.1 Adjusting Height
To adjust the height of the stand, loosen the quick-release lever on the main stand's central column. Raise or lower the telescopic support pole to your desired working height (adjustable from 42.5" to 74.8"). Securely tighten the quick-release lever once the desired height is reached.

Figure 3: The stand's adjustable height range and dimensions.
5.2 Clamping Your Bicycle
The 360° swivel clamp allows you to position your bike at any angle. Loosen the red knob on the clamp arm to rotate the clamp. Open the quick-release clamp jaws to fit your bicycle's frame tube (suitable for 1"-1.6" / 25-40 mm diameter). The rubber material on the clamp protects your bike's paint. Once the bike is in place, close the quick-release clamp and tighten the red knob to secure the bicycle firmly.

Figure 4: Close-up of the 360° rotating quick-release clamp, highlighting its protective rubber pads.
5.3 Using the Tool Tray
The integrated tool tray provides convenient storage for your tools and small parts during maintenance. It features various compartments and a magnetic strip to prevent screws and other metal components from getting lost.

Figure 5: The magnetic tool tray for organizing tools and small parts.
5.4 Stabilizing the Front Wheel
Use the included fixed rod to prevent the front wheel or handlebar from turning during repairs. Attach one end to the clamp arm and the other to the handlebar or front wheel, securing it with the rubber straps.

Figure 6: The fixed rod used to stabilize the front wheel or handlebar.
6. Maintenance
- Clean the stand regularly with a damp cloth to remove dirt and grime.
- Periodically check all bolts, screws, and quick-release mechanisms for tightness. Tighten as necessary.
- Store the stand in a dry place when not in use. The foldable design allows for compact storage.

Figure 7: The stand's foldable design for convenient storage and transport.
7. Troubleshooting
- Stand is unstable: Ensure all four legs are fully extended and the quick-release lever at the base is securely tightened. Verify the stand is on a flat surface.
- Bicycle slips from clamp: Ensure the quick-release clamp is fully closed and the red knob is tightened. Check that the frame tube diameter is within the specified range (1"-1.6").
- Height adjustment slips: Confirm the quick-release lever on the telescopic pole is fully tightened after adjusting the height.
8. Specifications
| Feature | Detail |
|---|---|
| Material | Alloy Steel, PA Plastic |
| Height Adjustment | 52 - 75 inches (approx. 132 - 190 cm) |
| Load Capacity | 66 lbs (30 kg) |
| Clamp Rotation | 360 degrees |
| Frame Tube Diameter | 1" - 1.6" (25 - 40 mm) |
| Base Type | Four-leg tripod with foldable footpads |
| Included Components | Workstand, Tool Tray, Fixed Rod |

Figure 8: The stand securely holding a bicycle, demonstrating its stability and load capacity.
9. Warranty and Support
This Yaheetech Bike Repair Stand comes with a Quality Guaranteed warranty. For any product inquiries, technical support, or warranty claims, please refer to the contact information provided with your purchase or visit the official Yaheetech website.


