
1. Introduction
This manual provides detailed instructions for the setup, operation, and maintenance of your Ashton Sutton Sharp SPC595 Atomic Table Clock and Weather Station. Please read this manual thoroughly before using the device to ensure proper function and to maximize its features.
2. Package Contents
- Ashton Sutton Sharp SPC595 Main Unit
- Wireless Outdoor Remote Sensor
- User Manual
3. Product Overview
The Ashton Sutton Sharp SPC595 is an advanced atomic clock and weather station designed for both wall mounting and desktop use. It provides comprehensive environmental data, including indoor and outdoor temperature and humidity, barometric pressure trends, and a 12-hour weather forecast. The atomic clock feature ensures precise timekeeping.
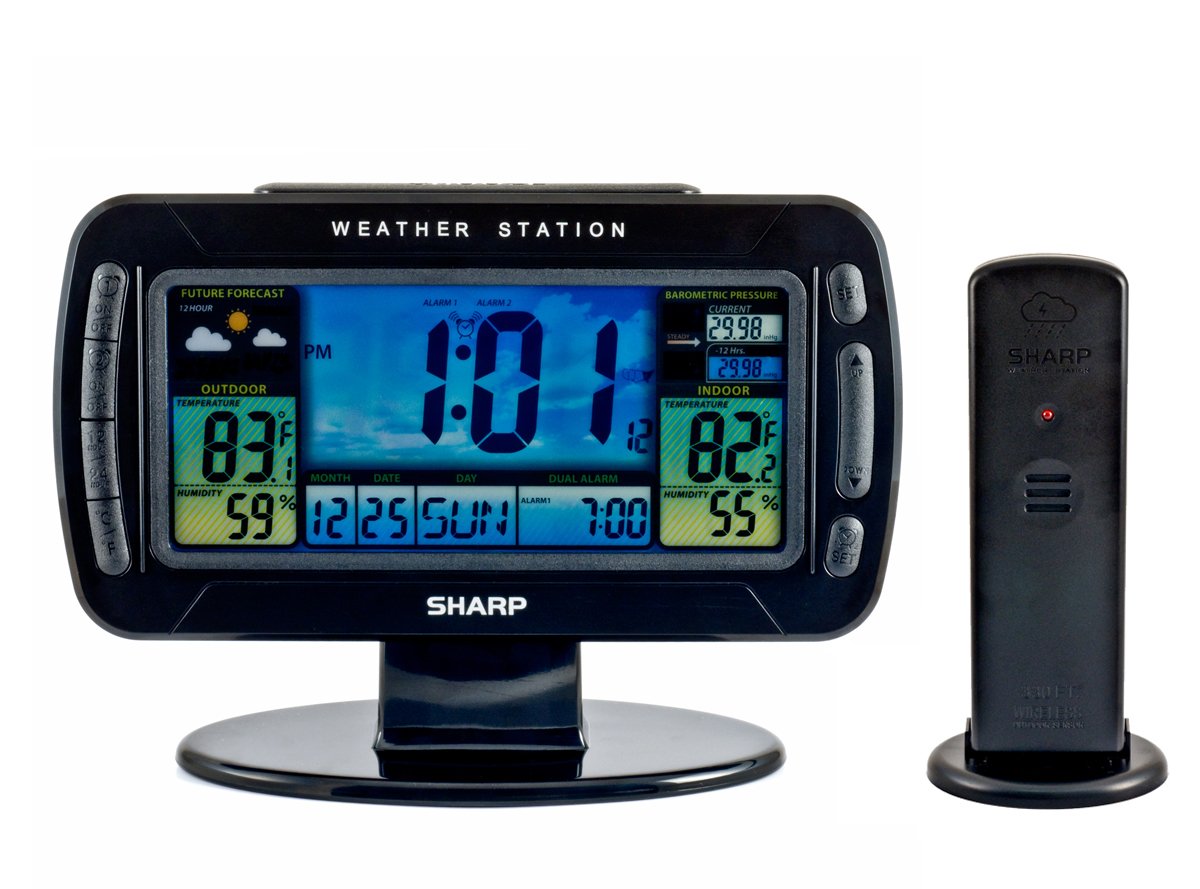
This image displays the Ashton Sutton Sharp SPC595 Atomic Table Clock and Weather Station. The main unit features a large, backlit LCD screen showing time, date, indoor and outdoor temperature and humidity, barometric pressure, and a 12-hour weather forecast. To the right, the compact remote sensor is shown, designed to transmit outdoor environmental data to the main unit.
3.1 Main Unit Features
- Large LCD display with backlight
- Atomic time and date with manual setting option
- Dual alarm function
- Indoor temperature and humidity display
- Outdoor temperature and humidity display (via remote sensor)
- Barometric pressure with trend indicator
- 12-hour weather forecast icons
- Moon phase display
3.2 Remote Sensor Features
- Transmits outdoor temperature and humidity data wirelessly to the main unit
- Weather-resistant design for outdoor placement
4. Setup
4.1 Battery Installation
The main unit requires 3 AAA batteries, and the remote sensor requires 2 AAA batteries (not included).
- For the Remote Sensor: Open the battery compartment cover on the back of the remote sensor. Insert 2 AAA batteries, observing the correct polarity (+/-). Close the cover securely.
- For the Main Unit: Open the battery compartment cover on the back of the main unit. Insert 3 AAA batteries, observing the correct polarity (+/-). Close the cover securely.
4.2 Initial Power-On and Atomic Time Synchronization
Upon battery installation, the main unit will power on and begin searching for the atomic time signal (WWVB). This process can take several minutes to several hours depending on your location and environmental conditions.
- Place the main unit near a window for better signal reception.
- The atomic clock icon will flash during synchronization. Once synchronized, the icon will become solid, and the correct time and date will be displayed.
4.3 Remote Sensor Pairing
The main unit will automatically attempt to connect with the remote sensor after power-on. Ensure the remote sensor is placed within range (typically up to 100 feet/30 meters in open air) and away from large metal objects or electronic interference.
- Ensure batteries are correctly installed in both the main unit and the remote sensor.
- The outdoor temperature and humidity readings should appear on the main unit's display within a few minutes.
- If readings do not appear, press the 'CHANNEL' button on the main unit or the 'RESET' button on the remote sensor to re-initiate the pairing process.
5. Operating Instructions
5.1 Manual Time and Date Setting
If atomic synchronization is unavailable or you wish to set the time manually:
- Press and hold the 'SET' button until the time display flashes.
- Use the 'UP' or 'DOWN' buttons to adjust the hour, then press 'SET' to confirm.
- Repeat this process for minutes, year, month, and day.
- Press 'SET' again to exit manual setting mode.
5.2 Alarm Settings
The unit features dual alarms (Alarm 1 and Alarm 2).
- Press the 'ALARM' button once to view Alarm 1 time. Press again for Alarm 2 time.
- While viewing an alarm time, press and hold the 'ALARM' button until the alarm time flashes.
- Use the 'UP' or 'DOWN' buttons to adjust the hour, then press 'ALARM' to confirm.
- Repeat for minutes.
- To activate/deactivate an alarm, press the 'ALARM ON/OFF' switch on the side of the unit. An alarm icon will appear on the display when active.
5.3 Display Modes
- Temperature Units: Press the 'C/F' button to switch between Celsius and Fahrenheit.
- Barometric Pressure Units: Press the 'BARO' button to switch between inHg and hPa.
- 12/24 Hour Format: Press the '12/24' button to toggle between 12-hour and 24-hour time display.
5.4 Weather Forecast
The weather station analyzes barometric pressure changes to predict weather conditions for the next 12 hours. Icons such as Sunny, Partly Cloudy, Cloudy, Rainy, and Snowy will be displayed. These are forecasts and may not always reflect current conditions.
6. Maintenance
6.1 Battery Replacement
Replace batteries in both the main unit and remote sensor when the low battery indicator appears on the display. Always replace all batteries in a unit at the same time with new ones of the same type.
6.2 Cleaning
Wipe the unit and sensor with a soft, damp cloth. Do not use abrasive cleaners or solvents, as these may damage the display or casing.
7. Troubleshooting
| Issue | Possible Cause | Solution |
|---|---|---|
| No outdoor temperature/humidity reading | Remote sensor out of range, low batteries, interference | Relocate sensor closer to main unit, replace batteries, avoid electronic interference. Press 'CHANNEL' or 'RESET' to re-pair. |
| Atomic time not synchronizing | Weak signal, interference, incorrect time zone setting | Place unit near a window, away from electronics. Allow several hours for synchronization. Manually set time if necessary. |
| Incorrect weather forecast | Forecast is based on barometric pressure trends, not real-time conditions. | Understand that the forecast is a prediction for the next 12 hours and may not always match current observations. |
| Display is dim or blank | Low batteries | Replace all batteries in the main unit. |
8. Specifications
| Feature | Detail |
|---|---|
| Model Number | SPC595 |
| Power Source (Main Unit) | 3 x AAA Batteries (not included) |
| Power Source (Remote Sensor) | 2 x AAA Batteries (not included) |
| Mounting Type | Wall Mount or Desktop |
| Material | Plastic |
| Color | Black |
| Operation Mode | Atomic |
| Alarm Clock | Yes (Dual Alarm) |
| Item Weight | 726 g |
| Item Dimensions (LxWxH) | 21.6 x 7.4 x 15.2 Centimeters |
9. Warranty and Support
This product is covered by a standard manufacturer's warranty against defects in materials and workmanship. Please refer to the warranty card included with your purchase for specific terms and conditions. For technical support or service inquiries, please contact the retailer or manufacturer directly.
Note: Specifications are subject to change without prior notice.