
1. Product Overview
The Mastercool 71098-13 is a precision 3/16" double flare die set designed for creating accurate double flares on 3/16" tubing. This die set is engineered for durability and reliability, ensuring long service life under repeated hydraulic pressure. It is specifically compatible with the Mastercool 71098 Kit and 71202 Hydraulic Tool, making it an essential replacement or addition to your Hydra-Flare system.
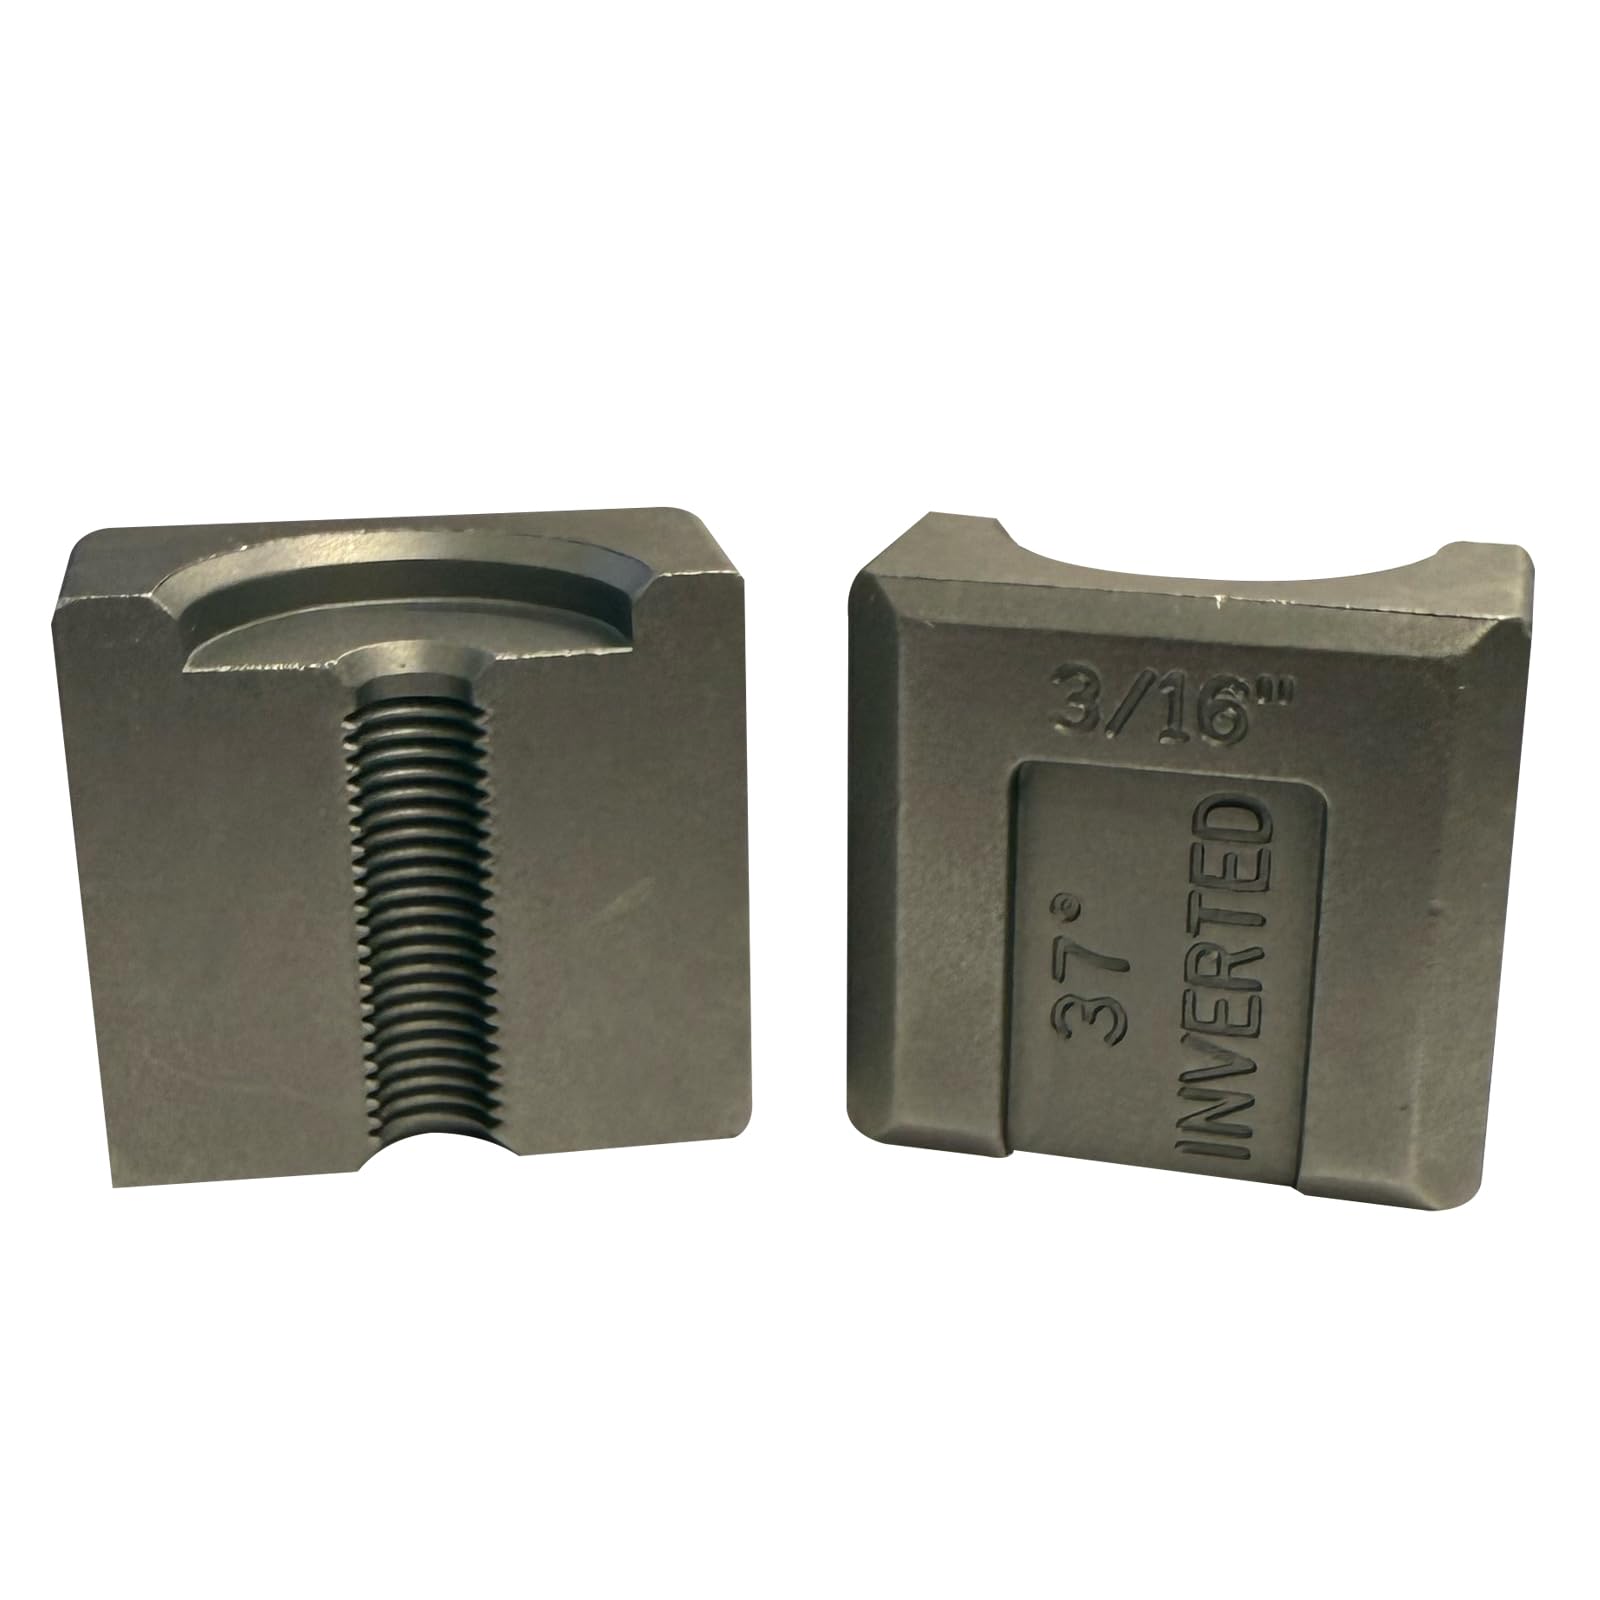
Image: The Mastercool 71098-13 3/16" Double Flare Die Set, showing its robust construction and precise sizing.
Key Features:
- Precision 3/16" Die Set: Specifically designed for accurate double flares on 3/16" tubing.
- Hydra-Flare System Compatibility: For use with Mastercool 71098 Kit and 71202 Hydraulic Tool.
- Durable Steel Construction: Built for extended service life under demanding conditions.
- Easy Installation: Designed for a drop-in fit into existing Hydra-Flare tool holders.
2. Safety Information
Always observe standard safety precautions when working with tools and tubing. Failure to do so may result in injury or damage to equipment.
- Wear appropriate personal protective equipment (PPE), including safety glasses, to protect against flying debris.
- Ensure the work area is clean, well-lit, and free from obstructions.
- Use the die set only with compatible Mastercool flaring tools as specified.
- Inspect the die set and flaring tool for any damage or wear before each use. Do not use damaged equipment.
- Keep hands and fingers clear of moving parts during operation.
3. Package Contents
The Mastercool 71098-13 package typically includes:
- One (1) Mastercool 3/16" Double Flare Die Set (71098-13)
4. Setup and Installation
This die set is designed for quick and easy installation into compatible Mastercool Hydra-Flare systems. Refer to your specific flaring tool's manual for detailed instructions on die replacement.
- Ensure Tool is Off: If using a hydraulic flaring tool, ensure it is powered off and depressurized before beginning.
- Remove Existing Die (if applicable): Carefully remove any previously installed die components from the flaring tool's holder.
- Insert 71098-13 Die Set: Place the 3/16" double flare die set into the designated slot or holder of your Mastercool 71098 Kit or 71202 Hydraulic Tool. Ensure it is seated correctly and securely.
- Secure Die: Follow your flaring tool's instructions to secure the die set in place, typically involving tightening a clamp or locking mechanism.
- Verify Fit: Gently test the movement of the flaring tool to ensure the die set is properly installed and does not interfere with operation.
5. Operating Instructions
Follow these general steps to create a double flare using the Mastercool 71098-13 die set with a compatible Mastercool Hydra-Flare system. Always consult your flaring tool's specific operating manual for precise instructions.
- Prepare Tubing: Cut the tubing (e.g., brake line, fuel line) to the desired length. Use a tubing cutter to ensure a clean, square cut. Deburr both the inside and outside edges of the tubing thoroughly to remove any sharp edges or burrs. This is crucial for a quality flare and to prevent cracks.
- Insert Tubing into Die: Place the prepared 3/16" tubing into the appropriate opening of the 71098-13 double flare die set. Ensure the tubing extends slightly beyond the face of the die, according to the specific requirements of your flaring tool.
- Position in Flaring Tool: Secure the die set with the tubing firmly into your compatible Mastercool Hydra-Flare system (e.g., 71098 Kit or 71202 Hydraulic Tool). Ensure the tubing is clamped securely to prevent slippage during the flaring process.
- Perform First Flare (Bubble Flare): Operate the flaring tool to form the initial bubble flare. This typically involves advancing the flaring cone or punch into the tubing until the tool's stop mechanism is engaged or the bubble flare is fully formed.
- Perform Second Flare (Double Flare): Reposition the tool or tubing as required by your specific flaring tool to complete the double flare. This step folds the bubble flare back onto itself, creating a robust, leak-proof, and durable seal.
- Inspect Flare: Carefully remove the tubing from the flaring tool and inspect the finished double flare. A properly formed flare should be smooth, symmetrical, free from cracks, and have uniform thickness.
6. Maintenance and Care
Proper maintenance ensures the longevity and performance of your Mastercool 71098-13 die set.
- Cleaning: After each use, clean the die set to remove any metal shavings or debris. Use a clean cloth and, if necessary, a mild solvent.
- Lubrication: Apply a light coat of oil to the die set periodically to prevent rust and ensure smooth operation.
- Storage: Store the die set in a dry, protected environment to prevent corrosion and damage. Keep it in its original packaging or a dedicated tool case.
- Inspection: Regularly inspect the die set for signs of wear, damage, or deformation. Worn or damaged dies can produce poor quality flares and should be replaced.
7. Troubleshooting
Refer to the table below for common issues and their potential solutions when using the die set.
| Problem | Possible Cause | Solution |
|---|---|---|
| Uneven or Lopsided Flare | Tubing not deburred properly; tubing not seated squarely in die; worn die. | Ensure tubing is thoroughly deburred and clean. Re-seat tubing squarely. Inspect die for wear and replace if necessary. |
| Cracked Flare | Tubing not deburred; over-tightening; incorrect tubing material; tubing too cold. | Deburr tubing thoroughly. Avoid excessive force. Ensure tubing is suitable for flaring. Allow tubing to reach room temperature. |
| Leaking Connection | Improperly formed flare; damaged flare nut; cross-threaded connection. | Re-flare tubing, ensuring a perfect form. Replace damaged flare nut. Ensure proper alignment when connecting and tighten correctly. |
8. Specifications
| Specification | Detail |
|---|---|
| Manufacturer | Mastercool |
| Brand | Mastercool |
| Model | 71098-13 |
| Product Dimensions | 2.25 x 1.5 x 1.25 inches |
| Item Model Number | 71098-13 |
| Manufacturer Part Number | 71098-13 |
| UPC | 700376107258 |
| Automotive Fit Type | Universal Fit |
9. Warranty and Support
Mastercool products are designed for quality and reliability. For specific warranty information, please refer to the documentation included with your Mastercool Hydra-Flare system or visit the official Mastercool website.
For technical assistance, product inquiries, or support, please contact Mastercool's U.S.-based service team. Contact details can typically be found on the Mastercool website or product packaging.