
1. Introduction
This manual provides essential information for the safe and efficient operation of your Krups EA816570 Espresseria Automatic Display Coffee Machine. Please read these instructions carefully before using the appliance and keep them for future reference. This fully automatic coffee machine is designed to deliver high-quality espresso and coffee beverages with ease, featuring an intuitive LCD display and customizable settings.
2. Safety Instructions
- Always ensure the appliance is connected to a grounded power outlet with the correct voltage (230 Volts).
- Do not immerse the appliance, power cord, or plug in water or any other liquid.
- Keep the appliance out of reach of children.
- Unplug the machine before cleaning or if it will not be used for an extended period.
- Do not operate the appliance if the power cord or plug is damaged, or if the machine malfunctions. Contact authorized service personnel.
- Use only fresh, cold water in the water tank.
- Never put anything other than coffee beans into the bean container.
- Be cautious of hot surfaces and steam during operation.
3. Product Components
Familiarize yourself with the main parts of your coffee machine:
- Bean Container: For whole coffee beans (capacity: 260g).
- Water Tank: Removable tank for fresh water (capacity: 1.7 Liters).
- Control Panel with LCD Display: For selecting beverages and adjusting settings.
- Coffee Spout: Dispenses prepared coffee. Adjustable height.
- Steam Nozzle: For frothing milk for cappuccinos and lattes.
- Drip Tray: Collects excess water and coffee drips.
- Coffee Grounds Container: Collects used coffee grounds.
- Cup Warmer: Top surface to pre-heat cups.
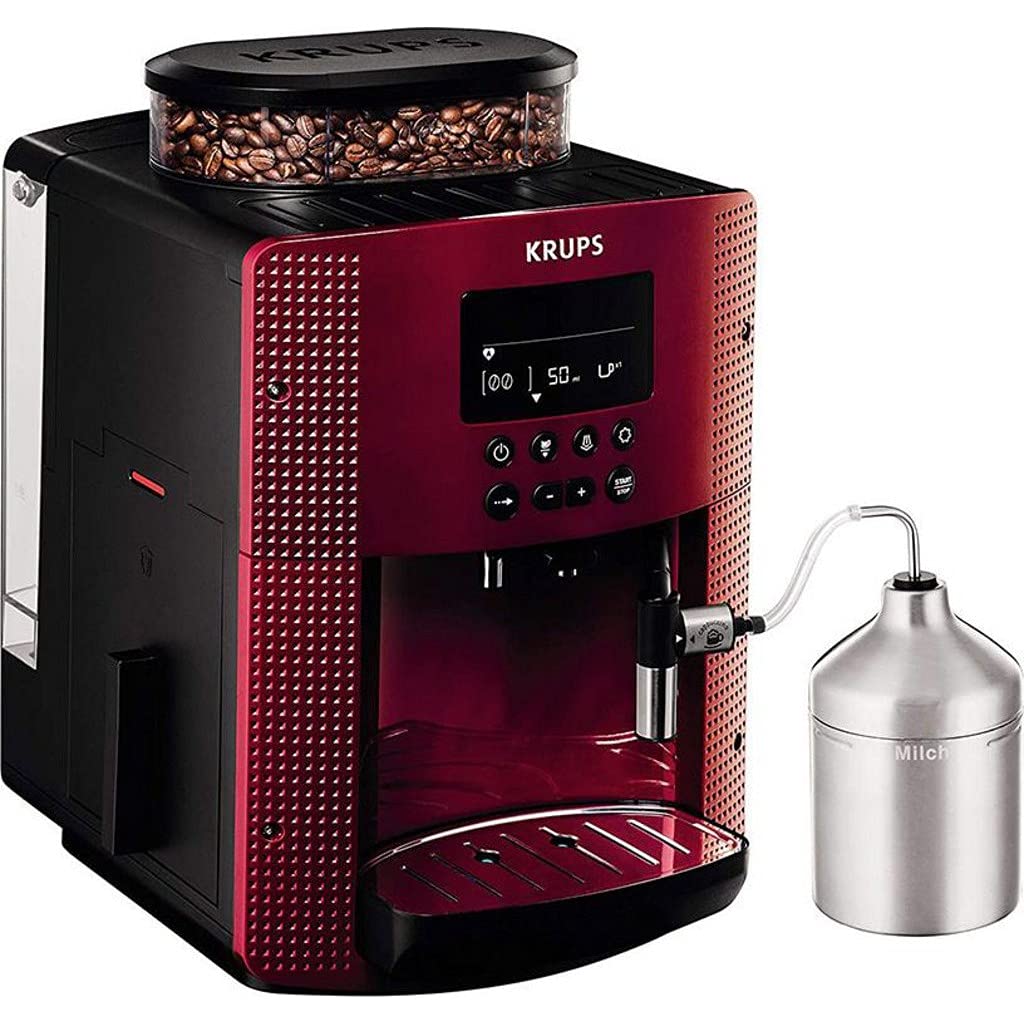
Front view of the Krups EA816570 Espresseria Automatic Display Coffee Machine, showcasing its compact design and user-friendly display.
4. Setup
- Unpacking: Carefully remove the machine from its packaging. Remove all protective films and packaging materials.
- Placement: Place the machine on a stable, level surface, away from heat sources and water splashes. Ensure adequate ventilation.
- Initial Rinse: Before first use, perform an initial rinse cycle. Fill the water tank with fresh water. Place a container under the coffee spout. Follow the on-screen instructions on the LCD display to initiate the rinse. This cleans the internal circuits.
- Fill Bean Container: Open the lid of the bean container and fill it with fresh coffee beans. Do not overfill.
- Fill Water Tank: Remove the water tank, fill it with fresh, cold water, and reinsert it securely.
- Power On: Plug the power cord into a grounded outlet. Press the power button to turn on the machine.
5. Operating Instructions
5.1 Making Coffee
- Ensure the water tank is filled and the bean container has enough coffee beans.
- Place one or two cups under the coffee spout. The machine can prepare up to two cups simultaneously.
- Select your desired beverage (e.g., Espresso, Coffee) using the LCD display and control buttons.
- You can adjust settings such as coffee strength (grinding level - 3 options) and temperature (3 options) via the display before brewing.
- Press the start button. The machine will grind the beans and brew your coffee.
5.2 Frothing Milk (for Cappuccino/Latte)
- Fill a pitcher with cold milk.
- Position the steam nozzle into the milk.
- Activate the steam function via the control panel.
- Move the pitcher up and down to create desired froth.
- Once frothed, turn off the steam function and clean the nozzle immediately.
6. Maintenance and Cleaning
Regular cleaning ensures optimal performance and longevity of your coffee machine.
- Daily Cleaning: Empty and rinse the drip tray and coffee grounds container daily. Wipe the exterior of the machine with a damp cloth.
- Steam Nozzle: After each use, wipe the steam nozzle with a damp cloth to remove milk residue. Periodically, use the needle provided (if applicable) to clear any blockages.
- Water Tank: Clean the water tank regularly with mild detergent and rinse thoroughly.
- Descaling: The machine will indicate when descaling is required. Use a Krups-approved descaling solution and follow the instructions on the LCD display. Descaling removes mineral buildup and is crucial for machine health.
- Cleaning Tablets: The machine will prompt for cleaning with a cleaning tablet. Use Krups cleaning tablets and follow the on-screen instructions. This process cleans the internal coffee circuits.
7. Troubleshooting
| Problem | Possible Cause | Solution |
|---|---|---|
| No coffee is dispensed. | Water tank empty, bean container empty, or coffee spout blocked. | Fill water tank/bean container. Clean coffee spout. |
| Coffee is too cold. | Temperature setting is too low. Cups are cold. | Increase temperature setting. Pre-heat cups using the cup warmer. |
| Machine displays 'Descale' message. | Mineral buildup in the system. | Perform a descaling cycle as instructed by the machine. |
| Milk not frothing properly. | Steam nozzle blocked or milk is not cold enough. | Clean the steam nozzle. Use fresh, cold milk. |
If problems persist, please contact Krups customer support.
8. Specifications
- Brand: KRUPS
- Model: EA816570
- Color: Red
- Dimensions (L x W x H): 24.5 x 33 x 36.5 cm
- Weight: 7 kg
- Coffee Capacity: Up to 2 cups simultaneously
- Water Tank Capacity: 1.7 Liters
- Power: 1450 W
- Voltage: 230 Volts
- Material: Stainless steel
- Special Features: Programmable, Milk Frother, Cup Warmer
- Grinding Levels: 3
- Temperature Levels: 3
- Bean Container Capacity: 260g
9. Warranty and Support
Your Krups EA816570 coffee machine comes with a manufacturer's warranty. Please refer to the warranty card included in your product packaging for specific terms and conditions, including the warranty period and coverage details.
For technical assistance, spare parts, or service, please contact Krups customer support. You can find contact information on the official Krups website or in the warranty documentation.
When contacting support, please have your model number (EA816570) and purchase date ready.


