1. Introduction
This manual provides comprehensive instructions for the installation, operation, and maintenance of your K-Rain 2514 Single Station Controller 110V. This controller is designed for automatic irrigation systems, offering reliable and efficient water management for a single zone.
Please read this manual thoroughly before installation and operation to ensure proper use and to prevent damage to the unit or injury.
2. Important Safety Information
- Electrical Safety: This unit operates on 110V AC. Installation should be performed by a qualified individual or in accordance with local electrical codes. Disconnect power before servicing.
- Outdoor Use: The controller features a rain-tight enclosure suitable for outdoor installation. Ensure the enclosure is properly sealed after wiring.
- Children: Keep the controller out of reach of children.
- Water Exposure: While rain-tight, avoid submerging the unit in water or directing high-pressure water jets directly at it.
3. Package Contents
Verify that all components are present before beginning installation:
- K-Rain 2514 Single Station Controller 110V
- Instruction Manual (this document)
- Mounting hardware (screws, anchors)
4. Setup and Installation
4.1 Mounting the Controller
Choose a suitable location for mounting the controller. It should be easily accessible, protected from direct sunlight if possible, and near a 110V power outlet. Use the provided mounting hardware to securely attach the controller to a wall or sturdy surface.
4.2 Wiring Connections
Before making any electrical connections, ensure the power supply is disconnected.
The K-Rain 2514 controller is pre-wired for 110V input and includes connections for a single irrigation valve and a rain sensor.
- Power Connection: Connect the 110V power supply wires to the designated terminals inside the controller. Ensure proper polarity (Line, Neutral, Ground) as indicated.
- Valve Connection: Connect the wires from your 24V AC irrigation solenoid valve to the "VALVE" and "COMMON" terminals. The controller supports one valve.
- Rain Sensor Connection: The controller is pre-wired for easy connection of a rain sensor. Connect the rain sensor wires to the designated "RAIN SENSOR" terminals. Refer to your rain sensor's manual for specific wiring instructions.
After all connections are made, ensure the wiring compartment is securely closed to maintain the rain-tight integrity of the enclosure.
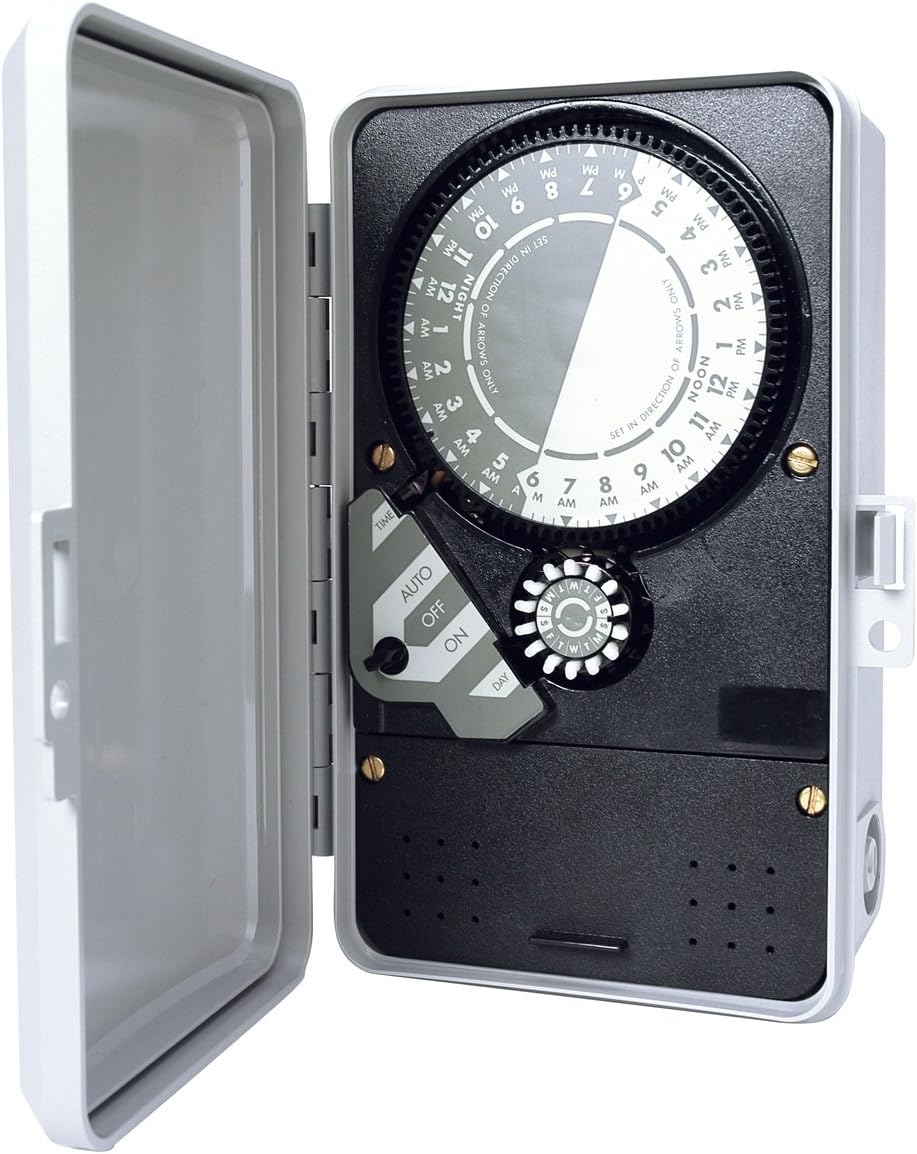
Figure 1: K-Rain 2514 Controller with cover open, showing the internal dial timer, AUTO/OFF/ON switch, and day selector. The wiring terminals are located in the lower section, covered by a panel.
5. Operating Instructions
The K-Rain 2514 uses a mechanical dial timer for programming.
5.1 Setting Current Time
Rotate the large central dial clockwise until the current time aligns with the "TIME" indicator arrow. The dial is marked with AM/PM hours. Ensure the correct AM/PM is set (e.g., 3 PM is different from 3 AM).
5.2 Programming Watering Cycles
The dial has small pins around its circumference. Each pin represents a time interval. To set a watering start time, push the pins outwards for the desired duration. For example, if you want watering to start at 6 AM and last for 30 minutes, push out the pins corresponding to 6:00 AM to 6:30 AM.
- Multiple Start Times: You can set multiple watering cycles throughout the day by pushing out pins at different times.
- Minimum Watering Duration: The smallest increment for watering is typically 15 minutes, corresponding to one pin.
5.3 Setting Watering Days ("Skip-A-Day" 14 Day Program)
The controller features a "Skip-A-Day" 14-day program. This is typically controlled by a separate dial or switch (often labeled "DAY" or with day indicators) that allows you to select specific days or intervals for watering. Consult the specific markings on your controller's day selector for detailed configuration. For example, you might select to water every other day, or on specific days of the week within a 14-day cycle.
5.4 AUTO/OFF/ON Switch
The controller features a three-position switch:
- AUTO: The controller operates according to the programmed schedule. This is the standard operating mode.
- OFF: All automatic watering is suspended. The valve will remain closed.
- ON: The valve will open immediately and remain open until the switch is moved to AUTO or OFF. This is for manual testing or immediate watering.
5.5 Rain Sensor Functionality
When a compatible rain sensor is connected and detects sufficient rainfall, it will override the programmed schedule and prevent watering. This conserves water. The controller allows for manual override of the rain sensor from the controller face, typically via a dedicated switch or setting.
6. Maintenance
- Cleaning: Periodically wipe the exterior of the controller with a damp cloth. Do not use abrasive cleaners or solvents.
- Inspection: Annually inspect wiring connections for corrosion or damage. Ensure the enclosure remains sealed.
- Rain Sensor Check: Regularly check your rain sensor for debris accumulation that might impede its function.
7. Troubleshooting
| Problem | Possible Cause | Solution |
|---|---|---|
| Controller not powering on. | No power supply; faulty wiring; tripped breaker. | Check 110V power source. Verify wiring connections. Reset circuit breaker. |
| Valve not watering. | Controller in OFF mode; incorrect programming; faulty valve; rain sensor active. | Set switch to AUTO. Verify program settings. Test valve manually. Check rain sensor status. |
| Valve continuously watering. | Controller in ON mode; faulty valve; stuck program pin. | Set switch to AUTO or OFF. Inspect valve. Check program pins on dial. |
| Watering at wrong times. | Incorrect current time setting; incorrect program pin placement. | Reset current time. Re-verify program pin settings. |
If troubleshooting steps do not resolve the issue, contact K-Rain customer support.
8. Specifications
- Model: 2514
- Input Power: 110V AC
- Output Power: 24V AC (for solenoid valve)
- Number of Stations: 1
- Programming: Mechanical dial timer with push pins
- Watering Duration: Adjustable via pins (typically 15-minute increments)
- Watering Cycles: Multiple start times per day
- Day Selection: "Skip-A-Day" 14-day program
- Rain Sensor: Pre-wired for rain sensor connection
- Enclosure: Rain-tight
- Dimensions: Approximately 7.9 x 2.9 x 8.8 inches (20.1 x 7.4 x 22.4 cm)
- Weight: Approximately 2.5 pounds (1.13 kg)
- Certifications: UL approved
9. Warranty and Support
For warranty information, technical support, or service inquiries, please contact K-Rain customer service directly. Details can typically be found on the K-Rain official website or product packaging.
K-Rain Contact Information: Refer to www.krain.com for the most current support details.


