
1. Introduction
This manual provides detailed instructions for the installation, operation, and maintenance of your JOOAN 16CH CCTV Security 1080P DVR. Please read this manual thoroughly before using the product to ensure proper setup and optimal performance. Keep this manual for future reference.
2. Product Overview
2.1 Key Features
- High-performance 1080P 16-channel DVR for clear image capture.
- Real-time preview and playback capabilities.
- Supports local monitoring and remote viewing via smartphone or PC.
- 6-in-1 Hybrid DVR: Compatible with IP, XVI, AHD, CVI, CVBS, and TVI analog cameras (up to 2MP/1080P resolution).
- H.265+ video compression for efficient storage, saving up to 50% storage space compared to H.264.
- AI & Smart Playback features including motion detection, human detection, and face detection for quick video retrieval.
- Supports 3.5" SATA hard drives from 350GB to 6TB (hard drive not included).
- Motion detection recording with text alerts to your smartphone.
2.2 Package Contents
Upon opening the package, please verify that all items are present and in good condition:
- JOOAN 16CH CCTV Security DVR Unit
- Power Adapter (12V 1A)
- USB Mouse
- User Manual (this document)

Figure 2.2: DVR dimensions and included accessories.
2.3 DVR Unit Layout

Figure 2.3: Front and Rear Panels of the DVR. The front panel includes power, record, alarm indicators, and menu navigation buttons. The rear panel features 16 video input ports (V1-V16), V-OUT, HD-OUT (HDMI), A-OUT (Audio Out), A-IN (Audio In), Ethernet port, USB ports, VGA port, and DC12V power input.
3. Setup
3.1 Hard Drive Installation (No HDD Included)
The DVR supports a 3.5-inch SATA hard drive (350GB to 6TB). Follow these steps to install a hard drive:
- Loosen the screws fixing the box cover.
- Push forward the cover to the end and remove it.
- Connect the hard drive to the DVR system using the provided SATA data and power cables.
- Put screws on to fix the hard drive inside the box.
- Put the cover back to position and install the screws.

Figure 3.1: Hard Drive Installation Steps.
3.2 Initial Connections
Before powering on, connect all necessary peripherals:
- Connect your cameras to the DVR's video input ports (V1-V16).
- Connect a monitor to the VGA or HDMI output port.
- Connect the USB mouse to a USB port.
- For remote viewing, connect the DVR to your router via an Ethernet cable.
- Connect the power adapter to the DC12V input and then to a power outlet.

Figure 3.2: DVR Connection Diagram.
3.3 Mobile App Setup for Remote Viewing
To view your cameras remotely on your smartphone or tablet, download the official JOOAN app:
- Scan the QR code displayed on your DVR's monitor or visit http://dl.danale.com/getvideoapp to download the app for iOS or Android.
- Install the app on your device.
- Register an account within the app.
- Add your DVR device by scanning the QR code provided in the app or by manually entering the device ID.
- Once added, you can enjoy live viewing from anywhere.

Figure 3.3: App Download and Remote View Setup.
4. Operating Instructions
4.1 Live View and Playback
After successful setup, the DVR will display live feeds from connected cameras. You can switch between single and multi-camera views. To review recorded footage, access the playback menu.
4.2 Channel Type Configuration
The DVR supports various camera types. If your camera image is abnormal, you may need to adjust the signal type. Navigate to the 'Main Menu' > 'PreviewSignal' to select the correct signal type (e.g., AHD, TVI, CVI, CVBS, IP). For hybrid camera setups (analog + IP), go to 'Main Menu' > 'ChannelType' to configure the channel allocation.

Figure 4.2: Adjusting Preview Signal and Channel Type.
4.3 Smart Playback and AI Features
The DVR includes advanced AI features for efficient monitoring and playback:
- Motion Detection: Configure specific areas for motion detection. When motion is detected, the system can trigger recording, send app push notifications, email alerts, or activate a buzzer.
- Human Detection: Focuses on detecting human figures to reduce false alarms.
- Face Detection: Identifies faces in the video feed, allowing for quick searching of recordings based on facial recognition.
- Smart Playback: Easily find and play back relevant video segments based on detected events (motion, human, face).

Figure 4.3.1: Customized Motion Detection and Timely Alerts.
Figure 4.3.2: Face Detection & Smart Playback Interface.
4.4 Video Playback Speed Control
During playback, you can control the speed of the video. The DVR supports 2X, 4X, and 8X fast forward and rewind speeds for easier viewing and review of footage.
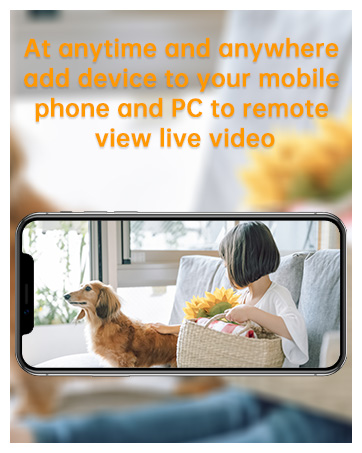
Figure 4.4: 8x Fast Forward Control.
4.5 Multi-Device Remote Access
The JOOAN DVR allows simultaneous remote access from multiple devices, including desktop PCs, laptops, tablets, and smartphones. This enables various users to monitor the surveillance system concurrently.

Figure 4.5: Multi-Devices Remote Access.
5. Maintenance
To ensure the longevity and optimal performance of your DVR system, follow these maintenance guidelines:
- Keep Clean: Regularly clean the exterior of the DVR with a soft, dry cloth. Avoid using liquid cleaners or aerosols.
- Ventilation: Ensure the DVR is placed in a well-ventilated area. Do not block ventilation openings. Proper airflow prevents overheating.
- Power Supply: Use only the original power adapter provided with the DVR. Unstable power can damage the unit.
- Firmware Updates: Check the JOOAN official website periodically for firmware updates. Keeping the firmware updated can improve performance and add new features.
- Data Backup: Regularly back up important video footage to an external storage device or cloud service to prevent data loss.
6. Troubleshooting
This section addresses common issues you might encounter with your JOOAN DVR. If you experience problems not covered here, please contact customer support.
| Problem | Possible Cause | Solution |
|---|---|---|
| No image or abnormal image from camera | Incorrect signal type selected for the camera channel. | Go to 'Main Menu' > 'PreviewSignal' and select the correct signal type (AHD, TVI, CVI, CVBS, IP) for the camera. Ensure camera is properly connected and powered. |
| DVR reboots frequently or goes offline | Unstable power supply, overheating, or software issue. | Ensure stable power. Check ventilation. Update firmware if available. If problem persists, contact support. |
| Cannot access DVR remotely via app | Network configuration issues, incorrect app settings, or DVR not connected to internet. | Verify DVR is connected to the internet. Check network settings (IP address, port forwarding if applicable). Ensure correct device ID in the app. Restart DVR and router. |
| No recording or hard drive not detected | Hard drive not installed correctly, faulty HDD, or not formatted. | Ensure hard drive is securely connected (SATA data and power). Check if the hard drive is detected and formatted within the DVR's menu. Replace HDD if faulty. |
| Poor video quality or lag | Camera resolution mismatch, network bandwidth issues, or cable quality. | Ensure cameras are compatible with 1080P resolution. Check network speed for remote viewing. Use high-quality coaxial or Ethernet cables. |
7. Specifications
| Feature | Specification |
|---|---|
| Model Number | TC-703NVR-4E-2T |
| Video Inputs | 16 Channels |
| Supported Camera Types | IP, XVI, AHD, CVI, CVBS, TVI (6-in-1 Hybrid) |
| Max Resolution | 1080P (2MP) |
| Video Compression | H.265+ |
| Hard Drive Support | 1 x 3.5" SATA HDD (350GB-6TB, not included) |
| Connectivity | VGA, USB, HDMI, Ethernet |
| Special Features | AI & Smart Playback (Motion, Human, Face Detection), Frame Rate Control |
| Product Dimensions | 25.5L x 21.2W x 4H Centimetres |
| Item Weight | 1.15 kg |
| Color | Black |
| Manufacturer | JOOAN |
| First Available Date | July 15, 2015 |
8. Support and Warranty
For technical assistance or customer service, please use the following contact information:
- Technical Support Email: technicalreply@qacctv.com
- Skype: market@qacctv.com
- Service Online Hours: 5 PM ~ 2 AM (PST)
Please note that specific warranty details are not provided in the product information. For warranty inquiries, please contact JOOAN customer support directly using the provided contact methods.

