
1. Product Overview
These replacement door hinges are designed for use with various refrigerator and freezer models. They ensure proper door function and sealing, which is crucial for appliance efficiency and food preservation. This set includes hinges for both the upper and lower sections of the appliance door.
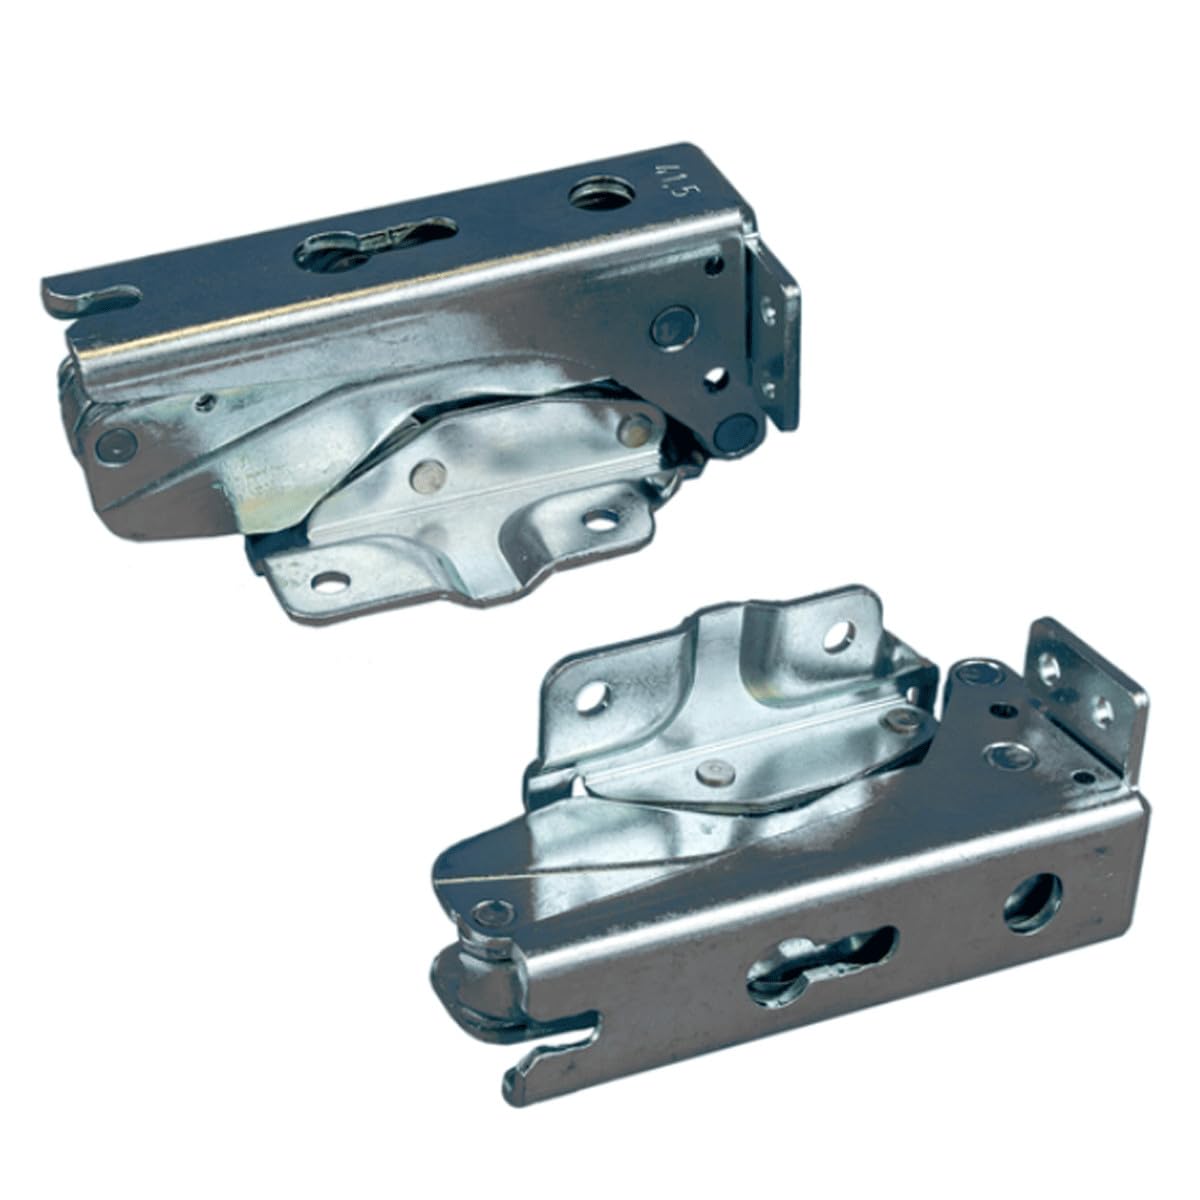
Image 1: An example of the AEG 4055504197 door hinges. This image shows the general appearance of the hinge components.
2. Compatible Models
These hinges are compatible with a range of refrigerator and freezer models from AEG, Electrolux, Faure, Zanussi, Liebherr, Progress, and Brandt. Please verify your appliance's model number against the list below to ensure compatibility:
- agn71800 F0
- agn81800 F0
- eug2243aow
- sk91800–5I, sk91800–4i, sk91800–5I, 6i
- skd71800 F0, skd81800 F0
- skz71800 F0, skz81800 F0, skz81840 F0, skz71840 F0, skz81840 F0
- aik2652r, aik2651r
- ag91850–4i
- sw91822–4i
- sz91802–4i, sz91842–4i
3. Package Contents
The package typically includes the following components:
- 1 x Upper left / Lower right hinge
- 1 x Upper right / Lower left hinge
4. Installation Instructions (Setup)
Safety First: Before beginning any installation or repair, always disconnect your appliance from the main power supply to prevent electrical shock. It is recommended to have a second person assist with holding the door during hinge replacement.
- Prepare the Appliance: Empty the refrigerator or freezer compartment to reduce weight and allow easier access. Secure the door with tape if necessary to prevent it from swinging open unexpectedly.
- Remove Old Hinges: Carefully locate the screws securing the existing hinges to both the appliance frame and the door. Use an appropriate screwdriver to remove these screws. Support the door as the hinges are removed to prevent it from falling.
- Detach the Door: Once both upper and lower hinges are unscrewed, gently lift the door off the appliance. Place it on a protected, flat surface.
- Install New Hinges: Attach the new hinges to the door using the original screws or new screws if provided. Ensure the hinges are oriented correctly (upper left/lower right and upper right/lower left).
- Reattach the Door: With assistance, carefully align the door with the hinge pins on the appliance frame. Once aligned, secure the hinges to the appliance frame with screws. Do not overtighten.
- Test Door Operation: Open and close the door several times to ensure it swings freely and closes securely. Check for proper alignment and seal. Adjust hinge screws slightly if needed to achieve optimal alignment.
- Reconnect Power: Once satisfied with the installation, reconnect the appliance to the main power supply.
5. Maintenance
Regular maintenance of your door hinges can extend their lifespan and ensure smooth operation:
- Cleaning: Periodically wipe down the hinges with a damp cloth to remove dust and grime. Avoid abrasive cleaners.
- Lubrication: If the door begins to squeak or feel stiff, apply a small amount of food-grade silicone lubricant to the hinge pins. Do not use oil-based lubricants as they can attract dirt.
- Tighten Screws: Over time, hinge screws may loosen. Periodically check and gently tighten any loose screws to maintain door stability.
6. Troubleshooting
If you encounter issues after hinge replacement, consider the following:
- Door Not Closing Properly: Check if the hinges are correctly aligned. Loosen the screws slightly, adjust the door position, and retighten. Ensure no obstructions are preventing the door from closing fully.
- Door Squeaks: Apply a small amount of food-grade silicone lubricant to the hinge pins.
- Door Feels Loose: Inspect all hinge screws and tighten any that are loose. Ensure the hinges themselves are not damaged.
- Gap in Door Seal: This could indicate misaligned hinges. Adjust the hinges to ensure the door gasket makes full contact with the appliance frame.
7. Specifications
| Attribute | Detail |
|---|---|
| Brand | AEG |
| Model Number | 4055504197 |
| Installation Type | Integrated |
| Batteries Included | No |
| Batteries Required | No |
| Configuration | Bottom Freezer (for compatible models) |
| Number of Doors | 1 (for compatible models) |
| Cooling Method | Compressor (for compatible models) |
| Date First Available | April 26, 2022 |
8. Warranty and Support
Information regarding specific warranty terms for this replacement part is not available in the product details. Please refer to the original appliance manufacturer's documentation or contact AEG customer support for warranty inquiries related to replacement parts.
For further assistance or technical support, please contact AEG customer service or visit their official website. When contacting support, have your appliance model number and the hinge model number (4055504197) ready.

