
1. Introduction
Thank you for choosing the TFA 35.1133.01 Sun Funk Weather Station. This device provides accurate indoor and outdoor temperature readings, along with a weather forecast based on atmospheric pressure changes. This manual will guide you through the setup, operation, and maintenance of your weather station to ensure optimal performance and longevity.
2. Safety Information
- Read this instruction manual carefully before using the device.
- Keep this manual for future reference.
- Do not expose the device to extreme temperatures, vibrations, or shocks.
- Avoid direct sunlight and moisture.
- Do not immerse the device in water.
- Use only specified batteries. Ensure correct polarity.
- Remove depleted batteries promptly to prevent leakage.
- Do not attempt to repair the device yourself. Contact qualified personnel for service.
- Keep the device and batteries out of reach of children.
3. Package Contents
Please check that all components are present and undamaged:
- TFA 35.1133.01 Main Weather Station Unit
- Wireless Outdoor Sensor
- Instruction Manual
- Note: Batteries (4 x AAA) are typically required and may not be included.
4. Product Overview
The TFA 35.1133.01 Sun Funk Weather Station consists of a main display unit and a wireless outdoor sensor. The main unit displays indoor temperature, outdoor temperature, and a weather forecast. The outdoor sensor transmits temperature data wirelessly to the main unit.
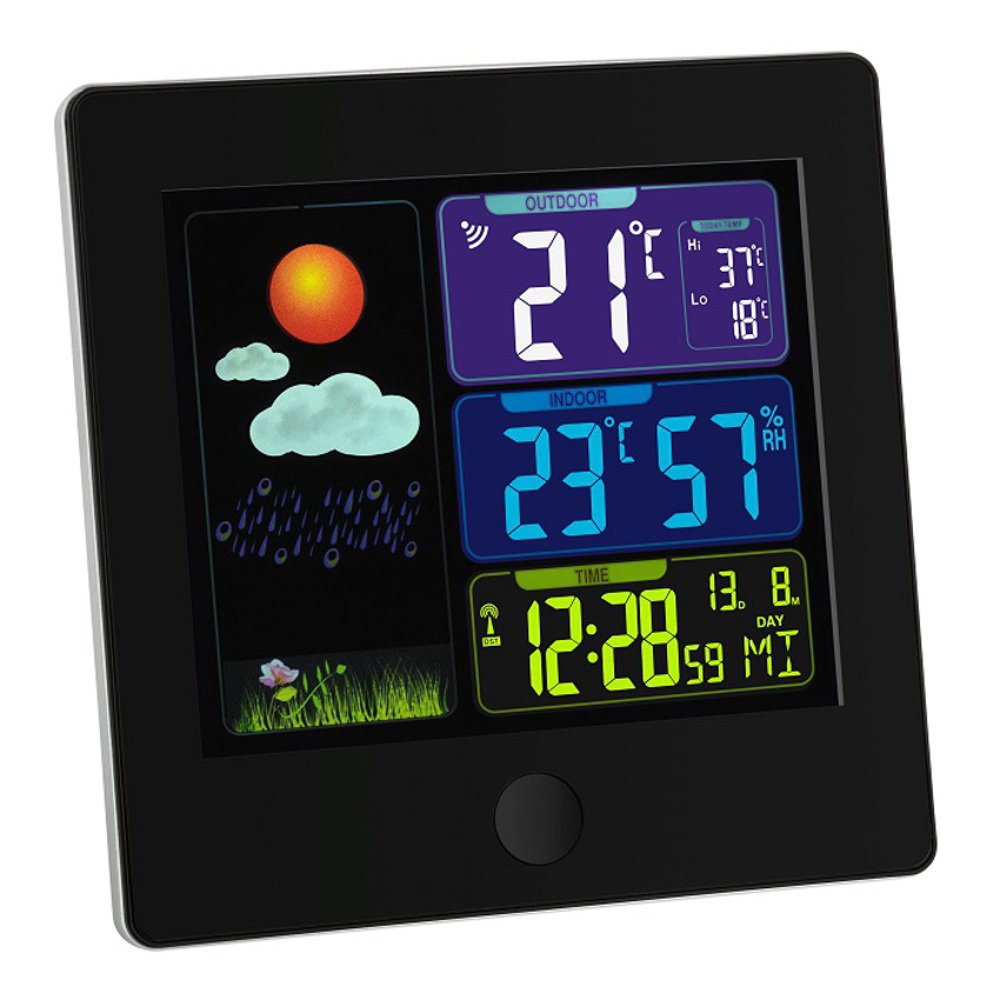
Image 1: TFA 35.1133.01 Sun Funk Weather Station. This image shows the main display unit and the compact wireless outdoor sensor. The main unit features a clear digital display, while the outdoor sensor is designed for external placement.
Main Unit Features:
- Large LCD display for easy reading.
- Indoor temperature display.
- Outdoor temperature display (from wireless sensor).
- Weather forecast icons (sunny, partly cloudy, cloudy, rainy).
- Radio-controlled clock (DCF77 signal for automatic time synchronization).
- Battery compartment.
Outdoor Sensor Features:
- Temperature sensor.
- Wireless transmission to the main unit.
- Battery compartment.
- Wall mounting option.
5. Setup
5.1 Battery Installation
- Outdoor Sensor: Open the battery compartment cover on the back of the outdoor sensor. Insert 2 x AAA batteries, observing the correct polarity (+/-). Close the cover securely.
- Main Unit: Open the battery compartment cover on the back of the main unit. Insert 2 x AAA batteries, observing the correct polarity (+/-). Close the cover securely.
- Important: Always insert batteries into the outdoor sensor first, then into the main unit. This ensures proper synchronization.
5.2 Sensor Placement
- Place the outdoor sensor in a shaded, dry location, protected from direct sunlight and rain, to ensure accurate temperature readings.
- Ensure the sensor is within the wireless range of the main unit (typically up to 30 meters in open air). Walls and other obstacles can reduce this range.
- Avoid placing the sensor near heat sources (e.g., vents, windows) or cold sources (e.g., refrigerators).
5.3 Initial Synchronization and Time Setting
- After inserting batteries, the main unit will automatically search for the outdoor sensor signal. This may take a few minutes. The outdoor temperature will appear on the display once connected.
- The main unit will also attempt to receive the DCF77 radio time signal. This signal automatically sets the correct time and date. Place the main unit near a window for better reception. This process can take several minutes or even hours, depending on your location and signal strength.
- If the DCF77 signal is not received, you may need to manually set the time and date. Refer to the specific button functions on your device (e.g., MODE, SET buttons) for manual adjustment.
6. Operating Instructions
6.1 Display Information
The main unit's display typically shows the following information:
- Time and Date: Automatically set by the DCF77 radio signal.
- Indoor Temperature: Current temperature measured by the main unit.
- Outdoor Temperature: Current temperature transmitted from the wireless sensor.
- Weather Forecast: Represented by icons (e.g., sun, clouds, rain) indicating predicted weather changes based on atmospheric pressure trends.
- Signal Strength Indicator: For both the outdoor sensor and the DCF77 time signal.
6.2 Button Functions (Example)
While specific button labels may vary, common functions include:
- MODE/SET: Used to switch between display modes (e.g., time, alarm) or to enter setting mode.
- +/ADJ: Used to increase values during setting or to manually adjust time/date.
- -/MEM: Used to decrease values during setting or to view minimum/maximum temperature records.
- CHANNEL: If multiple outdoor sensors are supported, this button cycles through channels.
Refer to the specific button layout on your device for precise functions.
7. Maintenance
7.1 Battery Replacement
- When the battery indicator appears on the display, replace the batteries in the respective unit (main unit or outdoor sensor).
- Always replace all batteries in a unit at the same time with new ones of the same type.
- Dispose of depleted batteries according to local regulations.
7.2 Cleaning
- Clean the device with a soft, damp cloth. Do not use abrasive cleaners or solvents.
- Ensure no moisture enters the device's interior.
7.3 Storage
- If the device will not be used for an extended period, remove all batteries to prevent leakage.
- Store the device in a cool, dry place.
8. Troubleshooting
| Problem | Possible Cause | Solution |
|---|---|---|
| No display on main unit. | Depleted or incorrectly inserted batteries. | Replace batteries, ensuring correct polarity. |
| Outdoor temperature not displayed or flashing. | Outdoor sensor out of range, depleted batteries, or interference. |
|
| Incorrect outdoor temperature reading. | Sensor exposed to direct sunlight or heat source. | Relocate the outdoor sensor to a shaded, well-ventilated area. |
| Time not automatically set (DCF77 signal). | Poor signal reception due to location or interference. |
|
9. Specifications
| Feature | Detail |
|---|---|
| Model Number | 35.1133.01 |
| Brand | TFA-Dostmann |
| Product Dimensions | Main Unit: 2.5 x 12 x 12 cm; 168 g |
| Power (Main Unit) | 2 x AAA batteries (not included) |
| Power (Outdoor Sensor) | 2 x AAA batteries (not included) |
| Material | Plastic |
| Special Feature | Lightweight, Radio-controlled time (DCF77) |
| Recommended Use | Indoor/Outdoor temperature monitoring |
| Wireless Range | Up to 30 meters (open air, may vary with obstacles) |
10. Warranty and Support
10.1 Warranty Information
This product is typically covered by a 1-year commercial warranty from the date of purchase. This warranty covers manufacturing defects and material faults. It does not cover damage caused by improper use, accidents, unauthorized repairs, or normal wear and tear. Please retain your proof of purchase for warranty claims.
10.2 Customer Support
For technical assistance, warranty claims, or further information, please contact your retailer or the manufacturer's customer service department. Contact details can usually be found on the product packaging or the manufacturer's official website.
Manufacturer: TFA-Dostmann


