
1. Introduction
The Ivation Electronic Drawer Safe provides a secure storage solution for your valuables. Constructed from solid steel, it features a full-digit keypad for electronic access and includes override keys for manual entry. Its compact design allows for placement in drawers or other discreet locations, and it can be anchored to a wall or floor for enhanced security. This manual will guide you through the setup, operation, and maintenance of your safe.
2. What's in the Box
Please check the contents of your package to ensure all items are present.
- 1 x Ivation Electronic Drawer Safe
- 2 x Override Keys
- 4 x AA Batteries
- 4 x Screws
- 4 x Anchors
- 4 x Washers
- 1 x Owner's Manual (this document)

Figure 2.1: Package Contents and Parts Diagram
3. Parts & Controls
Familiarize yourself with the main components of your safe, as illustrated in Figure 2.1 and the image below.
- Knob
- Keyhole Cover
- Keypad
- Yellow LED (Indicates programming mode)
- Red LED (Indicates error or low battery)
- Green LED (Indicates successful entry)
- Reset Button (inside door near the hinge)
- Battery Compartment (on back of door)
- Mounting Holes (on bottom and back)

Figure 3.1: Keypad and Lock Mechanism
4. Setup
4.1. Battery Installation
The safe requires 4 AA batteries for operation.
- Open the safe using one of the provided override keys. To do this, gently pry off the Ivation nameplate covering the keyhole.
- Insert an override key into the keyhole and turn it clockwise while simultaneously turning the knob clockwise to open the safe door.
- Locate the battery compartment on the back of the safe door.
- Remove the battery compartment cover.
- Insert 4 AA batteries, ensuring correct polarity (+/-).
- Replace the battery compartment cover.
- Close the safe door and turn the knob counter-clockwise to lock it.

Figure 4.1: Battery Compartment

Figure 4.2: Required AA Batteries
4.2. Setting Your Passcode
You can program a personal passcode of 4 to 8 digits.
- With the safe door open, locate the red reset button inside the safe, near the hinge.
- Press the red reset button. The yellow LED on the keypad will illuminate.
- Enter your desired 4 to 8 digit passcode on the keypad.
- Press the '#' button to confirm your new passcode. The yellow LED will turn off, and the green LED will flash once, indicating successful programming.
- Test your new passcode with the safe door open before closing it. If successful, the green LED will light up, and you can turn the knob to open/close.
Important: If the red LED flashes and beeps, the passcode was not set correctly. Repeat the steps.
5. Operation
5.1. Opening the Safe with Passcode
- Enter your 4 to 8 digit passcode on the keypad.
- Press the '*' button.
- If the passcode is correct, the green LED will light up. Within 5 seconds, turn the knob clockwise to open the safe door.
Note: If an incorrect passcode is entered three times, the system will lock for 20 seconds. If incorrect entries continue, the lockout time will increase.
5.2. Opening the Safe with Override Key
The override keys provide manual access in case of forgotten passcode or dead batteries.
- Gently pry off the Ivation nameplate covering the keyhole on the keypad panel.
- Insert an override key into the keyhole and turn it clockwise.
- While holding the key turned, simultaneously turn the knob clockwise to open the safe door.
- Once open, you can replace batteries or reset the passcode if needed.
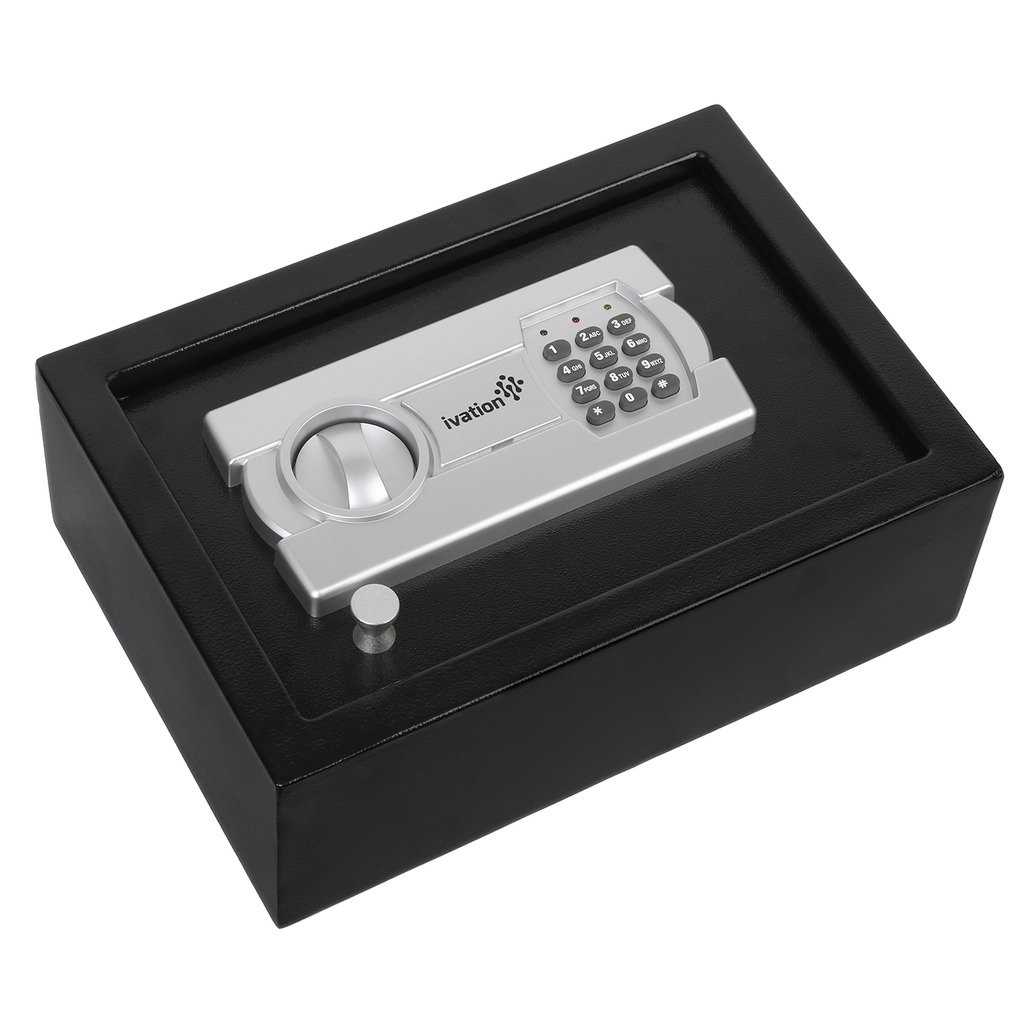
Figure 5.1: Opening with Override Key
5.3. Closing and Locking the Safe
To lock the safe, simply close the door and turn the knob counter-clockwise. The safe will automatically lock.

Figure 5.2: Closing and Locking the Safe
6. Installation
For enhanced security, the Ivation Electronic Drawer Safe can be anchored to a wall or floor.
- Choose a suitable location for your safe, such as inside a drawer, cabinet, or directly on a floor.
- Open the safe door and remove the protective mat from the bottom to expose the pre-drilled mounting holes.
- Position the safe in the desired location and mark the drilling points through the mounting holes onto the surface (wall or floor).
- Drill pilot holes into the marked spots. For wood surfaces, use appropriate wood screws. For concrete or drywall, insert the provided anchors into the pilot holes before securing with screws.
- Align the safe with the drilled holes and secure it using the provided screws and washers.
- Replace the protective mat inside the safe.

Figure 6.1: Mounting Holes for Secure Installation
Warning: Ensure the mounting surface is strong enough to support the safe and its contents.
7. Maintenance
- Battery Replacement: When the red LED flashes during operation, it indicates low battery power. Replace all four AA batteries promptly to ensure continued functionality. Always use new, high-quality alkaline batteries.
- Cleaning: Clean the exterior of the safe with a soft, damp cloth. Avoid using abrasive cleaners or solvents, as these can damage the finish.
- Key Storage: Store the override keys in a secure location away from the safe itself. Do not store them inside the safe.
8. Troubleshooting
| Problem | Possible Cause | Solution |
|---|---|---|
| Safe does not open with passcode. | Incorrect passcode entered. Batteries are low or dead. System is locked out due to multiple incorrect entries. | Ensure correct passcode is entered, followed by '*'. Replace batteries using the override key. Wait for the lockout period to expire (20 seconds initially) before trying again. |
| Red LED flashes during operation. | Low battery power. | Replace all 4 AA batteries immediately. |
| Cannot set new passcode. | Passcode not confirmed with '#'. Error during entry. | Ensure '#' is pressed after entering the new passcode. Repeat the passcode setting steps carefully. |
| Keyhole cover is difficult to remove. | Tight fit. | Gently pry it off using a small, flat tool (e.g., a small screwdriver). |
9. Specifications
| Feature | Detail |
|---|---|
| Brand | Ivation |
| Model Number | IVABSTNGNSFE |
| Lock Type | Electronic, Key |
| Material | Alloy Steel |
| Color | Metallic |
| Outer Dimensions | 12.5" x 9" x 4.5" (approximate) |
| Chamber Depth | 4 inches |
| Power Source | 4 x AA Batteries (Included) |
| Mounting Type | Floor Mount, Wall Mount |
| Water Resistance Level | Not Water Resistant |
10. Product Overview Video
Watch this official video for a visual guide on the features and basic operation of the Ivation Electronic Drawer Safe.
Video 10.1: Ivation Electronic Drawer Safe Features and Operation (Manufacturer Video)
11. Warranty & Support
For warranty information or technical support, please refer to the contact details provided with your purchase documentation or visit the official Ivation website.
