
1. Introduction
The Juki HZL-355Z Sewing Machine is an electric sewing machine designed for various sewing tasks, featuring 26-stitch patterns including an Automatic 1-step buttonhole. This machine is suitable for a wide range of materials such as denim, zipper, and fabrics for DIY projects like insoles, bags, and curtains. Its lightweight and compact design, along with a hard-shell carrying case, make it an ideal portable companion for all your sewing needs.
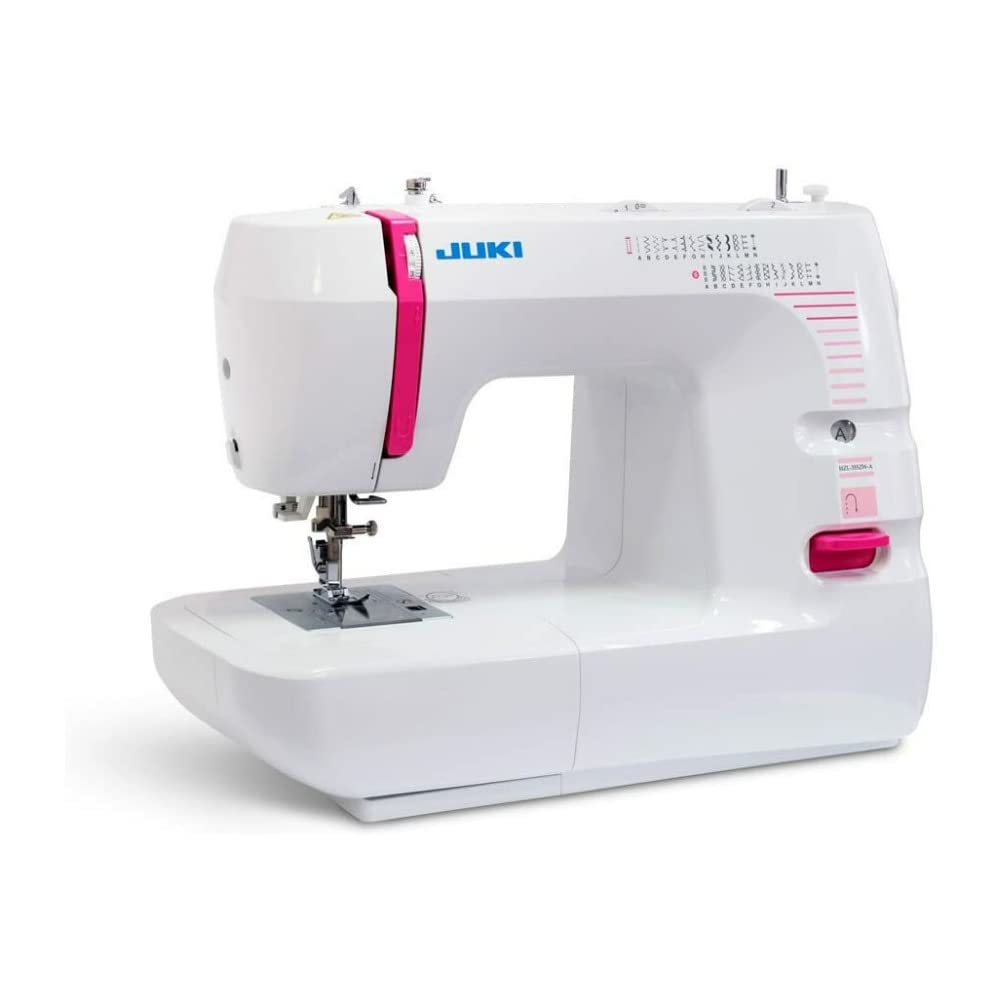
This image displays the Juki HZL-355Z Sewing Machine. It is a compact, white sewing machine with pink accents, featuring various stitch pattern indicators and controls on its front and side panels. The needle and presser foot assembly are visible, along with the free arm area.
2. Key Features
- Automatic Needle Threader: This feature simplifies the threading process, allowing for quick and effortless needle threading without eyestrain.
- Automatic One-Step Buttonholing: By placing a button on the buttonhole foot, the machine automatically sews buttonholes to the precise size of the button.
- Adjustable Presser Foot Pressure: The presser foot pressure can be adjusted to optimize sewing results for different types of materials.
- Free Arm Sewing: The auxiliary bed slides off to convert the machine into a free arm, facilitating sewing of collars, cuffs, and other cylindrical or awkward items. The auxiliary box also provides convenient storage for standard accessories.
- Easy-to-Use Design: This household sewing machine is designed for ease of use, making it suitable for beginners and sewing enthusiasts. It includes slip-free bottom pads for stability during operation.
3. Setup Guide
3.1 Unpacking and Placement
Carefully remove the sewing machine from its packaging. Place the machine on a stable, flat surface with adequate lighting. Ensure there is enough space around the machine for comfortable operation and fabric handling.
3.2 Power Connection
Connect the power cord to the machine's power input and then plug it into a standard electrical outlet. Ensure the power switch is in the 'OFF' position before connecting.
3.3 Threading the Machine
- Place a spool of thread on the spool pin.
- Follow the numbered threading path indicated on the machine, guiding the thread through all tension discs and guides.
- Raise the presser foot lever.
- Use the automatic needle threader to easily thread the needle. If threading manually, pass the thread through the eye of the needle from front to back.
3.4 Bobbin Winding and Insertion
- Place an empty bobbin onto the bobbin winder spindle.
- Guide the thread from the spool through the bobbin winding tension disc.
- Wrap the thread a few times around the bobbin.
- Push the bobbin winder spindle to the right.
- Start the machine to wind the bobbin. Stop when the bobbin is full.
- Insert the wound bobbin into the bobbin case according to the machine's instructions, ensuring the thread is correctly routed through the tension spring.
4. Operating Instructions
4.1 Selecting Stitch Patterns
Turn the stitch pattern selector dial to choose from the 26 available stitch patterns. Refer to the stitch chart on the machine for visual guidance.
4.2 Adjusting Stitch Length and Width
Use the stitch length and width adjustment dials to fine-tune your stitches. Longer stitches are suitable for basting or gathering, while shorter stitches provide stronger seams. Stitch width is adjustable for zigzag and decorative stitches.
4.3 Using the Automatic One-Step Buttonhole
- Attach the buttonhole foot to the machine.
- Place the button you intend to use into the buttonhole foot's holder.
- Select the buttonhole stitch pattern.
- Lower the buttonhole lever.
- Begin sewing; the machine will automatically create a buttonhole sized to your button.
4.4 Adjusting Presser Foot Pressure
Locate the presser foot pressure adjustment dial or lever. Increase pressure for thicker fabrics and decrease for delicate or stretchy materials to prevent puckering or stretching.
4.5 Free Arm Sewing
To utilize the free arm, slide off the auxiliary bed. This exposes the narrow arm, ideal for sewing cuffs, sleeves, pant hems, and other small, circular items.
5. Maintenance
5.1 Cleaning the Machine
Regularly clean lint and dust from the bobbin area, feed dogs, and needle plate using a small brush or vacuum cleaner. Always unplug the machine before cleaning.
5.2 Needle Replacement
Replace the needle frequently, especially after 8-10 hours of sewing or if it becomes bent or dull. Use the correct needle type and size for your fabric. Ensure the flat side of the needle faces the back of the machine when inserting.
5.3 Storage
When not in use, store the machine in its hard-shell carrying case to protect it from dust and damage. Store in a dry, cool place away from direct sunlight.
6. Troubleshooting
6.1 Skipped Stitches
- Check if the needle is bent or dull; replace if necessary.
- Ensure the needle is inserted correctly and fully.
- Verify that the machine is threaded correctly, both upper thread and bobbin thread.
- Use the appropriate needle type and size for your fabric.
6.2 Thread Breakage
- Re-thread the machine, ensuring the thread is seated correctly in all tension discs.
- Check for burrs or rough spots on the needle plate or bobbin case.
- Ensure the thread tension is not too high.
- Use good quality thread.
6.3 Uneven Stitching
- Adjust the upper thread tension.
- Check the bobbin tension.
- Ensure the presser foot pressure is appropriate for the fabric.
- Clean lint from the feed dogs.
6.4 Machine Not Starting
- Verify the power cord is securely plugged into both the machine and the electrical outlet.
- Check if the power switch is in the 'ON' position.
- Ensure the foot controller is properly connected.
7. Specifications
| Feature | Specification |
|---|---|
| Product Dimensions | 19.1 x 15.2 x 10.5 inches |
| Item Weight | 21 pounds |
| ASIN | B00V3XVGHY |
| Item Model Number | 1 |
| Is Discontinued By Manufacturer | No |
| Date First Available | March 23, 2015 |
| Brand | JUKI |
| Color | Pink |
| UPC | 708038730011 |
8. Warranty and Support
For specific warranty information and customer support, please refer to the documentation included with your purchase or visit the official JUKI website. Keep your proof of purchase for any warranty claims.


