
Introduction
This manual provides detailed instructions for the assembly, installation, operation, and maintenance of your Home Basics 3 Tier Tension Rod Shower Caddy. This shower caddy is designed to provide convenient storage for your bath and shower essentials, utilizing a tension rod system for secure placement in most shower stalls.
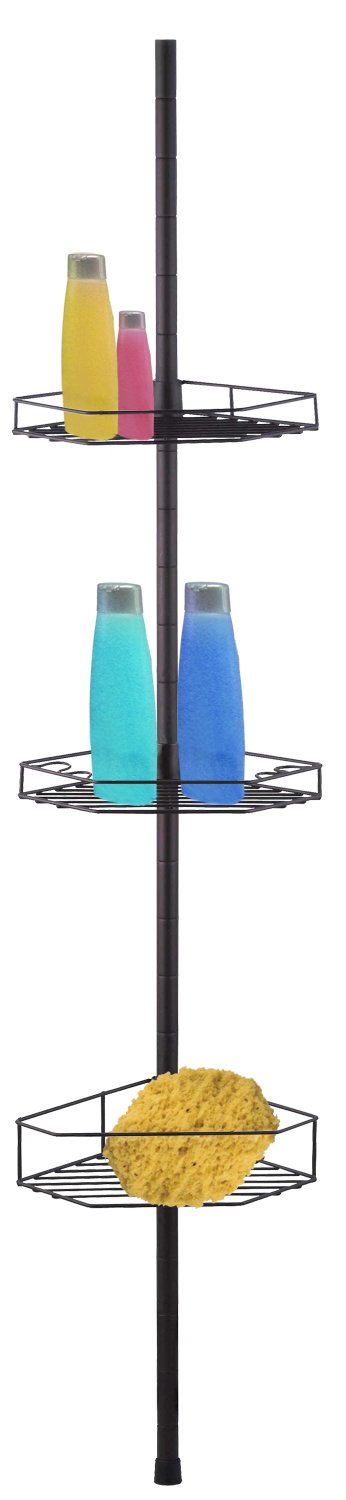
Image: The Home Basics 3 Tier Tension Rod Shower Caddy in bronze finish, showcasing its three triangular shelves and adjustable tension pole.
Safety Information
WARNING: Read all instructions before assembly and use. Failure to follow these instructions may result in product instability or injury.
- Ensure all components are securely fastened before placing items on the shelves.
- Do not overload the shelves. The maximum weight capacity for the entire caddy is 12.5 pounds (5.6 kg).
- Periodically check the tension rod for stability. If it loosens, re-adjust to prevent collapse.
- Keep small parts away from children during assembly.
- Install the caddy on a clean, dry, and sturdy surface.
Package Contents
Before beginning assembly, verify that all parts are present and undamaged. If any parts are missing or damaged, do not proceed with assembly and contact customer service.
- Adjustable Tension Rod (multiple sections)
- 3 x Triangular Storage Shelves
- Rubber End Caps (for top and bottom of tension rod)
- Rubber Rings/Stoppers (for shelf support)

Image: An illustration showing the various components of the shower caddy, including the tension pole sections, three shelves, and rubber stoppers.
Setup and Installation
Follow these steps to assemble and install your shower caddy securely.
Step 1: Assemble the Tension Rod
- Unpack all tension rod sections.
- Connect the tension rod sections by twisting them together clockwise until they are firmly joined. Ensure there are no gaps between sections.
- Attach the rubber end caps to the top and bottom of the assembled tension rod.
Step 2: Attach the Shelves
- Slide the rubber rings/stoppers onto the tension rod at your desired shelf heights. These rings will provide support for the shelves.
- Place each triangular shelf onto the rubber rings, ensuring it sits securely and level. Adjust the height of the rubber rings as needed to customize shelf spacing.
Step 3: Position and Secure the Caddy
- Choose a corner in your shower or bathtub area where you want to install the caddy. Ensure the ceiling and floor/tub surfaces are clean and dry.
- Place the assembled caddy in the chosen corner. Hold the bottom end cap firmly on the floor/tub surface.
- Extend the top section of the tension rod by twisting it until it firmly presses against the ceiling. Continue twisting to tighten the tension until the caddy is stable and secure. The rod should be under sufficient tension to hold itself firmly in place without slipping.
- Verify that the caddy is vertical and all shelves are level and stable.

Image: A diagram illustrating the adjustable height feature of the tension rod to fit various shower stalls, highlighting the three levels of storage and slim profile for maximizing space.
Operation
Once installed, your Home Basics 3 Tier Tension Rod Shower Caddy is ready for use.
- Place your shampoo, conditioner, soaps, loofahs, and other shower essentials on the shelves.
- Distribute weight evenly across the shelves to maintain stability and prevent tipping.
- Do not exceed the maximum weight capacity of 12.5 pounds (5.6 kg) for the entire unit.

Image: The Home Basics 3 Tier Tension Rod Shower Caddy installed in a modern shower, holding various bath products on its shelves.
Maintenance
Proper care and maintenance will extend the life and appearance of your shower caddy.
- To clean, wipe the caddy with a soft, damp cloth and mild soap. Avoid abrasive cleaners, scouring pads, or harsh chemicals, as these can damage the finish.
- Rinse thoroughly with clean water and dry immediately with a soft cloth to prevent water spots and maintain the bronze finish.
- Regularly check the tension rod for any signs of rust, especially in high-humidity environments. While the product is designed to be rust-resistant, proper care helps maintain this feature.
- Periodically re-tighten the tension rod if it feels loose to ensure continued stability.
Troubleshooting
If you encounter any issues with your shower caddy, refer to the following common problems and solutions.
Problem: The caddy is not stable or keeps slipping.
Solution:
- Ensure the tension rod is fully extended and tightened by twisting it until it is firmly secured between the ceiling and floor/tub.
- Verify that the rubber end caps are firmly pressed against the surfaces.
- Check that the ceiling and floor/tub surfaces are clean, dry, and free of soap residue or slippery substances before installation.
Problem: Shelves do not stay in place or slide down.
Solution:
- Verify that the rubber rings/stoppers are correctly positioned and securely holding the shelves. They should fit snugly around the pole and under the shelf.
- Ensure the shelves are not overloaded. Excessive weight can cause the shelves or their supports to slip. Redistribute items or reduce the load.
Problem: Rust appears on the caddy.
Solution:
- While designed to be rust-resistant, prolonged exposure to moisture and lack of ventilation can affect the finish. Ensure the caddy is regularly cleaned and dried after use.
- Consider applying a rust-inhibiting spray suitable for bathroom environments if the issue persists, following the product's instructions.
Specifications
| Feature | Detail |
|---|---|
| Brand | Home Basics |
| Model Number | SC01533 |
| Material | Bronze |
| Finish Type | Oil Rubbed |
| Mounting Type | Tension Mount |
| Product Dimensions (D x W x H) | 9"D x 7.5"W x 95.5"H (22.86 cm D x 19.05 cm W x 242.57 cm H) |
| Item Weight | 3.8 pounds (1.7 kg) |
| Number of Compartments | 3 |
| Maximum Weight Capacity | 12.5 pounds (5.6 kg) |
| Special Feature | Rust Resistant |
| UPC | 886466015334 |
Warranty and Support
For warranty information or product support, please contact Home Basics customer service directly. Refer to your purchase documentation or the manufacturer's official website for specific warranty terms and contact details.
Please retain this manual for future reference.