
1. Introduction
This manual provides essential information for the safe and effective use of the Greisinger GMH 3451 Conductivity Meter. This device is designed for precise measurement of conductivity, specific resistance, salinity, Total Dissolved Solids (TDS), and temperature. It features a robust design with an integrated 4-pole measuring cell and a data logger for comprehensive analysis.
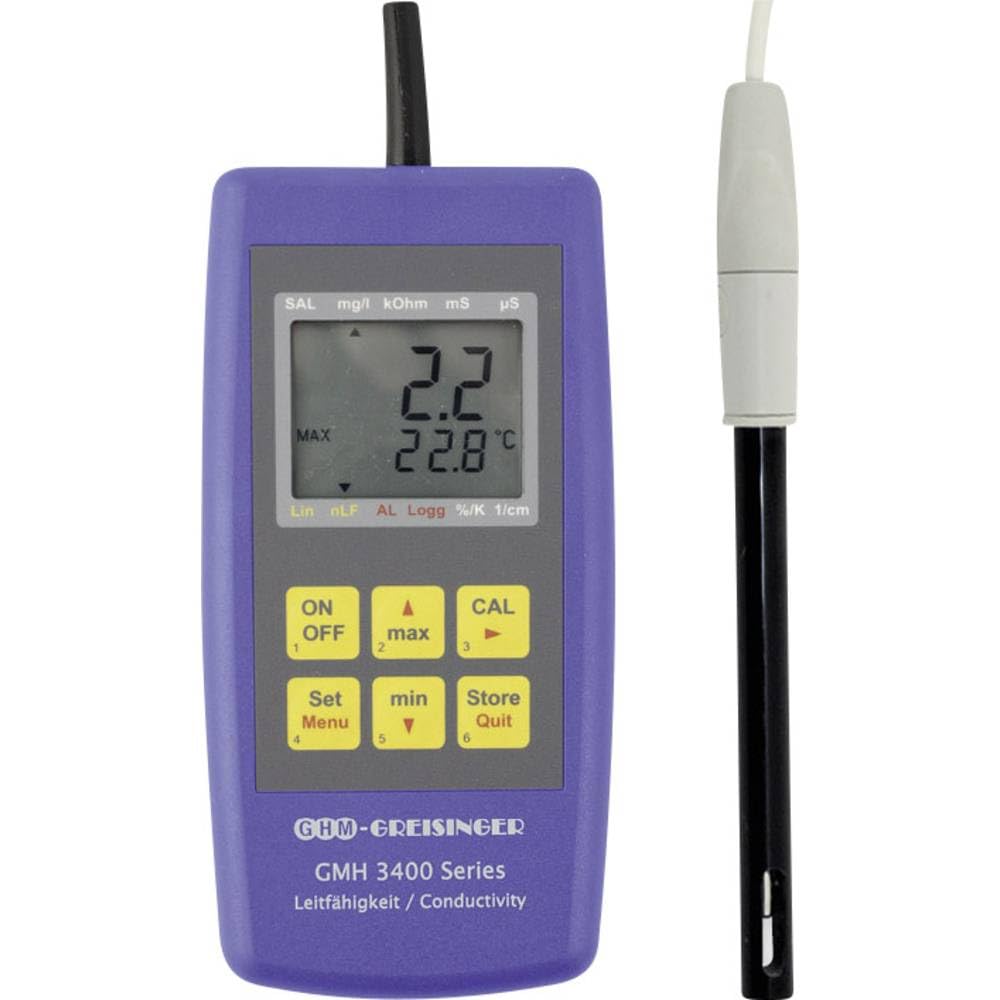
Figure 1: Front view of the Greisinger GMH 3451 Conductivity Meter.
2. Product Features
The Greisinger GMH 3451 offers a range of features for accurate and convenient measurements:
- Measurement Functions: Conductivity, specific resistance, salinity, TDS, and temperature.
- Integrated Measuring Cell: 4-pole measuring cell with graphite electrode and epoxy shaft, fixed to the device with approximately 1 meter of cable.
- Data Logger: Built-in data logging capabilities for recording measurement values.
- Automatic OFF Function: Conserves battery life.
- Hold Function: Freezes the current measurement display.
- MIN/MAX Memory: Stores minimum and maximum measured values.
- Alarm Function: Configurable minimum and maximum alarms.
- Real-time Clock: For accurate time-stamping of logged data.
- Cell Correction: Adjustable from 0.800 to 1200 cm-1, manually or automatically via selectable reference solutions.
- Temperature Compensation: Deactivatable, with non-linear, linear, or no compensation options.
- Interface: Serial interface for data transfer.
- Power Supply: Operates with batteries (replacement message available) and supports an external power adapter.
- Protection Type: IP65, offering protection against dust and low-pressure water jets.

Figure 2: Greisinger GMH 3451 Conductivity Meter showing the attached electrode.
3. Setup
- Unpacking: Carefully remove the device and all accessories from the packaging. Inspect for any visible damage.
- Power Supply: The device can be powered by batteries or an external power adapter. If using batteries, ensure they are correctly inserted. The device will display a message when battery replacement is needed.
- Electrode Connection: The 4-pole measuring cell is permanently connected to the device via a 1-meter cable. Ensure the cable is not damaged or kinked.
- Initial Power On: Press the power button to turn on the device. The display should illuminate.
- Basic Settings: Refer to the operating instructions for initial configuration, such as setting the real-time clock and preferred measurement units.
4. Operating Instructions
Follow these steps for accurate measurements:
- Power On: Press the ON/OFF button to switch on the device.
- Select Measurement Mode: Use the mode selection buttons (if available, not explicitly detailed in source but implied by multiple functions) to choose between conductivity, specific resistance, salinity, TDS, or temperature measurement.
- Calibration (Cell Correction):
- For accurate readings, perform cell correction regularly.
- The cell constant can be adjusted manually (0.800 - 1200 cm-1) or automatically using selectable reference solutions. Consult the device's on-screen menu for calibration procedures.
- Temperature Compensation: Ensure the appropriate temperature compensation setting is selected (non-linear, linear, or none) based on your application. This function can be deactivated if not required.
- Taking a Measurement: Immerse the electrode into the sample solution. Ensure the electrode is fully submerged and free of air bubbles. Wait for the reading to stabilize on the digital display.
- Hold Function: Press the HOLD button to freeze the current display value. Press again to release.
- MIN/MAX Values: Access the MIN/MAX memory function to view the lowest and highest recorded values during a measurement session.
- Data Logging: Utilize the data logger function to record measurements over time. Refer to the device's menu for setting logging intervals and retrieving data via the serial interface.
- Power Off: Press and hold the ON/OFF button to switch off the device. The automatic OFF function will also power down the device after a period of inactivity.
5. Maintenance
Proper maintenance ensures the longevity and accuracy of your Greisinger GMH 3451:
- Electrode Cleaning: After each use, rinse the graphite electrode and epoxy shaft with distilled or deionized water to prevent residue buildup. For stubborn deposits, use a soft brush or a mild cleaning solution recommended by the manufacturer.
- Battery Replacement: When the low battery indicator appears, replace the batteries promptly. Ensure the device is off before opening the battery compartment. Dispose of old batteries according to local regulations.
- Storage: Store the device in a clean, dry place at temperatures within the specified operating range (-5 to +80 °C). Protect the electrode from physical damage.
- Calibration: Regular calibration (cell correction) is crucial for maintaining measurement accuracy. Perform calibration according to your application's requirements and industry standards.
- Housing Cleaning: Clean the device housing with a damp cloth. Do not use abrasive cleaners or solvents.
6. Troubleshooting
This section addresses common issues you might encounter:
- Device Does Not Power On:
- Check if batteries are correctly inserted and charged. Replace if necessary.
- If using an external power adapter, ensure it is properly connected and functional.
- Inaccurate Readings:
- Perform a cell correction (calibration) using fresh reference solutions.
- Clean the electrode thoroughly.
- Ensure the electrode is fully submerged and free of air bubbles during measurement.
- Verify that the temperature compensation setting is appropriate for your sample.
- No Data Logging:
- Check the device's memory capacity. Delete old data if full.
- Ensure data logging is activated and configured correctly in the device settings.
- Display Issues:
- If the display is faint, replace the batteries.
- If the display shows error codes, consult the full manufacturer's manual for specific error interpretations.
For issues not covered here, please contact Greisinger customer support or refer to the comprehensive manufacturer's documentation.
7. Specifications
| Parameter | Value |
|---|---|
| Product Type | Combined Measurement Device |
| Measurement Functions | Conductivity, Specific Resistance, Salinity, TDS, Temperature |
| Conductivity Measurement Range | 0.0 µS - 400.0 mS |
| Specific Resistance Range | 0.005 - 100.0 kΩ/cm |
| Salinity Measurement Range | 0.0 - 70.0 g/kg |
| TDS Measurement Range | 0 - 1999 mg/l |
| Temperature Measurement Range | -5 °C to +100 °C |
| Operating Temperature | -5 °C to +80 °C |
| Automatic Temperature Compensation | Yes |
| Display Type | Digital |
| Electrode Material | Graphite (electrode), Epoxy (shaft) |
| Electrode Dimensions | Length approx. 120 mm, Ø approx. 12 mm |
| Cable Length (Electrode) | Approx. 1 meter (fixed connection) |
| Interface | Serial |
| Protection Type | IP65 |
| Dimensions (L x W x H) | 142 mm (H) x 71 mm (W) x 26 mm (D) |
| Weight | 230 g |
| Manufacturer Reference | 603924 |
8. Warranty and Support
Specific warranty details are not provided in the product data. For warranty claims, technical support, or service inquiries, please contact your retailer or the official Greisinger customer service directly. Keep your purchase receipt as proof of purchase.
Manufacturer: GREISINGER
ASIN: B00UTKDSH8
Date First Available on Amazon.com.be: May 7, 2022


