1. Introduction
Welcome to the user manual for your Walther PRO PL70R LED Flashlight. This document provides essential information for the safe and efficient operation, maintenance, and troubleshooting of your device. Please read it thoroughly before use to ensure optimal performance and longevity of your flashlight.
2. Safety Instructions
Observe the following safety precautions to prevent injury or damage to the flashlight:
- Do not shine directly into eyes: The high intensity LED light can cause temporary vision impairment or permanent eye damage.
- Keep out of reach of children: This product is not a toy.
- Battery Safety:
- Use only recommended battery types (ICR 18650 or AAA with adapter).
- Do not mix old and new batteries, or different types of batteries.
- Ensure correct polarity when inserting batteries.
- Do not dispose of batteries in fire; they may explode.
- If the flashlight will not be used for an extended period, remove the batteries to prevent leakage.
- Operating Temperature: Avoid exposing the flashlight to extreme temperatures.
- Water Resistance: The flashlight is waterproof, but avoid prolonged submersion beyond its rated depth (if specified, otherwise general waterproof).
3. Package Contents
Please verify that all items listed below are included in your package:
- Walther PRO PL70R LED Flashlight
- 1 x ICR 18650 Rechargeable Battery
- Battery Holder for 3 x AAA Batteries
- USB Charger
- USB Charging Cable
- USB Car Charging Adapter (12V/24V input)
- Belt Pouch
- Wrist Strap
- AC Power Adapter

Image 3.1: Included accessories for the Walther PRO PL70R flashlight, featuring the rechargeable battery, AAA battery holder, USB charger, charging cables, car adapter, belt pouch, wrist strap, and AC power adapter.
4. Setup
4.1 Battery Installation
The Walther PRO PL70R can be powered by either one ICR 18650 rechargeable battery or three AAA batteries using the provided adapter.
- For 18650 Battery: Unscrew the tail cap of the flashlight. Insert the 18650 battery with the positive (+) terminal facing towards the flashlight head. Screw the tail cap back on securely.
- For AAA Batteries: Place three AAA batteries into the provided battery holder, ensuring correct polarity for each battery. Insert the loaded battery holder into the flashlight with the positive (+) end facing towards the flashlight head. Screw the tail cap back on securely.

Image 4.1: Front view of the Walther PRO PL70R LED Flashlight, showing the lens and main body. This image represents the flashlight ready for battery installation.
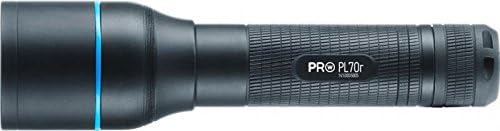
Image 4.2: Side view of the Walther PRO PL70R LED Flashlight, highlighting its compact and ergonomic design. The tail cap, where batteries are inserted, is visible at the end.
4.2 Charging the 18650 Battery
To charge the included ICR 18650 rechargeable battery:
- Remove the 18650 battery from the flashlight.
- Place the battery into the USB charger.
- Connect the USB charging cable to the charger and then to either the AC power adapter (for wall outlet charging) or the USB car charging adapter (for vehicle charging).
- The indicator light on the charger will show the charging status (e.g., red for charging, green for fully charged).
- Once fully charged, disconnect the charger and remove the battery.
5. Operating Instructions
5.1 Power On/Off
Press the power button located on the tail cap to turn the flashlight on or off.
5.2 Light Modes (Brightness Levels)
The Walther PRO PL70R features three brightness levels: 100%, 40%, and 10%.
- With the flashlight on, lightly press the power button (without clicking) to cycle through the brightness modes.
- A full click will turn the flashlight off.
5.3 Beam Adjustment System (BAS)
The Beam Adjustment System allows you to focus the light beam from a wide floodlight to a narrow spotlight.
- To adjust the beam, simply slide the head of the flashlight forward or backward.
- Sliding forward typically narrows the beam for long-distance illumination, while sliding backward widens it for broader area lighting.
5.4 Tactical Defence Strobe (TDS) Mode
The Tactical Defence Strobe mode provides a disorienting flashing light for tactical situations.
- To activate the strobe mode, rapidly double-press the power button from the OFF position.
- Press the power button again to turn off the strobe.
6. Maintenance
6.1 Cleaning
- Wipe the flashlight body with a soft, damp cloth.
- For the lens, use a lens cleaning cloth and solution to avoid scratches.
- Do not use abrasive cleaners or solvents.
6.2 Battery Care and Storage
- If the flashlight will not be used for an extended period, remove the batteries to prevent potential leakage and damage.
- Store batteries in a cool, dry place.
- Recharge the 18650 battery regularly, even if not in use, to maintain its lifespan.
7. Troubleshooting
| Problem | Possible Cause | Solution |
|---|---|---|
| Flashlight does not turn on. | Low or depleted battery. Incorrect battery installation. Loose tail cap. | Charge or replace battery. Ensure battery is inserted with correct polarity. Tighten tail cap securely. |
| Light output is dim. | Low battery charge. Lens is dirty. | Recharge or replace battery. Clean the lens. |
| Beam adjustment is stiff. | Dirt or debris in the sliding mechanism. | Clean the sliding parts of the flashlight head. Avoid forcing the mechanism. |
| Flashlight flickers. | Loose battery connection. Low battery. | Ensure battery is securely installed. Recharge or replace battery. |
8. Specifications
| Feature | Detail |
|---|---|
| Brand | Walther |
| Model | PL70R |
| Light Source | LED |
| Max Brightness | 910 Lumens (100% mode) |
| Brightness Modes | 910 lm (100%), 365 lm (40%), 90 lm (10%) |
| Runtime | 1h 50min (100%), 4h 30min (40%), 18h (10%) |
| Beam Range | 205 m (100%), 150 m (40%), 85 m (10%) |
| Length | 143 mm |
| Weight | 142 g |
| Material | Aluminum |
| Power Source | Battery powered (ICR 18650 or 3x AAA) |
| Battery Type | Lithium-ion (18650) |
| Voltage | 3.7 Volts |
| Waterproof Level | Waterproof |
| Special Features | Beam Adjustment System (BAS), Multiple Power Sources, Tactical Defence Strobe (TDS) Mode |
9. Warranty and Support
Walther products are manufactured to high-quality standards. For information regarding warranty coverage, please refer to the warranty card included with your product or visit the official Walther website.
For technical support, spare parts, or service inquiries, please contact your local authorized Walther dealer or the customer service department. Keep your purchase receipt as proof of purchase for any warranty claims.


