Introduction
Thank you for choosing the SAMI SM-S9939L Alarm Clock Radio. This device combines a digital clock, an alarm function, and an FM/AM radio into a compact unit, ideal for your bedside table. Please read this manual carefully before operating the device to ensure proper use and to maximize its lifespan. Keep this manual for future reference.
Safety Information
- Do not expose the unit to rain, moisture, or extreme temperatures.
- Avoid placing the unit near heat sources such as radiators, heat registers, stoves, or other apparatus (including amplifiers) that produce heat.
- Do not block any ventilation openings. Install in accordance with the manufacturer's instructions.
- Protect the power cord from being walked on or pinched, particularly at plugs, convenience receptacles, and the point where they exit from the apparatus.
- Only use attachments/accessories specified by the manufacturer.
- Unplug this apparatus during lightning storms or when unused for long periods of time.
- Refer all servicing to qualified service personnel. Servicing is required when the apparatus has been damaged in any way, such as power-supply cord or plug is damaged, liquid has been spilled or objects have fallen into the apparatus, the apparatus has been exposed to rain or moisture, does not operate normally, or has been dropped.
Package Contents
Please check that the following items are included in your package:
- SAMI SM-S9939L Alarm Clock Radio Unit
- Power Adapter (if mains powered)
- User Manual (this document)
Product Overview
The SAMI SM-S9939L features a clear digital display and intuitive controls for easy operation. Below is a general representation of the product.
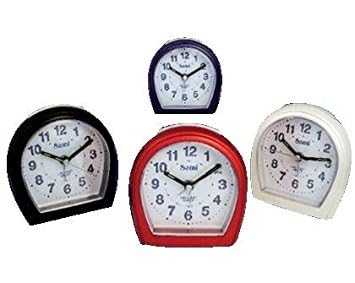
Figure 1: Front view of the SAMI SM-S9939L Alarm Clock Radio. This image shows the compact rectangular design, the digital display, and several control buttons on the front panel, typical for setting time, alarm, and radio functions.
Common controls typically include:
- Time Set Button: Used to adjust the current time.
- Alarm Set Button: Used to set or adjust the alarm time.
- Snooze/Sleep Button: Activates snooze function or sets sleep timer.
- Radio On/Off Button: Powers the radio on or off.
- Tuning Buttons (+/-): Adjusts radio frequency.
- Volume Buttons (+/-): Controls audio output level.
- Mode Button: Switches between clock, radio, or other functions.
Setup
1. Power Connection
- If your unit is mains powered, connect the power adapter to the DC input jack on the back of the alarm clock. Plug the other end into a standard wall outlet.
- If your unit is battery powered, insert the required batteries (not included) into the battery compartment, observing correct polarity (+/-).
- The display should illuminate, indicating the unit is powered on.
2. Initial Time Setting
- Press and hold the Time Set button until the hour digits start flashing.
- Use the +/- (or dedicated hour/minute) buttons to adjust the hour. Pay attention to AM/PM indicators if applicable.
- Press the Time Set button again to confirm the hour and move to minute adjustment.
- Use the +/- buttons to adjust the minutes.
- Press the Time Set button one last time to save the current time.
Operating Instructions
Setting the Alarm
- Press and hold the Alarm Set button until the alarm hour digits flash.
- Use the +/- buttons to set the desired alarm hour.
- Press the Alarm Set button again to confirm the hour and move to minute adjustment.
- Use the +/- buttons to set the desired alarm minutes.
- Press the Alarm Set button one last time to save the alarm time.
- To activate or deactivate the alarm, press the Alarm On/Off button (or repeatedly press the Alarm Set button until the alarm icon appears/disappears).
Using the Radio
- Press the Radio On/Off button to turn on the radio.
- Use the Tuning +/- buttons to manually scan for radio stations.
- To auto-scan for stations, press and hold the Tuning +/- button for a few seconds. The radio will scan and stop at the next strong station.
- Adjust the volume using the Volume +/- buttons.
- To turn off the radio, press the Radio On/Off button again.
Snooze Function
When the alarm sounds, press the Snooze button to temporarily silence the alarm. The alarm will sound again after a few minutes (typically 5-9 minutes, depending on the model).
Sleep Timer Function
While the radio is playing, press the Sleep button (often combined with Snooze) repeatedly to cycle through available sleep timer durations (e.g., 90, 60, 30, 15 minutes, or OFF). The radio will automatically turn off after the selected time.
Maintenance
- Cleaning: Wipe the unit with a soft, dry cloth. Do not use abrasive cleaners or solvents.
- Storage: If not in use for an extended period, unplug the unit and store it in a cool, dry place. If battery-powered, remove batteries before storage.
- Ventilation: Ensure the ventilation openings are clear of dust and debris to prevent overheating.
Troubleshooting
| Problem | Possible Cause | Solution |
|---|---|---|
| Unit does not power on. | Power cord not connected; batteries depleted or incorrectly inserted. | Ensure power cord is securely plugged in. Check battery orientation and replace if necessary. |
| Alarm does not sound. | Alarm not activated; alarm volume too low; incorrect alarm time set. | Verify alarm is activated (alarm icon visible). Increase alarm volume. Re-check alarm time setting. |
| Poor radio reception. | Antenna not extended; interference from other electronic devices; weak signal area. | Extend the FM wire antenna fully. Reposition the unit to improve reception. Move away from other electronics. |
| Display is dim or blank. | Brightness setting too low; power issue. | Check if there is a display brightness control. Ensure stable power supply. |
Specifications
- Brand: SAMI
- Model Number: SM-S9939L (8435128415597)
- Special Feature: Radio
- Power Source: Battery Powered / Electric (Mains)
- Display Type: Digital
- Material: Acrylonitrile Butadiene Styrene (ABS)
- Alarm Function: Yes
- Mounting Type: Tabletop
- Shape: Rectangular
Warranty and Support
SAMI products are designed for reliability and performance. For specific warranty information, please refer to the warranty card included with your purchase or contact your retailer. For technical support or inquiries, please visit the official SAMI website or contact their customer service department.


