
1. Introduction
This manual provides comprehensive instructions for the safe and efficient assembly, operation, and maintenance of your TOOLPORT 13x20 ft Marquee Party Tent. Please read this manual thoroughly before attempting to set up or use the tent. Retain this manual for future reference.
The TOOLPORT PRO Smart Marquee is designed for various outdoor events and celebrations, offering a robust and waterproof shelter solution. It features a strong steel frame and durable PVC 700 N tarpaulins.
2. Safety Information
- Assembly: Always assemble the tent with at least two people. Ensure all connections are securely bolted and tightened.
- Anchoring: Always use the provided ground pegs and safety ropes to secure the tent, especially in windy conditions. Failure to properly anchor the tent can result in damage or injury.
- Weather Conditions: While the tent is waterproof, it is not designed for extreme weather conditions such as heavy snow, strong winds, or severe thunderstorms. Disassemble the tent if adverse weather is expected.
- Fire Safety: Keep all heat sources and open flames away from the tent fabric. The PVC material is not fireproof.
- Ventilation: Ensure adequate ventilation when the tent is enclosed, especially if using heating or cooking appliances inside.
- Proposition 65 Warning: This product may contain chemicals known to the State of California to cause cancer and birth defects or other reproductive harm.
3. Package Contents
Verify that all components are present before beginning assembly:
- Steel Frame Components (tubes and connectors)
- PVC Tarpaulins (roof, sidewalls, front with entrances)
- Ground Pegs
- Safety Ropes
- Assembly Manual (this document)
4. Setup Instructions
Follow these steps for proper assembly of your TOOLPORT Marquee Party Tent. It is recommended to have at least two people for assembly.
- Prepare the Area: Choose a flat, level surface free from sharp objects. Clear any debris that could damage the tarpaulin.
- Unpack Components: Lay out all frame components and tarpaulins. Organize them for easy access.
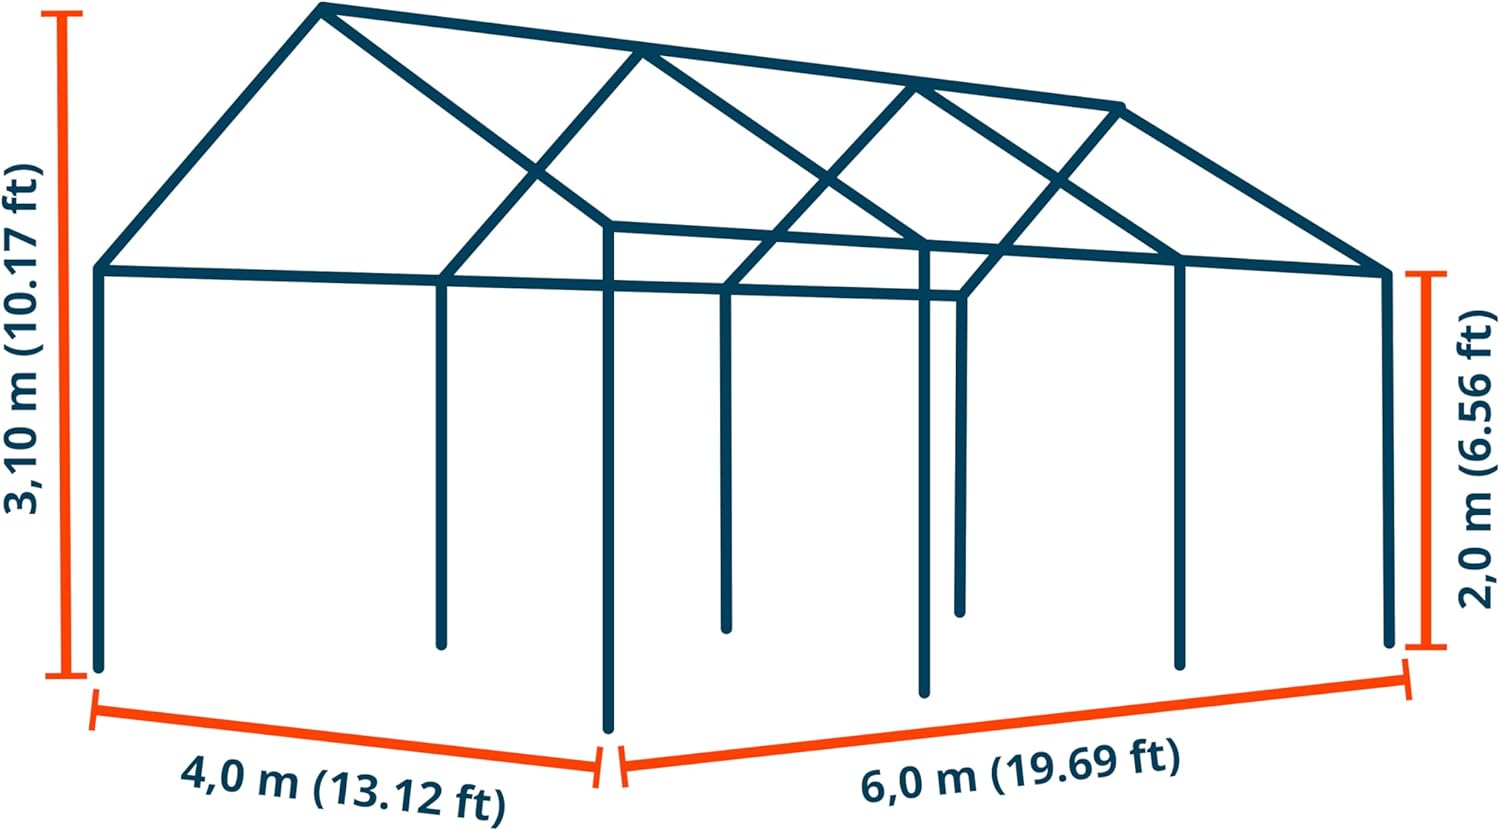
- Assemble the Roof Frame: Connect the roof tubes and connectors according to the diagram. Ensure all bolts are securely fastened.
- Attach Roof Tarpaulin: Drape the roof tarpaulin over the assembled roof frame. Ensure it is centered and aligned correctly.
- Assemble Leg Poles: Attach the leg poles to the roof frame connectors. Gradually raise the tent structure, ensuring stability.
- Secure Frame Connections: Double-check all bolted connections on the steel frame for tightness.
- Attach Sidewalls: Hang the sidewalls and end walls (with entrances) to the frame using the integrated fasteners. Ensure the wind deflectors at the bottom are properly positioned.
- Anchor the Tent: Drive ground pegs through the designated loops at the base of each leg and along the bottom edge of the sidewalls. Attach safety ropes to the frame and secure them to additional ground pegs, pulling taut to provide extra stability.
- Final Adjustments: Ensure the tarpaulins are taut to prevent water pooling and that all entrances are functional.


5. Operating Instructions
The TOOLPORT Marquee Party Tent is designed for temporary outdoor use to provide shelter for events, parties, or storage.
- Entrances: The tent features multiple entrances on the front wall for easy access. These can be rolled up and secured to remain open or zipped closed for privacy and weather protection.
- Sidewalls: The sidewalls can be removed or adjusted to suit your event needs, allowing for an open-air feel or full enclosure.
- Ventilation: Utilize the removable sidewalls and entrances to manage airflow and temperature inside the tent.


6. Maintenance
Proper maintenance will extend the lifespan of your party tent.
- Cleaning Tarpaulins: Clean PVC tarpaulins with mild soap and water. Avoid harsh chemicals or abrasive cleaners, as these can damage the material. Rinse thoroughly and allow to air dry completely before storage.
- Frame Inspection: Periodically inspect the steel frame for any signs of rust, damage, or loose connections. Tighten bolts as needed.
- Storage: When not in use, disassemble the tent and store all components in a dry, cool place, away from direct sunlight and extreme temperatures. Ensure tarpaulins are completely dry to prevent mold and mildew.
- Repair: Small tears in the PVC tarpaulin can often be repaired with a PVC repair kit. For significant damage, contact customer support.
7. Troubleshooting
| Problem | Possible Cause | Solution |
|---|---|---|
| Tent is unstable or sways in light wind. | Insufficient anchoring; loose frame connections. | Ensure all ground pegs are fully inserted and safety ropes are taut. Check and tighten all frame bolts. |
| Water pooling on the roof. | Tarpaulin not taut enough; improper assembly. | Adjust the roof tarpaulin to ensure it is stretched tightly over the frame. Verify correct frame assembly. |
| Difficulty connecting frame poles. | Misalignment; debris in connection points. | Ensure poles are correctly oriented. Clear any obstructions from the connection points. Apply slight pressure or gently tap with a rubber mallet if needed. |
| Sidewalls do not fit properly. | Incorrect orientation; frame not fully squared. | Check that sidewalls are attached to the correct sides and oriented properly. Ensure the main frame is square and level. |
8. Specifications
| Feature | Detail |
|---|---|
| Brand | TOOLPORT |
| Model Number | PRO Smart |
| Size | 13x20 ft (240"L x 156"W x 79"H) |
| Floor Area | 23.57 Square Meters |
| Material | Metal (Frame), PVC 700 N (Tarpaulins) |
| Color | White |
| Item Weight | 201 pounds (91300 Grams) |
| Water Resistance Level | Waterproof |
| Ultraviolet Light Protection | 50+ |
| Assembly Required | Yes |
9. Warranty and Support
For warranty information, replacement parts, or technical assistance, please contact TOOLPORT customer support. You can find more information and contact details on the official TOOLPORT store page:


