
Hifonics BRX2016.1D
Hifonics BRX2016.1D Monoblock Class D Amplifier User Manual
Model: BRX2016.1D
Introduction
Thank you for choosing the Hifonics BRX2016.1D Monoblock Class D Amplifier. This manual provides essential information for the proper installation, operation, and maintenance of your amplifier. Please read this manual thoroughly before attempting to install or operate the unit to ensure optimal performance and safety.
Safety Information
Always observe the following safety precautions during installation and operation:
- Disconnect the vehicle's negative battery terminal before making any power connections.
- Ensure all wiring is properly routed and secured to prevent damage or short circuits.
- Use appropriate gauge wiring for power and ground connections as specified in the installation section.
- Install the amplifier in a well-ventilated area to prevent overheating.
- Avoid mounting the amplifier in locations exposed to moisture or direct sunlight.
- Seek professional assistance if you are unsure about any installation steps.
Package Contents
Verify that all items are present in your package:
- Hifonics BRX2016.1D Monoblock Class D Amplifier
- Remote Bass Control Unit (HFR-31)
- Remote Bass Control Cable
- Mounting Hardware (screws)
- User Manual (this document)
Product Overview
Key Features
- Ultra-fine MOSFETs circuit maximizing power efficiency while improving sound quality.
- LED power (Green) and protect (Red) indicators.
- Designed for 1 Ohm stable operation.
Amplifier Layout
The Hifonics BRX2016.1D amplifier features a robust design with clearly labeled controls and connections for ease of installation and adjustment.

Figure 1: Top view of the Hifonics BRX2016.1D amplifier, showcasing the Brutus series design and Hifonics logo.
Control Panel
The control panel side of the amplifier houses all the input and adjustment controls.

Figure 2: Detailed view of the amplifier's control panel, showing input, level, phase, boost, and filter adjustments.
- Balanced Input: For connecting high-level audio signals.
- L/R Input: Standard RCA inputs for low-level audio signals.
- Level: Adjusts the input sensitivity to match the head unit's output.
- Phase: Adjusts the phase of the output signal (0° to 180°).
- Center/Width: Controls for specific audio adjustments (e.g., bass equalization).
- Boost: Provides bass boost at a selectable frequency.
- Subsonic: High-pass filter for very low frequencies, protecting subwoofers.
- LPF (Low-Pass Filter): Adjusts the cutoff frequency for the low-pass filter (35Hz - 250Hz).
- Remote: RJ11 port for connecting the remote bass control.
- Mode (MST/SLV): Switch for Master/Slave operation in multi-amplifier setups.
- Power/Protect LEDs: Indicators for amplifier status.
- Master Out: RCA output for linking to another amplifier in a master/slave configuration.
- Slave In: RCA input for receiving signal from a master amplifier.
Power and Speaker Connections
The opposite side of the amplifier provides terminals for power, ground, remote turn-on, and speaker outputs.
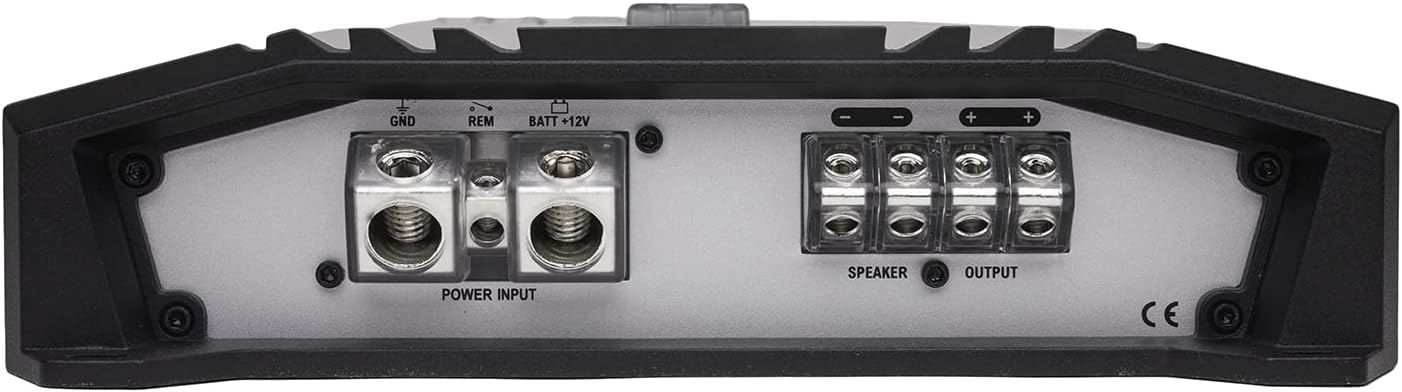
Figure 3: View of the amplifier's power input and speaker output terminals.
- GND (Ground): Connect to the vehicle's chassis ground.
- REM (Remote): Connect to the head unit's remote turn-on output.
- BATT+12V: Connect directly to the vehicle's positive battery terminal.
- Speaker Output: Terminals for connecting your subwoofer(s).
Remote Bass Control (HFR-31)
The included remote bass control allows for convenient adjustment of the bass level from the driver's seat.

Figure 4: The HFR-31 remote bass control unit.
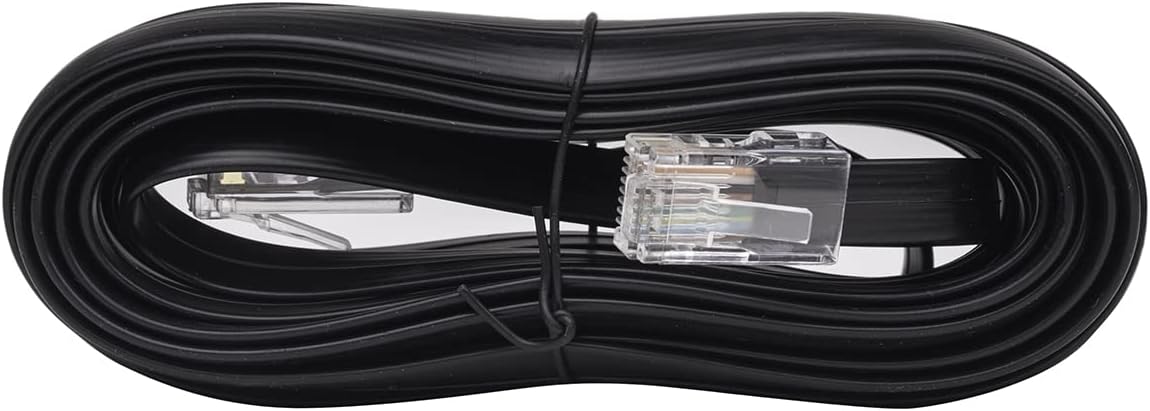
Figure 5: The cable for connecting the remote bass control to the amplifier.
Setup and Installation
Mounting the Amplifier
Choose a mounting location that is dry, well-ventilated, and secure. Avoid areas where the amplifier could be exposed to direct sunlight, excessive heat, or moisture.
- Ensure adequate airflow around the amplifier's heat sink fins.
- Use the provided mounting hardware to secure the amplifier firmly to a solid surface.
- Do not mount the amplifier upside down, as this can impede heat dissipation.

Figure 6: Close-up view of the amplifier's heat sink fins, designed for efficient heat dissipation.
Wiring Connections
Power Wiring
- BATT+12V: Connect a heavy-gauge power cable (e.g., 4 AWG or larger for 2000W) directly from the amplifier's +12V terminal to the vehicle's positive battery terminal. Install an appropriate fuse (not included) within 18 inches of the battery.
- GND (Ground): Connect a heavy-gauge ground cable of the same size as the power cable from the amplifier's GND terminal to a clean, unpainted metal surface on the vehicle's chassis. Ensure a good electrical connection.
- REM (Remote): Connect a smaller gauge wire (e.g., 18 AWG) from the amplifier's REM terminal to the remote turn-on output of your head unit.
Speaker Wiring
Connect your subwoofer(s) to the amplifier's speaker output terminals. Ensure correct polarity (+ to + and - to -). This amplifier is stable down to 1 Ohm. Refer to your subwoofer's specifications for proper impedance matching.
Input Signal Wiring
- RCA Inputs (L/R): Connect RCA cables from your head unit's pre-amp outputs to the amplifier's L/R input terminals.
- Balanced Input: If your head unit supports balanced outputs, use the balanced input for improved noise rejection.
Remote Bass Control Connection
Connect the remote bass control cable to the "Remote" RJ11 port on the amplifier's control panel and mount the control unit in a convenient location within reach of the driver.
Operating Instructions
Adjusting Controls
- Level: Start with the level control at minimum. Play a familiar track and slowly increase the level until the sound is clear and distortion-free. Avoid setting it too high, which can cause clipping and damage.
- Phase: Adjust the phase control (0° or 180°) to achieve the best bass response and blend with your front speakers. Listen for the strongest, most impactful bass.
- Subsonic Filter: Set the subsonic filter to protect your subwoofer from playing frequencies below its resonant frequency. A common setting is around 20-30Hz, depending on your subwoofer.
- LPF (Low-Pass Filter): Adjust the LPF to control the upper frequency limit of the subwoofer. Typically set between 60Hz and 100Hz, depending on your main speakers and desired blend.
- Boost: Use the bass boost sparingly. Excessive boost can lead to distortion and potential damage. Adjust to taste for a subtle enhancement.
Mode Switch (MST/SLV)
If using multiple BRX2016.1D amplifiers, set one amplifier to MST (Master) and the others to SLV (Slave). Connect the Master Out of the master amplifier to the Slave In of the slave amplifier(s) using RCA cables. This allows a single set of controls on the master amplifier to adjust all linked amplifiers.
LED Indicators
- Green LED (Power): Illuminates when the amplifier is powered on and operating normally.
- Red LED (Protect): Illuminates when the amplifier enters protection mode due to overheating, short circuit, or low voltage. If this LED lights up, turn off the system, identify and resolve the issue, then restart.
Maintenance
To ensure long-lasting performance from your Hifonics amplifier, follow these simple maintenance guidelines:
- Regularly inspect all wiring connections for tightness and corrosion.
- Keep the amplifier clean and free of dust and debris. Use a soft, dry cloth for cleaning.
- Ensure that the amplifier's heat sink fins are not obstructed, allowing for proper cooling.
- Avoid spilling liquids on the amplifier.
Troubleshooting
If you experience problems with your amplifier, consult the following table for common issues and solutions:
| Problem | Possible Cause | Solution |
|---|---|---|
| No Power (Power LED off) | Blown fuse, loose power/ground/remote wire, no remote signal. | Check fuse, verify all power, ground, and remote connections are secure and receiving voltage. |
| Amplifier in Protect Mode (Protect LED on) | Overheating, short circuit in speaker wiring, impedance too low, low voltage. | Allow amplifier to cool, check speaker wiring for shorts, verify speaker impedance, check vehicle's electrical system. |
| No Sound Output | No input signal, incorrect gain setting, speaker wires disconnected. | Check RCA connections, adjust gain, verify speaker connections. |
| Distorted Sound | Gain set too high, incorrect filter settings, poor ground connection. | Reduce gain, adjust LPF/subsonic filters, ensure solid ground connection. |
| Weak Bass Output | Incorrect phase setting, low-pass filter set too high, gain too low. | Adjust phase, lower LPF frequency, increase gain. |
Specifications
Detailed technical specifications for the Hifonics BRX2016.1D Monoblock Class D Amplifier:
| Feature | Specification |
|---|---|
| Brand | Hifonics |
| Model | BRX2016.1D |
| Maximum Output Power | 2000 Watts |
| Number of Channels | 1 (Monoblock) |
| Mounting Specifications | 1 Ohm Stable, Automotive Compliance |
| Item Dimensions (L x W x H) | 37.3 x 24.9 x 6.1 centimeters |
| Item Weight | 13.34 Pounds |
| Manufacturer | MaxxSonics |
| GTIN / UPC | 806576223634 |
Warranty and Support
Hifonics products are designed for reliability and performance. For warranty information, please refer to the warranty card included with your product or visit the official Hifonics website. For technical support or service inquiries, please contact Hifonics customer service through their official channels.
Related documentsBRX2016.1D


Ask a question about this manual
Ask about setup, troubleshooting, compatibility, parts, safety, or missing instructions. Manuals+ will review the question and use this page’s manual context to help answer it.