
Introduction
Thank you for purchasing the Soundmaster DAB500SI Portable Digital Radio. This manual provides essential information for the safe and efficient operation of your device. Please read it thoroughly before use and retain it for future reference.
Product Overview
The Soundmaster DAB500SI is a compact and versatile digital radio, offering both DAB/DAB+ and FM reception. It features a clear display, intuitive controls, and a headphone output for personal listening. Its portable design allows for use in various locations.
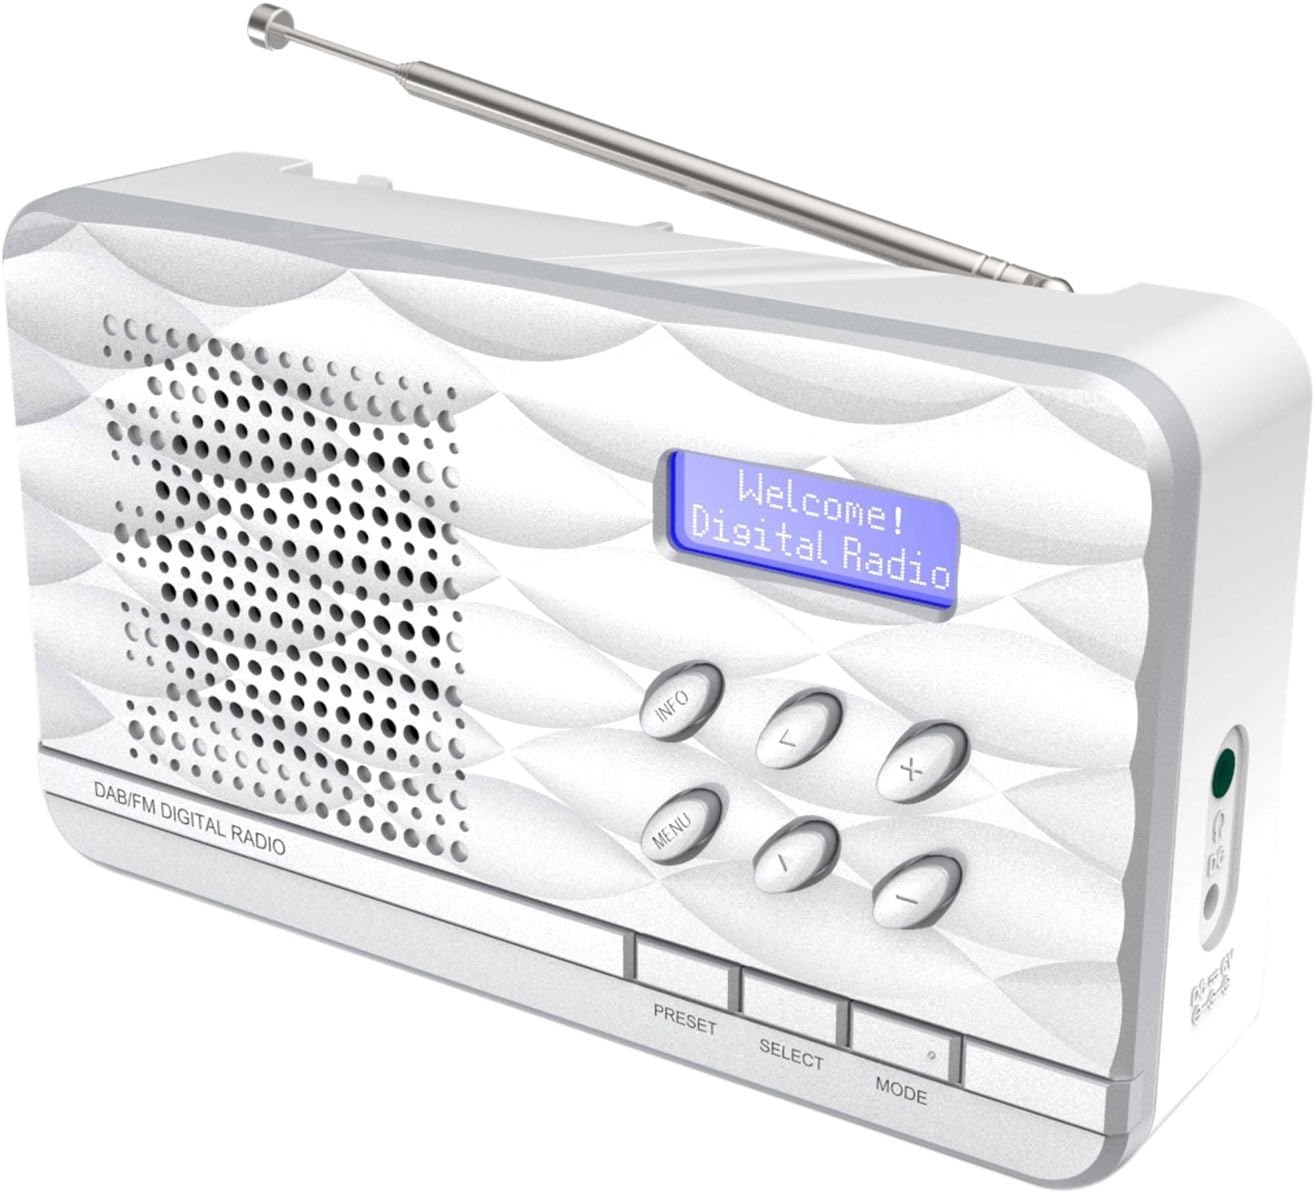
Figure 1: Soundmaster DAB500SI Portable Digital Radio. The image shows the silver radio with its extendable antenna, front speaker grille, blue backlit display showing "Welcome! Digital Radio", and control buttons labeled INFO, MENU, PRESET, SELECT, MODE, and navigation arrows. Dimensions are indicated as 19cm (width), 11cm (height), and 7cm (depth).
Setup
1. Unpacking
Carefully remove the radio from its packaging. Ensure all components are present: the DAB500SI radio unit and this user manual.
2. Power Connection
The DAB500SI is powered by mains electricity. Locate the DC IN port on the side of the unit. Connect the provided power adapter to this port and then plug it into a standard wall outlet.
Alternatively, the unit can be powered by 4x AA batteries (not included) for portable use. Open the battery compartment on the rear of the unit and insert the batteries, observing correct polarity.
3. Antenna Adjustment
Extend the telescopic antenna fully for optimal DAB/DAB+ and FM reception. Adjust its position to achieve the best signal quality.
Operating Instructions
1. Power On/Off
Press the POWER button (usually combined with the MODE button or a dedicated button) to turn the radio on or off.
2. Mode Selection (DAB/FM)
Press the MODE button to switch between DAB/DAB+ and FM radio modes.
3. DAB/DAB+ Radio Operation
- First Time Setup: When first powered on in DAB mode, the radio will automatically perform a full scan for available stations. This may take a few minutes.
- Station Selection: Use the LEFT/RIGHT navigation buttons (labeled < and > on the device) to browse through the list of available DAB stations. Press SELECT to confirm your choice.
- Manual Scan: If you move the radio to a new location or wish to update the station list, press MENU, then navigate to "Full Scan" or "Auto Scan" and press SELECT.
- Information Display: Press the INFO button repeatedly to cycle through various information displays such as program type, signal strength, time, date, and DLS (Dynamic Label Segment) text.
4. FM Radio Operation
- Auto Scan: In FM mode, press and hold the SELECT button to perform an auto scan. The radio will scan and store available stations.
- Manual Tuning: Use the LEFT/RIGHT navigation buttons (labeled < and > on the device) to manually tune the frequency in small increments.
- RDS Information: If available, RDS (Radio Data System) information such as station name and program type will be displayed. Press INFO to cycle through available RDS data.
5. Presets
The radio supports up to 20 preset stations for both DAB and FM modes.
- Storing a Preset: Tune to the desired station. Press and hold the PRESET button until "Preset Store" appears on the display. Use the navigation buttons to select a preset number (1-20) and press SELECT to confirm.
- Recalling a Preset: Press the PRESET button briefly. Use the navigation buttons to select the desired preset number and press SELECT to tune to it.
6. Volume Control
Use the +/- buttons (labeled + and - on the device) to adjust the volume level.
7. Headphone Use
Connect standard 3.5mm headphones to the headphone jack on the side of the unit for private listening. The internal speaker will be muted automatically.
Maintenance
1. Cleaning
Wipe the radio with a soft, dry cloth. Do not use abrasive cleaners, waxes, or solvents as they may damage the finish. Ensure the unit is unplugged before cleaning.
2. Storage
If storing the radio for an extended period, remove the batteries to prevent leakage. Store in a cool, dry place away from direct sunlight and extreme temperatures.
3. Battery Replacement
When using batteries, replace all four AA batteries simultaneously when the low battery indicator appears or audio quality degrades. Ensure correct polarity when inserting new batteries.
Troubleshooting
| Problem | Possible Cause | Solution |
|---|---|---|
| No power | Power adapter not connected or faulty; batteries depleted or incorrectly inserted. | Check power adapter connection and wall outlet. Replace batteries, ensuring correct polarity. |
| Poor DAB/FM reception | Antenna not extended or poorly positioned; weak signal area. | Fully extend and adjust the telescopic antenna. Try repositioning the radio. Perform a full scan in DAB mode. |
| No sound from speaker | Volume too low; headphones connected. | Increase volume. Disconnect headphones if not desired. |
| Radio freezes or becomes unresponsive | Temporary software glitch. | Disconnect power for a few seconds, then reconnect. If using batteries, remove and reinsert them. |
Specifications
- Model Number: DAB500SI
- Brand: Soundmaster
- Supported Radio Bands: AM, DAB, DAB+, FM
- Preset Stations: 20 (DAB/FM)
- Maximum Speaker Output Power: 1 Watt
- Connectivity Technology: Auxiliary (3.5mm headphone jack)
- Power Source: Mains (AC adapter) or 4x AA Batteries (not included)
- Display: Backlit LCD
- Item Weight: 400 Grams
- Dimensions (approx.): 19 cm (Width) x 11 cm (Height) x 7 cm (Depth)
- Color: Silver
- Included Components: Radio unit, User Manual
Warranty and Support
Warranty Information
Please refer to the warranty card included with your product for detailed warranty terms and conditions. Keep your purchase receipt as proof of purchase for any warranty claims.
Customer Support
For technical assistance, troubleshooting, or spare parts inquiries, please contact your retailer or the Soundmaster customer service department. Contact details can typically be found on the manufacturer's official website or on the product packaging.
Note: Spare parts availability information is not provided by the manufacturer. Software updates are not guaranteed.


