1. Introduction
Thank you for choosing the Duravit Starck 3 Floorstanding Toilet Bowl. This manual provides essential information for the safe and efficient installation, operation, and maintenance of your new toilet bowl. Please read these instructions carefully before beginning installation or use, and retain them for future reference.
The Duravit Starck 3 series is designed for modern bathrooms, offering a sleek aesthetic and reliable performance. This floorstanding model, 216501, is crafted from durable ceramic in a white finish.
2. Safety Information
Please observe the following safety precautions to prevent injury or damage to the product:
- Professional Installation Recommended: Installation of plumbing fixtures should ideally be performed by a qualified professional to ensure proper function and compliance with local building codes.
- Heavy Item: The toilet bowl is heavy (approximately 65.5 lbs). Use proper lifting techniques or seek assistance to avoid injury during handling and installation.
- Fragile Material: Ceramic can chip or break if dropped or subjected to strong impact. Handle with care.
- Water Supply: Ensure the main water supply is turned off before beginning any installation or maintenance work to prevent flooding.
- Chemicals: Avoid using harsh abrasive cleaners or chemicals that could damage the ceramic surface or internal components.
3. Package Contents
Upon unpacking, please verify that all components are present and undamaged. The package for model 216501 typically includes:
- Duravit Starck 3 Floorstanding Toilet Bowl (White)
- Hardware for installation
- Note: Toilet seat and cover (e.g., model 006601) and flushometer are typically sold separately.
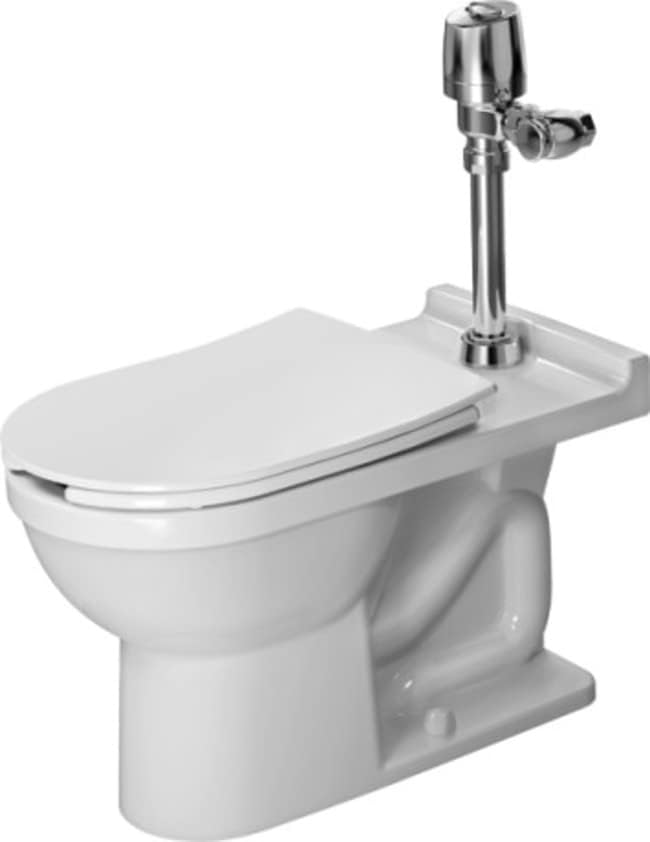
Figure 3.1: The Duravit Starck 3 Floorstanding Toilet Bowl, shown here with an example flushometer assembly (flushometer not included with bowl).
4. Setup and Installation
Installation of the Duravit Starck 3 Floorstanding Toilet Bowl requires careful attention to plumbing connections and proper sealing. It is highly recommended that installation be performed by a licensed plumber.
4.1. Pre-Installation Checks
- Ensure the floor is level and structurally sound to support the toilet bowl and user weight.
- Verify that the rough-in dimensions in your bathroom match the specifications of the toilet bowl. Refer to the technical diagrams below.
- Turn off the main water supply to the bathroom.
- Clear the installation area of any debris or old fixtures.
4.2. Installation Steps (General Guidelines)
- Prepare the Flange: Ensure the floor flange is securely mounted to the floor and free of obstructions.
- Install Wax Ring: Place a new wax ring (not included) onto the floor flange or directly onto the toilet bowl's waste outlet.
- Position the Bowl: Carefully lower the toilet bowl onto the floor flange, aligning the bolts with the holes in the base of the toilet. Press down firmly to create a seal with the wax ring.
- Secure the Bowl: Install washers and nuts onto the flange bolts. Tighten them alternately and evenly until the toilet is secure, but do not overtighten, as this can crack the ceramic.
- Connect Water Supply: Connect the flushometer (if applicable and purchased separately) to the water supply line and the toilet bowl's inlet. Ensure all connections are watertight.
- Install Toilet Seat: Attach the toilet seat (if purchased separately) according to its specific instructions.
- Test: Turn on the main water supply and check for leaks. Flush the toilet several times to ensure proper operation.

Figure 4.1: Side view technical diagram showing key dimensions and ADA compliance range for the Duravit Starck 3 toilet bowl. Dimensions are in millimeters and inches.

Figure 4.2: Top view technical diagram illustrating the overall width, depth, and bolt spacing for the Duravit Starck 3 toilet bowl. Dimensions are in millimeters and inches.
5. Operating Instructions
The Duravit Starck 3 Floorstanding Toilet Bowl operates using a gravity flush system, typically activated by an external flushometer (not included). To operate:
- Ensure the water supply is turned on.
- Activate the flushometer handle or button. This will release a measured amount of water into the bowl, initiating the flush cycle.
- The bowl will then refill to its normal water level.
Note: The performance of the flush system is dependent on the type and quality of the flushometer installed.
6. Maintenance
Regular cleaning and maintenance will ensure the longevity and hygienic performance of your Duravit Starck 3 toilet bowl.
6.1. Cleaning the Ceramic Surface
- Use a soft cloth or sponge with mild, non-abrasive bathroom cleaners.
- Avoid abrasive powders, scouring pads, or cleaners containing harsh acids, alkalis, or bleach, as these can damage the ceramic glaze.
- Rinse thoroughly with clean water after cleaning and wipe dry to prevent water spots.
6.2. General Care
- Periodically check all connections for leaks and tighten if necessary.
- Ensure the toilet seat (if installed) is properly secured and cleaned regularly.
7. Troubleshooting
This section addresses common issues you might encounter with your toilet bowl. For more complex problems, consult a qualified plumber.
| Problem | Possible Cause | Solution |
|---|---|---|
| Weak Flush | Low water pressure; partially closed water supply valve; issue with flushometer. | Ensure water supply valve is fully open. Check flushometer for obstructions or malfunction (refer to flushometer manual). |
| Leaking at Base | Loose flange bolts; damaged wax ring; cracked ceramic. | Gently tighten flange bolts. If leak persists, the wax ring may need replacement. Inspect for cracks; if found, the bowl may need replacement. |
| Clogging | Excessive waste; foreign objects; partial obstruction in drain line. | Use a plunger. If persistent, a plumber may need to clear the drain line. Avoid flushing non-biodegradable items. |
8. Specifications
Key technical specifications for the Duravit Starck 3 Floorstanding Toilet Bowl, model 216501:
- Model Number: 216501
- Brand: Duravit
- Color: White
- Material: Ceramic
- Product Dimensions (D x W x H): 17.88" x 14.63" x 17.88"
- Item Weight: 65.5 Pounds (approx. 29.7 kg)
- Installation Type: Undermount (refers to the waste outlet connection, typically floor-mounted for this type of bowl)
- Shape: As seen on Picture (Elongated)
- Flush Type: Gravity Flush Toilets
- Certification: ADA, CUPC
- Special Features: Eco Friendly
- Date First Available: January 13, 2015
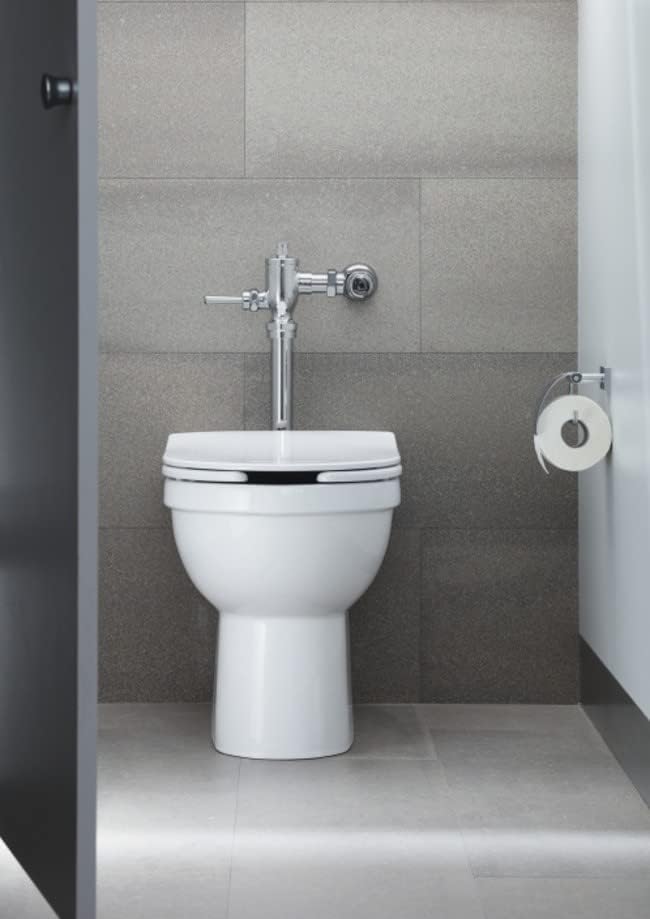
Figure 8.1: The Duravit Starck 3 Floorstanding Toilet Bowl installed in a contemporary bathroom setting, showcasing its compact and functional design.

Figure 8.2: An alternative view of the Duravit Starck 3 toilet bowl installed, highlighting its clean lines and integration with bathroom aesthetics.
9. Warranty and Support
Duravit products are manufactured to high-quality standards and come with a manufacturer's warranty. For specific warranty terms and conditions, please refer to the documentation provided with your purchase or visit the official Duravit website.
For technical support, replacement parts, or further assistance, please contact Duravit customer service. Contact information can typically be found on the Duravit website or in your purchase documentation.
Online Resources: For additional information, product registration, or to locate a service center, please visit the official Duravit website.


