
Introduction
This manual provides detailed instructions for the Western Digital WD Elements 2TB Portable Hard Drive (Model WDBHDW0020BBK-EESN). This external hard disk drive offers high-capacity storage and ultra-fast data transfers via USB 3.0, making it suitable for use with PCs, PlayStation 4, and Xbox consoles. Please read this manual thoroughly before using your device to ensure proper setup and operation.
1. Setup
1.1 Unpacking the Device
Carefully remove all components from the packaging. The box contents should include:
- Western Digital Elements Portable Hard Disk Drive
- USB 3.0 Cable
- Quick Start Guide
1.2 Connecting to Your Computer
To connect the WD Elements portable hard drive to your computer:
- Locate an available USB port on your computer. For optimal performance, use a USB 3.0 port. The drive is also compatible with USB 2.0 ports, but data transfer speeds will be slower.
- Connect the small end of the included USB 3.0 cable to the USB port on the WD Elements drive.
- Connect the larger end of the USB 3.0 cable to a USB port on your computer.
- The drive will automatically power on and be detected by your operating system.

Figure 1: Connecting the WD Elements Portable Hard Drive to a laptop, demonstrating USB 3.0 and USB 2.0 compatibility.
1.3 Initial Formatting
The WD Elements portable hard drive comes pre-formatted with NTFS for Windows 10 and Windows 8.1. If you are using a different operating system (e.g., macOS, Linux, or certain gaming consoles), reformatting may be required. Refer to your operating system's documentation for instructions on how to format an external drive.
Note: Reformatting the drive will erase all data currently on it. Ensure any necessary data is backed up before proceeding with reformatting.
2. Operating Instructions
2.1 Transferring Files
Once connected and recognized by your computer, the WD Elements drive will appear as a removable storage device. You can transfer files by:
- Drag and Drop: Select files or folders from your computer and drag them directly to the WD Elements drive icon or an open folder on the drive.
- Copy and Paste: Right-click on files or folders, select "Copy," then navigate to the WD Elements drive, right-click in the desired location, and select "Paste."

Figure 2: Demonstrating fast data transfers to the WD Elements Portable Hard Drive.
2.2 Safe Removal
To prevent data corruption, always safely eject the drive before disconnecting it from your computer:
- Windows: Click the "Safely Remove Hardware and Eject Media" icon in the system tray, then select the WD Elements drive. Wait for the "Safe to Remove Hardware" notification before disconnecting.
- macOS: Drag the drive icon from your desktop to the Trash, or right-click the drive icon and select "Eject." Wait for the icon to disappear before disconnecting.
2.3 Compatibility with Gaming Consoles
The WD Elements drive is compatible with PlayStation 4 and Xbox consoles for expanding storage. Specific setup instructions for these consoles may vary:
- PlayStation 4: Connect the drive to a USB port. Go to Settings > Devices > USB Storage Devices, select the WD Elements drive, and choose "Format as Extended Storage."
- Xbox: Connect the drive to a USB port. The console will prompt you to format the drive for games and apps.
Always follow the console's on-screen instructions for formatting and use of external storage.
3. Maintenance
3.1 Physical Care
- Keep the drive in a clean, dry environment, away from extreme temperatures and direct sunlight.
- Avoid dropping or subjecting the drive to physical shocks, as this can damage internal components and lead to data loss.
- Do not block ventilation openings (if any) and ensure adequate airflow around the device.
3.2 Data Management
- Regularly back up important data from your computer to the WD Elements drive, and vice-versa, to prevent data loss.
- Periodically check the drive's health using your operating system's disk utility tools.
- Avoid filling the drive to its absolute maximum capacity, as this can affect performance.
4. Troubleshooting
4.1 Drive Not Detected
- Check Connections: Ensure the USB cable is securely connected to both the drive and the computer. Try a different USB port or cable.
- Power: The drive is bus-powered via USB. Ensure your computer's USB port provides sufficient power. If using a USB hub, try connecting directly to the computer.
- Restart Computer: Sometimes a simple restart can resolve detection issues.
- Disk Management (Windows): Open Disk Management (right-click Start, select Disk Management) to see if the drive is listed but uninitialized or unformatted.
- Disk Utility (macOS): Open Disk Utility (Applications > Utilities > Disk Utility) to check if the drive is visible.
4.2 Slow Transfer Speeds
- USB Port: Ensure you are connected to a USB 3.0 port on your computer for maximum transfer rates. USB 2.0 ports will result in significantly slower speeds.
- Cable: Use the original USB 3.0 cable provided. Damaged or non-compliant cables can affect performance.
- File Type: Transferring many small files is generally slower than transferring a few large files of the same total size.
- Drive Fragmentation: Over time, a drive can become fragmented, affecting performance. Consider defragmenting the drive (Windows only) or backing up data and reformatting.
4.3 Drive Disconnects Randomly
- Cable Integrity: Inspect the USB cable for any damage. Replace if necessary.
- USB Port Power: Ensure the USB port is providing stable power. Avoid using unpowered USB hubs.
- Power Settings (Windows): In Device Manager, under "Universal Serial Bus controllers," right-click on "USB Root Hub" (or similar), go to "Properties," then "Power Management," and uncheck "Allow the computer to turn off this device to save power."
5. Specifications
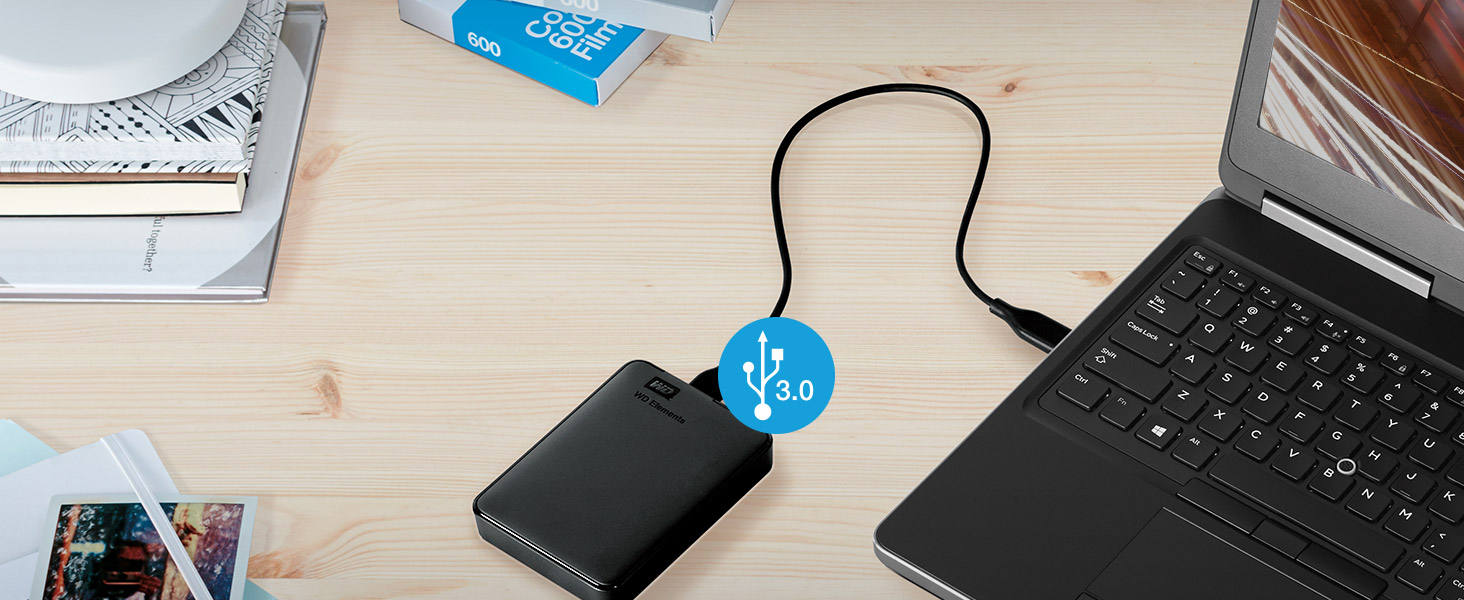
Figure 3: Physical dimensions of the WD Elements Portable Hard Drive.

Figure 4: The WD Elements Portable Hard Drive, highlighting its high capacity.
| Feature | Detail |
|---|---|
| Model Number | WDBHDW0020BBK-EESN |
| Digital Storage Capacity | 2 TB |
| Hard Disk Interface | USB 3.0 |
| Connectivity Technology | USB |
| Brand | Western Digital |
| Hard Disk Form Factor | 2.5 Inches |
| Hard Disk Description | Mechanical Hard Disk |
| Compatible Devices | Gaming Console (Microsoft Xbox One, Sony PlayStation 4), Laptop, Television |
| Installation Type | External Hard Drive |
| Color | Black |
| Read Speed | 125 Megabytes Per Second |
| Media Speed | 110 Megabytes Per Second |
| Data Transfer Rate | 625 Megabytes Per Second |
| Hardware Platform | Mac, PC, Unix |
| Item Weight | 0.1 Kilograms |
| Item Dimensions (L x W x Thickness) | 16L x 13W x 4Th Centimeters |
| Enclosure Material | Plastic |
| Country of Origin | Thailand |
6. Warranty Information
This Western Digital WD Elements Portable Hard Drive comes with a 3 Years Limited Warranty. For detailed terms and conditions, please refer to the warranty documentation included with your product or visit the official Western Digital support website.
7. Support
For further assistance, technical support, or to download the latest drivers and software, please visit the official Western Digital support website:
You may also contact the manufacturer directly:
Manufacturer: Calcomp Electronics Public Co., Ltd.60 Moo 8, Sethakij Rd., Klong Madeua Kratoom Bean,
Samut Sakhon 74110, Thailand.
For customers in India, you can contact the importer:
Importer: Ingram Micro India Pvt. Ltd.5th Floor, Building A, Empire Plaza, LBS Marg,
Vikhroli West, Mumbai 400083, India.


