
1. Introduction
This manual provides detailed instructions for the proper use and maintenance of your JVC GR-AX720 Compact VHS Camcorder. Please read this manual thoroughly before operating the camcorder to ensure optimal performance and longevity. Keep this manual for future reference.
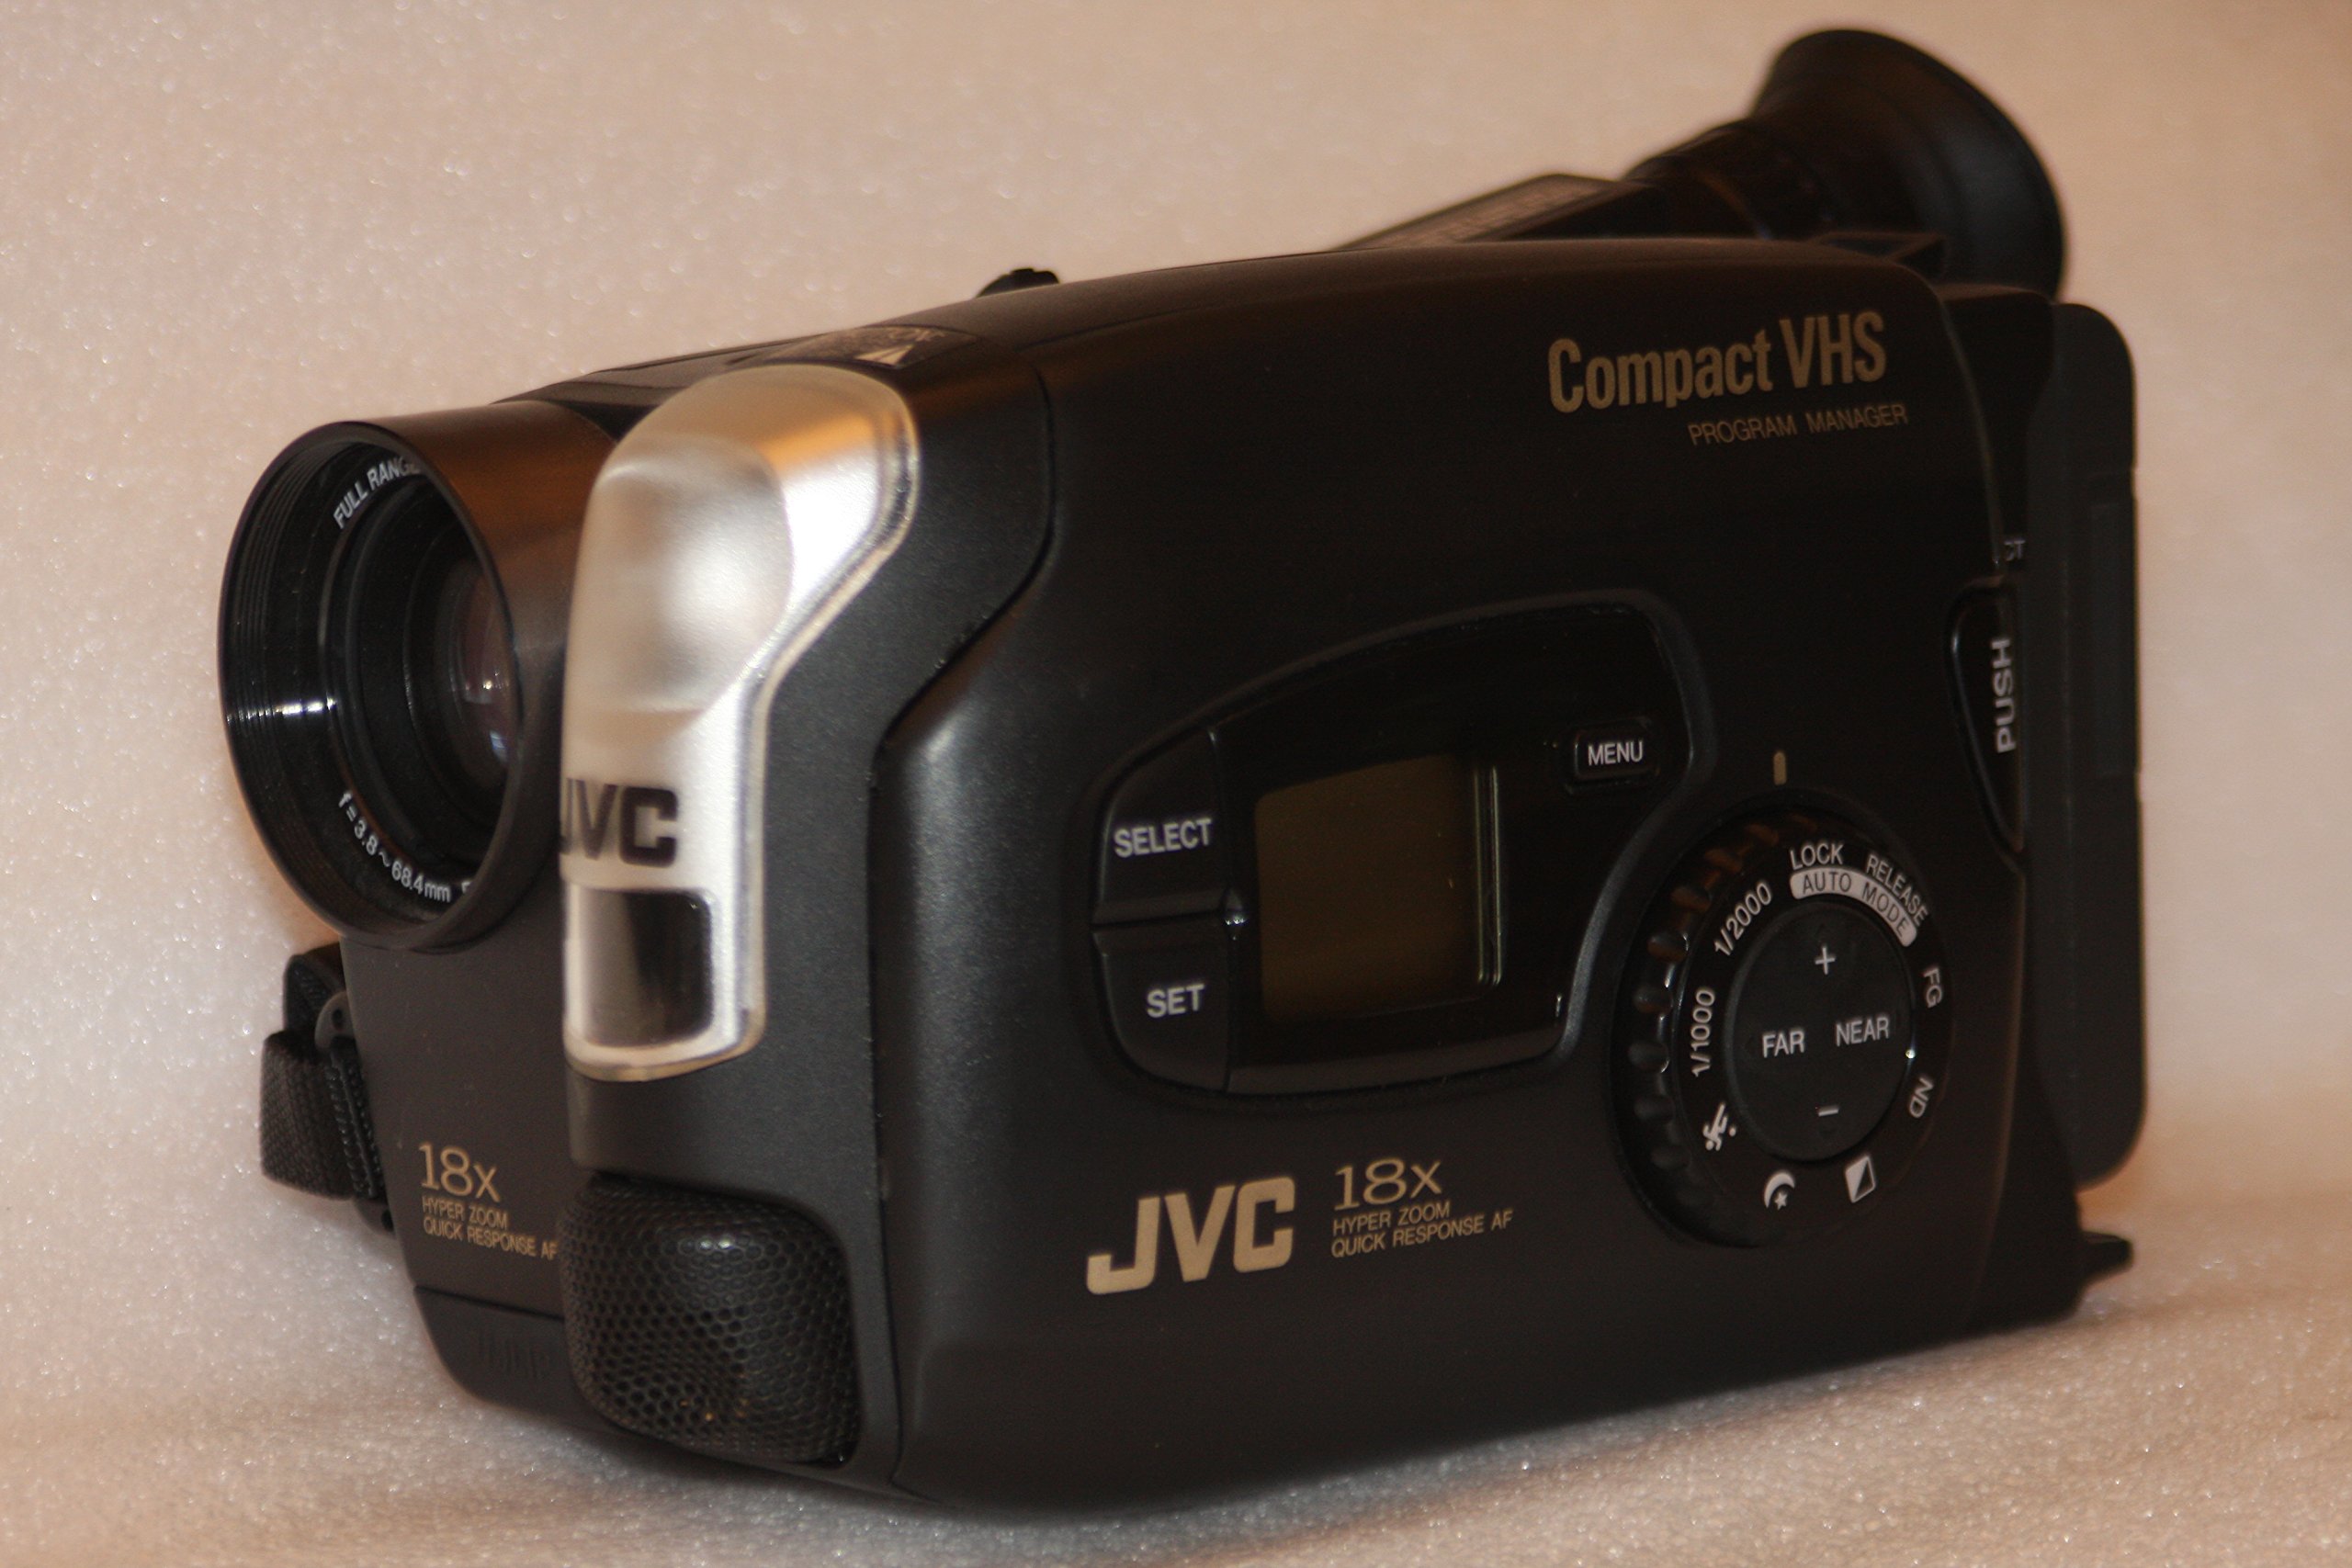
Image 1: Front and side view of the JVC GR-AX720 Compact VHS Camcorder, showcasing its compact design and main controls.
2. Product Overview
The JVC GR-AX720 is a Compact VHS (VHS-C) camcorder designed for recording and playing back video on VHS-C tapes. Key features include an 18x Hyper Zoom lens, Auto Light function, Fast Auto Focus (AF), Program AE with various special effects, and a color viewfinder for monitoring recordings and playback.
Key Features:
- VHS-C Format: Records to and plays from Compact VHS tapes. These tapes can be played in a standard VHS VCR using an appropriate adapter (not included).
- 18x Hyper Zoom: Provides extended optical zoom capabilities for capturing distant subjects.
- Color Viewfinder: Offers a color display for framing shots and reviewing footage.
- Auto Light: Automatically adjusts for optimal lighting conditions.
- Fast AF: Ensures quick and accurate focusing.
- Program AE with Special Effects: Allows for creative control over recordings.
3. Setup
3.1. Battery Installation and Charging
- Ensure the camcorder is powered off.
- Locate the battery compartment on the rear of the camcorder.
- Slide the battery release latch and insert the battery pack, ensuring it clicks into place securely.
- To charge the battery, connect the AC adapter to the camcorder's DC input and then to a power outlet. The charging indicator will illuminate.
3.2. Loading a VHS-C Cassette
- Open the cassette compartment by sliding the EJECT lever. The compartment cover will open.
- Insert a VHS-C cassette with the tape window facing forward and the open side facing down.
- Gently push the cassette down until it locks into position.
- Close the cassette compartment cover until it clicks shut.

Image 2: Side view of the camcorder, illustrating the general area for battery and cassette insertion.
3.3. Connecting to a Television
To view your recordings on a television, use the provided Composite A/V cable.
- Connect one end of the Composite A/V cable to the A/V output jacks on the camcorder.
- Connect the other end of the cable to the corresponding A/V input jacks (typically yellow for video, white/red for audio) on your television.
- Select the correct A/V input channel on your television.
4. Operating Instructions
4.1. Power On/Off
To power on the camcorder, slide the POWER switch from OFF to CAMERA for recording or PLAY for playback. To power off, slide the switch back to OFF.

Image 3: Close-up view of the power switch, light control, and record button on the camcorder.
4.2. Recording
- Set the POWER switch to CAMERA.
- Open the lens cover.
- Look through the color viewfinder to frame your shot.
- Use the ZOOM lever to adjust the focal length (telephoto/wide-angle).
- Press the RECORD button to start recording. The recording indicator will illuminate.
- Press the RECORD button again to stop recording.
Focus Adjustment:
The camcorder features Fast AF for automatic focusing. For manual focus, switch to manual mode (if available) and use the focus ring or buttons.
Special Effects:
Refer to the on-screen menu (accessed via the MENU button) for available Program AE modes and special effects.
4.3. Playback
- Set the POWER switch to PLAY.
- If connected to a TV, ensure the TV is on the correct A/V input.
- Use the playback controls (Play, Stop, Rewind, Fast Forward) to navigate your recordings.
4.4. Using the Color Viewfinder
The color viewfinder provides a real-time view of your subject during recording and displays recorded footage during playback. Adjust the diopter on the viewfinder for clear vision if needed.

Image 4: Side view of the camcorder, highlighting the adjustable color viewfinder.
5. Maintenance
5.1. Cleaning
- Lens: Use a soft, lint-free cloth specifically designed for optical lenses. Do not use abrasive cleaners.
- Body: Wipe the camcorder body with a soft, dry cloth. For stubborn dirt, slightly dampen the cloth with water. Avoid using solvents.
- Tape Heads: Regular cleaning of tape heads is recommended to maintain optimal video quality. Use a dry-type VHS-C head cleaner cassette (not included) according to its instructions.
5.2. Storage
- Store the camcorder in a cool, dry place away from direct sunlight and extreme temperatures.
- Remove the battery pack if the camcorder will not be used for an extended period.
- Keep the lens cap on to protect the lens from dust and scratches.
6. Troubleshooting
If you encounter issues with your JVC GR-AX720 camcorder, refer to the following common problems and solutions:
| Problem | Possible Cause | Solution |
|---|---|---|
| Camcorder does not power on. | Battery is depleted or not installed correctly. | Charge the battery or ensure it is securely installed. |
| No image in viewfinder during recording. | Lens cap is on. Power switch is not in CAMERA mode. | Remove the lens cap. Set the power switch to CAMERA. |
| Poor video quality during playback. | Dirty tape heads. Damaged tape. | Clean the tape heads using a head cleaner cassette. Try a different tape. |
| No sound during playback. | TV volume is low or muted. A/V cables are not connected correctly. | Adjust TV volume. Check A/V cable connections. |
If the problem persists after attempting these solutions, please contact JVC customer support.
7. Specifications
The following are technical specifications for the JVC GR-AX720 Compact VHS Camcorder:
| Feature | Specification |
|---|---|
| Model Name | JVC GR AX720 |
| Video Capture Format | VHS-C |
| Video Capture Resolution | 480p |
| Optical Zoom | 18x |
| Connectivity Technology | Composite A/V |
| Supported Audio Format | Analog Audio |
| Color | Black |
| Included Components | Battery, Carrying Case, User Manual, VHS-C to RCA Cable |

Image 5: Bottom view of the camcorder, displaying the model number (GR-AX720U) and other regulatory information.
8. Warranty and Support
For warranty information and customer support, please refer to the documentation included with your purchase or visit the official JVC website. Keep your proof of purchase for warranty claims.
JVC Customer Support: For technical assistance or service inquiries, please contact JVC directly through their official support channels.


