
Krups EA815070
Krups EA8150 Essential Espresso Fully Automatic Coffee Machine
Model: EA815070
1. Introduction
Thank you for choosing the Krups EA8150 Essential Espresso fully automatic coffee machine. This manual provides detailed instructions for setup, operation, maintenance, and troubleshooting to ensure you get the best experience from your appliance. Please read this manual carefully before first use and keep it for future reference.
2. Safety Instructions
- Always connect the appliance to a grounded power outlet.
- Do not immerse the appliance, power cord, or plug in water or any other liquid.
- Keep the appliance out of reach of children.
- Unplug the appliance from the power outlet before cleaning or when not in use for an extended period.
- Do not operate the appliance if the power cord or plug is damaged.
- Use only fresh, cold water in the water tank.
- Never put ground coffee into the bean hopper. Only use whole coffee beans.
3. Package Contents
Please check that all items are present in the packaging:
- Krups EA8150 Fully Automatic Coffee Machine
- Integrated Grinder
- 2x Cleaning Tablets (XS3000)
- Descaler
- Instruction Manual
4. Product Overview
Familiarize yourself with the main components of your Krups EA8150 coffee machine.

Figure 4.1: Overall view of the Krups EA8150 Essential Espresso machine.

Figure 4.2: Front view of the Krups EA8150, showing the LCD display and control buttons.

Figure 4.3: Dimensions of the Krups EA8150, indicating its compact size.
5. Setup
5.1 Initial Cleaning
Before first use, clean all removable parts (water tank, drip tray, coffee grounds container) with warm water and mild detergent. Rinse thoroughly and dry.
5.2 Filling the Water Tank
Remove the water tank from the back of the machine. Fill it with fresh, cold drinking water up to the 'MAX' level indicator. Replace the tank securely.
5.3 Adding Coffee Beans
Open the lid of the bean hopper located on top of the machine. Pour whole coffee beans into the hopper. Close the lid firmly to maintain freshness.

Figure 5.1: Coffee bean hopper with grind setting adjustment dial.
5.4 Adjusting Grind Settings
The grind setting can be adjusted using the dial inside the bean hopper (see Figure 5.1). Turn the dial to select your desired grind fineness. Finer grind for stronger coffee, coarser for milder. Adjust only when the grinder is running.
5.5 First Use / Priming
After filling the water tank and bean hopper, plug in the machine. The display will guide you through the initial priming process, which involves rinsing the internal circuits. Follow the on-screen prompts.
6. Operating Instructions
6.1 Making Espresso/Coffee
- Place a cup under the coffee spouts.
- Press the desired coffee button (e.g., Espresso, Coffee).
- The machine will automatically grind the beans and brew your coffee.

Figure 6.1: Brewing coffee with the Krups EA8150.

Figure 6.2: Using the intuitive control panel to select your drink.
6.2 Adjusting Coffee Strength and Volume
Use the '+' and '-' buttons on the control panel to adjust the coffee strength (3 levels) and water volume for your drink. These settings can be adjusted before brewing or during the brewing process for real-time customization.
6.3 Using the Steam Nozzle for Milk Frothing
- Fill a pitcher with cold milk.
- Position the steam nozzle into the milk.
- Activate the steam function via the control panel.
- Move the pitcher up and down to create desired foam.
- After frothing, clean the steam nozzle immediately (see Maintenance section).
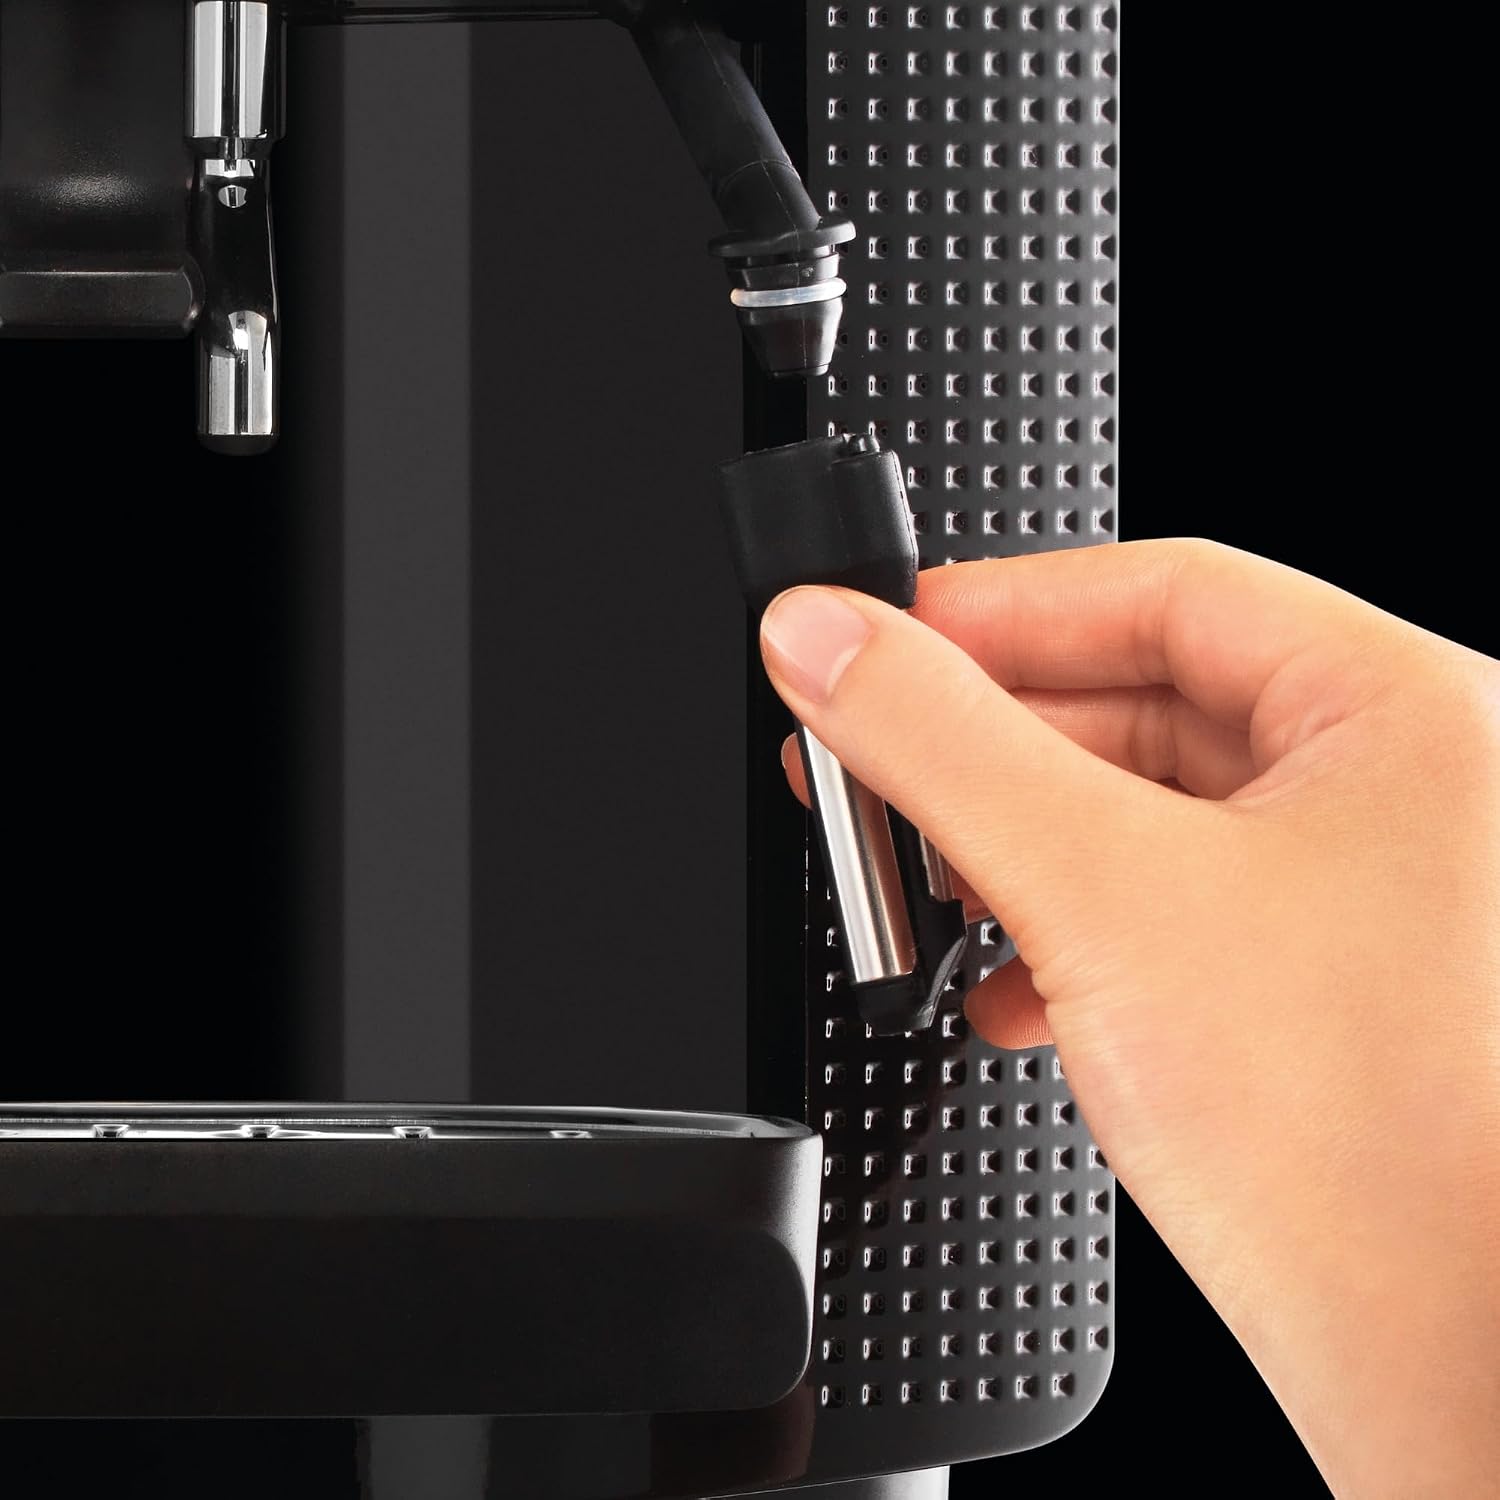
Figure 6.3: Detaching the steam nozzle for cleaning.

Figure 6.4: Example of a milk-based coffee drink prepared with the machine.
6.4 Programming Favorites
The machine allows you to program two favorite coffee preparations. Adjust the settings (strength, volume) to your preference, then press and hold the 'Favorites' button until the setting is saved. You can then recall these settings with a single press.
7. Maintenance and Cleaning
7.1 Daily Cleaning
- Drip Tray: Empty and rinse the drip tray daily or when the 'full' indicator appears.
- Coffee Grounds Container: Empty the coffee grounds container when prompted by the machine or at least once a day. Rinse and dry.
- Steam Nozzle: After each use, wipe the steam nozzle with a damp cloth. For thorough cleaning, detach the nozzle and rinse under running water.
7.2 Descaling
The machine will indicate when descaling is required. Use the provided descaler solution and follow the instructions on the display. Regular descaling is crucial for the longevity and performance of your machine.
7.3 Cleaning Tablets
The machine will prompt for a cleaning cycle using cleaning tablets. Place a cleaning tablet into the designated slot (usually the ground coffee chute) and follow the on-screen instructions. This process cleans the internal brewing unit.
8. Troubleshooting
| Problem | Possible Cause | Solution |
|---|---|---|
| No coffee dispenses | Water tank empty; Coffee beans empty; Brewing unit clogged | Refill water tank; Refill bean hopper; Run a cleaning cycle |
| Coffee is too weak | Grind setting too coarse; Insufficient coffee strength selected | Adjust grind to finer setting; Increase coffee strength on display |
| Machine leaks water | Drip tray full or not properly inserted; Water tank not seated correctly | Empty and reinsert drip tray; Ensure water tank is securely in place |
| Milk frother not working | Steam nozzle clogged; Insufficient steam pressure | Clean steam nozzle thoroughly; Run a descaling cycle if prompted |
9. Specifications
| Feature | Specification |
|---|---|
| Brand | Krups |
| Model Number | EA815070 |
| Color | Black |
| Power | 1450 Watt |
| Water Tank Capacity | 1.7 Liters |
| Pump Pressure | 15 Bar |
| Display Type | LCD-Display |
| Temperature Settings | 3 Levels |
| Grind Settings | 3 Levels |
| Dimensions (LxWxH) | 10.2T x 12.6B x 14.4H cm (approx.) |
| Item Weight | 7.2 Kilograms |
| Special Features | Automatic Shut-off, Double Cup Function, Hot Water Function, Height-adjustable Spout, Programmable |
10. Warranty and Support
Krups is committed to product quality and durability. This appliance is designed for long-term use and features a unique metal brewing unit for enhanced longevity. Krups offers a commitment to 15 years of repairability at a fair price, with a network of 6200 recognized repair workshops worldwide. For technical support, spare parts, or service, please refer to the contact information provided in your product packaging or visit the official Krups website.

Figure 10.1: Krups commitment to 15 years of repairability.
Related documentsEA815070


Ask a question about this manual
Ask about setup, troubleshooting, compatibility, parts, safety, or missing instructions. Manuals+ will review the question and use this page’s manual context to help answer it.