
1. Introduction
The GOWE AS-6DOF Robotic Arm is an automated mechanical device designed for a variety of applications, including industrial manufacturing, medical treatment, entertainment, educational purposes, military, and space exploration. This aluminum robotic arm kit includes an electric control system and is intended to provide an accessible platform for users interested in robotics.
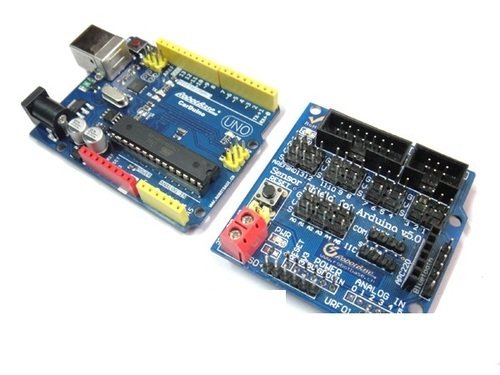
The AS-6DOF robotic arm utilizes an Arduino UNO R3 controller for its control system. Its joints are designed to move within a defined range. Control is achieved via software on a computer, which sends command signals to the Arduino controller for precise spatial operations. A camera can be mounted on the arm to provide visual feedback. When integrated with a mobile platform, the arm can perform visual tasks in hazardous environments, allowing for real-time instruction revision and accurate task completion. It is designed as a versatile and user-friendly robotics platform.
2. Product Overview
The AS-6DOF robotic arm is constructed from aluminum and features six degrees of freedom, allowing for complex movements and positioning. It is designed to be controlled by an Arduino UNO R3 board, making it compatible with a wide range of open-source development tools and programming environments.
An image showing the assembled GOWE AS-6DOF Robotic Arm, highlighting its aluminum construction and multiple joints.
3. Setup
3.1 Unpacking and Inspection
Carefully unpack all components from the packaging. Verify that all parts listed in the packing list are present and undamaged. If any components are missing or damaged, contact customer support immediately.
3.2 Assembly
Follow the detailed assembly instructions provided in the separate assembly guide. Ensure all screws are tightened securely but do not overtighten to avoid stripping threads. Pay close attention to the orientation of each joint and servo motor during assembly.
3.3 Connecting the Control System
- Connect the servo motors to the Arduino UNO R3 controller board according to the provided wiring diagram. Ensure correct polarity for power and signal lines.
- Connect the Arduino UNO R3 to your computer using a USB cable.
- Connect the external power supply to the robotic arm's power input, if required, as specified in the assembly guide. Ensure the power supply matches the voltage and current requirements.
4. Operating Instructions
4.1 Software Installation
Install the Arduino IDE (Integrated Development Environment) on your computer. Download the necessary libraries and example code for the AS-6DOF robotic arm from the official GOWE support website or the provided resources.
4.2 Uploading Firmware
- Open the provided example sketch (firmware) in the Arduino IDE.
- Select the correct Arduino board (Arduino UNO) and the corresponding COM port from the 'Tools' menu.
- Click the 'Upload' button to compile and transfer the firmware to the Arduino UNO R3 board.
4.3 Basic Movement Control
Once the firmware is uploaded, you can use the provided control software or write your own code to send commands to the robotic arm. Commands typically involve specifying target angles for each servo motor. Start with small, controlled movements to familiarize yourself with the arm's operation.
- Joint Control: Each joint can be controlled individually by sending angle commands to its corresponding servo.
- Sequence Programming: Develop sequences of movements to perform specific tasks.
- Safety: Always ensure the arm has clear space to move and keep hands and loose objects away from moving parts during operation.
5. Maintenance
5.1 Cleaning
Regularly clean the robotic arm with a soft, dry cloth to remove dust and debris. Avoid using liquid cleaners directly on electronic components or servo motors.
5.2 Joint Inspection
Periodically inspect all joints and fasteners for looseness. Tighten any loose screws as needed. Check for any signs of wear or damage to the aluminum structure or servo gears.
5.3 Cable Management
Ensure all cables are neatly routed and secured to prevent them from snagging on moving parts or becoming disconnected.
6. Troubleshooting
6.1 Arm Not Responding
- Check Power: Ensure the power supply is correctly connected and providing adequate power to the Arduino and servos.
- USB Connection: Verify the USB cable is securely connected to both the computer and the Arduino. Check the COM port selection in the Arduino IDE.
- Firmware: Confirm that the correct firmware has been successfully uploaded to the Arduino board.
- Wiring: Inspect all servo connections to the Arduino for correct wiring and polarity.
6.2 Erratic Movement
- Power Supply: Insufficient power can cause servos to behave erratically. Ensure the power supply meets the current demands of all servos.
- Servo Damage: A damaged servo motor may cause inconsistent movement. Test individual servos if possible.
- Code Errors: Review your control code for logical errors or incorrect angle commands.
6.3 Overheating Servos
- Overload: Avoid placing excessive loads on the arm that exceed the servo's torque capabilities.
- Continuous Operation: Prolonged continuous operation at high loads can cause overheating. Allow for cool-down periods.
- Friction: Check for any mechanical friction in the joints that might be increasing the load on the servos.
7. Specifications
| Feature | Specification |
|---|---|
| Model | AS-6DOF |
| Degrees of Freedom (DOF) | 6 |
| Material | Aluminum |
| Controller Type | Arduino UNO R3 (compatible) |
| Manufacturer | Gowegroup |
| ASIN | B00NBPROFU |
8. Warranty and Support
For warranty information and technical support, please refer to the documentation provided with your purchase or visit the official GOWE website. Keep your purchase receipt as proof of purchase for warranty claims.