1. Introduction
The KitchenAid KHB2352CU 3-Speed Hand Blender is a versatile kitchen tool designed to simplify your food preparation tasks. It allows you to blend, crush, chop, puree, and whisk a variety of ingredients with ease. This manual provides detailed instructions on how to assemble, operate, maintain, and troubleshoot your hand blender to ensure optimal performance and longevity.
Simply choose the appropriate speed for your ingredients. The chopper attachment is ideal for processing harder cheeses, nuts, and creating graham cracker crusts. The included whisk attachment efficiently whips creams and egg whites to fluffy peaks.
2. Important Safeguards
When using electrical appliances, basic safety precautions should always be followed, including the following:
- Read all instructions before using the hand blender.
- To protect against risk of electrical shock, do not put the motor body in water or other liquid.
- Close supervision is necessary when any appliance is used by or near children.
- Unplug from outlet when not in use, before putting on or taking off parts, and before cleaning.
- Avoid contact with moving parts.
- Do not operate any appliance with a damaged cord or plug, or after the appliance malfunctions or has been dropped or damaged in any manner.
- The use of attachments not recommended or sold by KitchenAid may cause fire, electric shock, or injury.
- Do not use outdoors.
- Do not let cord hang over edge of table or counter.
- Do not let cord contact hot surface, including the stove.
- Blades are sharp. Handle carefully.
3. Parts and Features
Familiarize yourself with the components of your KitchenAid Hand Blender:
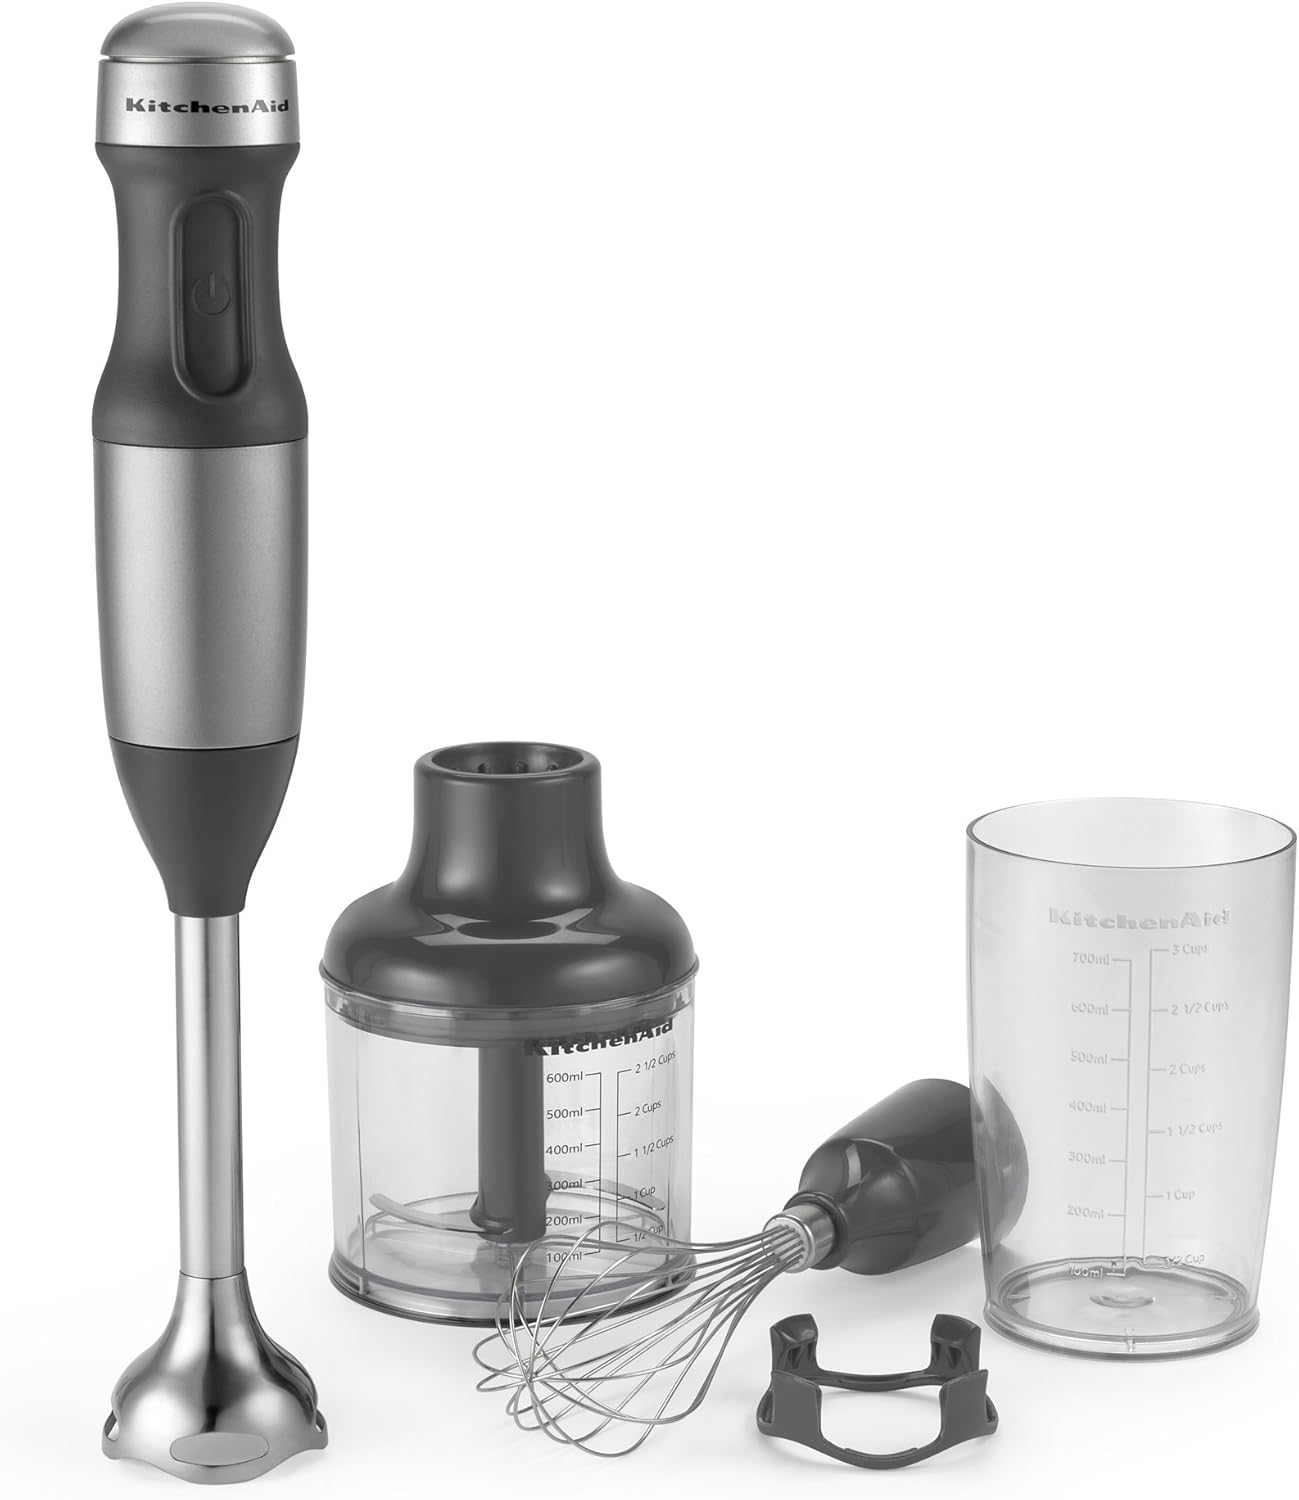
Image: The KitchenAid KHB2352CU 3-Speed Hand Blender showing the motor body, blending arm, whisk attachment, chopper attachment, and blending jar.
- Motor Body: The main unit containing the motor and speed controls. Features a soft grip handle for comfortable use.
- Removable 8" Blending Arm: Locks into the motor body and features a stainless steel S-shaped fixed blade for efficient blending.
- Whisk Attachment: Used for whipping egg whites, cream, and emulsifying liquids. Top-rack dishwasher safe.
- 2 1/2-Cup BPA-Free Chopper Attachment: Ideal for chopping herbs, nuts, cheese, and cooked meat. Comes with a lid.
- 3-Cup BPA-Free Blending Jar with Lid: Convenient for individual blending tasks, serving, or storing. Features clear measurements. Top-rack dishwasher safe.

Image: A close-up view of the KitchenAid 3-Cup BPA-Free Blending Jar, clearly showing the measurement markings in milliliters and cups.
4. Assembly and Setup
Before first use, wash all parts that will come into contact with food. Ensure the hand blender is unplugged before assembling or disassembling.
Attaching the Blending Arm:
- Align the blending arm with the motor body.
- Twist the blending arm clockwise until it locks securely into place. You should hear a click.
Attaching the Chopper Attachment:
- Place the chopper blade onto the center post inside the chopper bowl.
- Place the chopper lid onto the chopper bowl, aligning the tabs.
- Align the motor body with the chopper lid and twist clockwise until it locks.
Attaching the Whisk Attachment:
- Insert the whisk into the whisk adapter.
- Align the whisk adapter with the motor body and twist clockwise until it locks.
5. Operating Instructions
The KitchenAid Hand Blender features 3 speeds for various blending tasks. Always ensure the appliance is properly assembled before plugging it in.
Using the Blending Arm:
- Attach the blending arm to the motor body as described in Section 4.
- Plug the hand blender into a power outlet.
- Immerse the blending arm into the ingredients. Ensure the blade guard is fully submerged to prevent splashing.
- Press and hold the power button to activate. The blender will operate as long as the button is held.
- Move the blending arm up and down through the ingredients for thorough blending.
- Release the power button to stop.
- Unplug the appliance before removing the blending arm or cleaning.
Using the Chopper Attachment:

Image: The KitchenAid Hand Blender motor body attached to the chopper attachment, actively processing ingredients inside the chopper bowl.
- Assemble the chopper attachment as described in Section 4.
- Add ingredients to the chopper bowl. Do not overfill.
- Plug in the hand blender.
- Press and hold the power button to chop. Use short pulses for coarse chopping, or hold longer for finer results.
- Release the power button to stop.
- Unplug the appliance before disassembling or cleaning.
Using the Whisk Attachment:

Image: A detailed close-up of the KitchenAid whisk attachment, showing its wire construction and connection point.
- Assemble the whisk attachment as described in Section 4.
- Plug in the hand blender.
- Immerse the whisk into the ingredients (e.g., egg whites, cream).
- Press and hold the power button to whisk. Move the whisk in a circular motion for even results.
- Release the power button to stop.
- Unplug the appliance before disassembling or cleaning.
6. Care and Cleaning
Proper cleaning ensures the longevity and hygiene of your hand blender. Always unplug the appliance before cleaning.
- Motor Body: Wipe the motor body with a damp cloth. Do not immerse the motor body in water or any other liquid.
- Blending Arm, Whisk Attachment, Chopper Bowl, Chopper Lid, Blending Jar: These parts are top-rack dishwasher safe. Alternatively, they can be hand-washed in warm, soapy water. Rinse thoroughly and dry.
- Chopper Blade: Handle the chopper blade with extreme care as it is very sharp. Wash with warm, soapy water and rinse thoroughly.
- For quick cleaning of the blending arm, place a small amount of water with dish soap in your blending jar, submerge the blending arm, and give it a pulse or two. Rinse clean.
7. Troubleshooting
If you experience issues with your KitchenAid Hand Blender, refer to the following table:
| Problem | Possible Cause | Solution |
|---|---|---|
| Hand blender does not turn on. | Not plugged in; Power outlet not working; Attachment not properly secured. | Ensure the hand blender is securely plugged into a working outlet. Check that the attachment is fully locked into the motor body. |
| Blending arm detaches during use. | Blending arm not securely locked; Excessive force or twisting during operation. | Ensure the blending arm is twisted clockwise until it clicks firmly into place. Avoid applying excessive twisting force during operation. If the issue persists, contact customer support. |
| Ingredients are not blending/chopping effectively. | Too much liquid/too few solids; Overfilled chopper bowl; Blade is dull or damaged. | Adjust ingredient consistency. Do not overfill the chopper bowl. Ensure the blade is clean and free from debris. If the blade is dull or damaged, contact customer support for replacement parts. |
| Motor sounds strained or overheats. | Processing too thick/hard ingredients; Continuous operation for too long. | Reduce the load by adding more liquid or processing smaller batches. Allow the appliance to cool down before resuming operation. |
8. Specifications
| Feature | Detail |
|---|---|
| Brand | KitchenAid |
| Model | KHB2352CU |
| Product Dimensions | 12.7 x 12.7 x 40.13 cm |
| Item Weight | 2 Pounds (approx. 907.18 g) |
| Material Type | Polycarbonate |
| Power Source | Corded Electric |
| Number of Speeds | 3 |
| Special Features | Portable |
| Included Components | Motor Body, Blending Arm, Whisk Attachment, Chopper Attachment, Blending Jar |
| Material Type Free | BPA Free |
9. Warranty and Customer Support
KitchenAid products are built to last and are backed by a comprehensive warranty. For specific warranty details, please refer to the warranty card included with your product or visit the official KitchenAid website.
If you have any questions, require assistance, or need to order replacement parts, please contact KitchenAid Customer Service. Contact information can typically be found on the KitchenAid website or in your product packaging.


