1. Introduction
This manual provides essential information for the installation and use of your A-Tech 2GB DIMM DDR3 Non-ECC PC3-10600 1333MHz RAM Memory Module. Please read these instructions carefully before proceeding with installation to ensure proper function and to prevent damage to your system or the memory module.

Figure 1: A-Tech 2GB DIMM DDR3 RAM Memory Module in its protective packaging. The packaging includes product labels and a barcode (UPC: 5053462000007).
Random Access Memory (RAM) is a critical component that allows your computer to store data temporarily for quick access. Upgrading your system's RAM can enhance overall performance, improve multitasking capabilities, and speed up application loading times.
2. Safety Information
- Electrostatic Discharge (ESD) Precautions: Always handle memory modules by their edges. Avoid touching the gold connector pins or the integrated circuits (chips). Wear an anti-static wrist strap or frequently touch a grounded metal object (like the computer chassis) to discharge static electricity before handling components.
- Power Off: Ensure your computer is completely powered off and unplugged from the wall outlet before opening the case or installing any components.
- Physical Damage: Do not force the memory module into the slot. If it does not fit easily, recheck its orientation and the slot type. Excessive force can damage both the module and the motherboard.
- Ventilation: Ensure adequate ventilation around your computer to prevent overheating, especially after hardware upgrades.
3. Compatibility
This A-Tech 2GB DIMM DDR3 Non-ECC PC3-10600 1333MHz RAM Memory Module is designed for compatibility with various Acer Aspire All-in-One and Desktop PC systems. Please verify your system's specific memory requirements before installation. Refer to your computer's official documentation or manufacturer's website for precise compatibility details.
Compatible Acer Aspire Models include:
- Acer Aspire Z3730, Z3731
- Acer Aspire AX3300, AX3400-U2022
- Acer Aspire AZ3750, AZ3751, AZ5600, AZ5600-xxx
- Acer Aspire M1660, M1900, M1930
This module is a DIMM (Dual In-line Memory Module) type, which is typically used in desktop computers. It is not compatible with systems requiring SODIMM (Small Outline DIMM) memory, which is common in laptops and some compact All-in-One PCs.

Figure 2: Illustration showing the size difference between a standard DIMM (left) and a SODIMM (right) memory module. Ensure your system uses DIMM modules.
4. Installation (Setup)
Follow these steps to install your new A-Tech memory module:
- Prepare Your System: Shut down your computer completely. Disconnect the power cable and any other peripherals. Press and hold the power button for a few seconds to discharge any residual power.
- Open the Computer Case: Carefully open your computer's case. Refer to your computer's manual for specific instructions on how to access the motherboard and memory slots.
- Locate Memory Slots: Identify the DIMM memory slots on your motherboard. If you are replacing existing modules, note their orientation. If adding to empty slots, ensure they are compatible with DDR3 DIMM modules.
- Handle the Module: Remove the new A-Tech memory module from its anti-static packaging. Hold it only by the edges to avoid touching the gold contacts or chips.
- Insert the Module: Align the notch on the memory module with the key in the DIMM slot. Gently push the module straight down into the slot until the clips on both ends snap into place, securing the module. Do not force it. If the clips do not engage, the module may not be fully seated or correctly aligned.
- Close the Case: Once the module is securely installed, close your computer's case.
- Reconnect and Power On: Reconnect all cables and power on your computer.
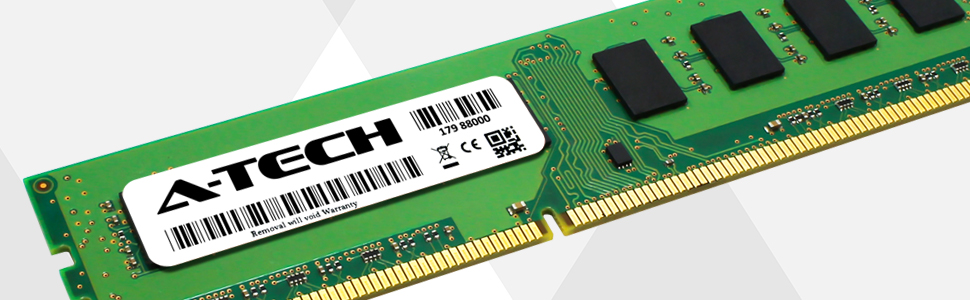
Figure 3: A close-up view of an A-Tech DIMM memory module, highlighting the gold contacts and the notch for proper slot alignment.
5. Operating
After successful installation and powering on your computer, the system should automatically detect the new memory. You can verify the installed RAM in the following ways:
- BIOS/UEFI: Access your computer's BIOS or UEFI settings during startup (usually by pressing F2, Del, or F10). The system information section typically displays the total installed RAM.
- Operating System:
- Windows: Right-click on 'This PC' or 'My Computer', select 'Properties'. The 'System' window will show the 'Installed RAM'.
- macOS: Click the Apple menu, then 'About This Mac'. The 'Overview' tab will display the memory information.
- Linux: Open a terminal and use commands like
free -horcat /proc/meminfo.
If the system recognizes the new memory, your installation was successful. No further configuration is typically required for standard memory modules.
6. Maintenance
A-Tech memory modules are designed for long-term reliability and generally require no specific maintenance once installed. To ensure optimal performance and longevity:
- Keep System Clean: Regularly clean the interior of your computer case to prevent dust buildup, which can impede airflow and lead to overheating of components, including RAM.
- Proper Handling: If you ever need to remove or re-install the module, always follow the safety precautions outlined in Section 2.
- Environmental Conditions: Operate your computer within recommended temperature and humidity ranges to protect all internal components.
7. Troubleshooting
If you encounter issues after installing the memory module, consider the following troubleshooting steps:
- No Display/System Not Booting:
- Ensure the memory module is fully seated in its slot. Remove and re-insert it, making sure the clips snap into place.
- Verify that the module is compatible with your motherboard and CPU.
- If multiple modules are installed, try booting with only the new A-Tech module, or try it in a different slot.
- Incorrect RAM Amount Detected:
- Check your system's BIOS/UEFI settings to confirm the detected memory.
- Ensure your operating system is 64-bit to fully utilize more than 4GB of RAM (though this module is 2GB, it's good practice).
- Verify that all modules are of the correct type (DDR3) and speed (1333MHz) for your system.
- System Instability/Crashes:
- Run a memory diagnostic tool (e.g., Windows Memory Diagnostic, MemTest86) to check for errors.
- Ensure your motherboard's BIOS/UEFI is updated to the latest version, as this can improve memory compatibility.
If problems persist, contact A-Tech support for further assistance.
8. Specifications
| Feature | Detail |
|---|---|
| Brand | A-Tech |
| Model Number | MS6309577 |
| Memory Size | 2 GB |
| Memory Type | DIMM DDR3 |
| ECC Type | Non-ECC Unbuffered |
| Speed | PC3-10600 (1333MHz) |
| Pin Count | 240-Pin |
| Voltage | 1.5V (Standard DDR3) |
| Compatible Devices | Desktop PCs (Acer Aspire series) |
| Product Dimensions | 6.7 x 2.3 x 0.4 inches |
| Item Weight | 1.2 ounces |
| UPC | 5053462000007 |
This memory module is designed to improve system performance by providing faster loading times, enhanced responsiveness, and better handling of demanding applications.

Faster Performance

Improved Responsiveness

Enhanced Reliability
9. Warranty and Support
A-Tech memory modules come with a Lifetime Warranty, ensuring peace of mind regarding the quality and durability of your purchase. This warranty covers defects in materials and workmanship for the life of the product.
For technical support, warranty claims, or any questions regarding your A-Tech memory module, please visit our official website or contact our customer service team.