
Product Overview
The Dixon CS Crimp Sleeve (Model CS300-5CS) is a component designed for secure hose connections. It features a 3-inch inner diameter (ID) and an outer diameter (OD) ranging from 3-29/64 inches to 3-32/64 inches, with a 3.563-inch ID for the crimp style sleeve. This sleeve is used in industrial applications, particularly within hydraulics, pneumatics, and plumbing systems, to create reliable and durable hose assemblies.
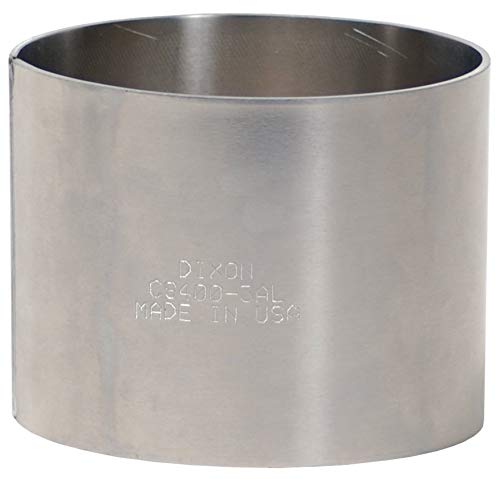
Image: A silver-colored metal crimp sleeve, cylindrical in shape, with "DIXON CS300-3AL MADE IN USA" embossed on its side. This image shows the general appearance and branding of the Dixon CS Crimp Sleeve.
Specifications
| Attribute | Detail |
|---|---|
| Brand | Dixon |
| Model | CS300-5CS |
| Inner Diameter (ID) | 3 inches |
| Outer Diameter (OD) Range | 3-29/64 inches to 3-32/64 inches |
| Crimp Sleeve ID | 3.563 inches |
| Connector Type | Crimp |
| Item Weight | 1.08 Pounds |
| Manufacturer | Dixon Valve & Coupling |
Safety Information
Always follow proper safety procedures when working with hydraulic and pneumatic systems. Wear appropriate personal protective equipment (PPE), including safety glasses and gloves. Ensure all connections are secure before pressurizing any system. Refer to the hose and fitting manufacturer's guidelines for specific crimping procedures and pressure ratings.
Setup and Installation
The Dixon CS Crimp Sleeve is designed for use with compatible hoses and fittings. Proper installation is critical for system integrity and safety.
Required Tools:
- Hose crimping machine
- Appropriate crimping dies for the sleeve and hose combination
- Hose cutting tool
- Measuring tape or caliper
- Safety glasses and gloves
Installation Steps:
- Prepare the Hose: Cut the hose to the desired length, ensuring a clean, square cut. Remove any burrs or debris from the hose end.
- Insert Fitting: Carefully insert the appropriate hose fitting into the end of the hose. Ensure the fitting is fully seated according to the fitting manufacturer's specifications.
- Position the Crimp Sleeve: Slide the Dixon CS Crimp Sleeve over the hose and fitting assembly. The sleeve should be positioned correctly over the crimp area of the fitting.
- Crimp the Assembly: Place the hose and sleeve assembly into the crimping machine with the correct dies. Follow the crimping machine manufacturer's instructions for setting the crimp diameter and performing the crimp. Ensure the crimp is uniform and meets the specified diameter.
- Inspect the Crimp: After crimping, visually inspect the sleeve for any cracks, deformities, or incomplete crimps. Measure the crimped diameter to ensure it falls within the acceptable range specified by the fitting manufacturer.
Note: Always refer to the specific crimping specifications provided by the hose and fitting manufacturers for optimal performance and safety. Incorrect crimping can lead to system failure.
Operating Considerations
Once installed, the crimp sleeve forms a permanent connection. The operational integrity of the assembly depends on the quality of the crimp and the compatibility of all components (hose, fitting, and sleeve) with the system's operating conditions, including pressure, temperature, and fluid type.
- Do not exceed the maximum working pressure or temperature ratings of the hose assembly.
- Avoid exposing the assembly to chemicals or environments incompatible with the sleeve material.
- Ensure the hose assembly is not subjected to excessive bending, twisting, or abrasion during operation.
Maintenance and Inspection
Regular inspection of hose assemblies is crucial for preventing failures and ensuring safe operation.
Inspection Checklist:
- Visual Inspection: Check the crimp sleeve for any signs of corrosion, cracks, deformation, or slippage.
- Leakage: Inspect for any signs of fluid leakage around the crimped connection.
- Hose Condition: Examine the hose itself for cuts, abrasions, bulges, or hardening.
- Fitting Integrity: Ensure the fitting remains securely seated within the hose and sleeve.
If any damage or signs of wear are observed, the hose assembly should be immediately removed from service and replaced. Do not attempt to repair a damaged crimp sleeve or hose assembly.
Troubleshooting
Most issues related to crimp sleeves stem from improper installation or component incompatibility. If a problem occurs, consider the following:
- Leakage at Crimp:
- Possible Cause: Incorrect crimp diameter (too loose or too tight).
- Solution: Verify crimp specifications and re-crimp with correct settings, or replace the assembly.
- Possible Cause: Incompatible hose, fitting, or sleeve.
- Solution: Ensure all components are designed to work together.
- Sleeve Slippage:
- Possible Cause: Insufficient crimp force or incorrect die selection.
- Solution: Re-evaluate crimping process and equipment. Replace assembly.
- Premature Failure:
- Possible Cause: Exceeding pressure/temperature ratings, chemical incompatibility, or excessive abrasion.
- Solution: Review system operating conditions and material compatibility.
For persistent issues, consult with a qualified hydraulics or pneumatics professional.
Warranty and Support
For information regarding warranty coverage for Dixon products, please refer to the official Dixon Valve & Coupling company website or contact their customer support directly. Warranty terms typically cover manufacturing defects under normal use conditions.
For technical support, product inquiries, or assistance with specific applications, please contact Dixon Valve & Coupling through their official channels:
- Website: www.dixonvalve.com (Note: This is a general example, actual link may vary.)
- Customer Service: Refer to the website for contact numbers or email addresses.
When contacting support, please have your product model number (CS300-5CS) and any relevant purchase information available.