
Introduction
This manual provides essential information for the proper installation, operation, and maintenance of the Dixon CS400-3SS 304SS Crimp Style Sleeve. Please read these instructions carefully before use to ensure safe and efficient performance. Retain this manual for future reference.
Product Overview
The Dixon CS400-3SS is a King Crimp Style Sleeve constructed from 304 Stainless Steel, designed for use with compatible crimp style shanks. It is engineered for industrial applications requiring secure hose connections.
Key Features:
- Material: 304 Stainless Steel
- Type: King Crimp Style Sleeve
- Inner Diameter (ID): 4.375" (111.13mm)
- Wall Thickness: 0.09"
- Compatible Hose ID: 4"
- Compatible Hose Outer Diameter (OD): 4-21/64" - 4-24/64"
Safety Information
WARNING: Improper installation or use can lead to serious injury or equipment damage. Adhere to all safety guidelines.
- Only use Dixon crimp style shanks with Dixon crimp style sleeves and ferrules.
- Do not interchange products from other manufacturers with Dixon products due to potential differences in dimensions and tolerances.
- Pressure ratings are specified at 70°F (21°C). Consult Dixon for pressure ratings at elevated temperatures.
- Always wear appropriate personal protective equipment (PPE) during installation and maintenance.
- Ensure all connections are secure and leak-free before operating any system.
Setup and Installation
Proper installation is crucial for the performance and safety of the crimp style sleeve. Follow these steps carefully:
- Select Compatible Components: Ensure you are using a Dixon crimp style shank and ferrule that are compatible with the CS400-3SS sleeve and the hose being used. Refer to Dixon's product specifications for compatibility.
- Prepare Hose: Cut the hose squarely to the desired length. Ensure the hose ends are clean and free from debris.
- Insert Shank: Carefully insert the crimp style shank into the hose end. Ensure the shank is fully seated.
- Position Sleeve: Slide the CS400-3SS crimp style sleeve over the hose and shank assembly. The sleeve should be positioned correctly over the crimping area of the shank.
- Crimp Connection: Using appropriate crimping equipment, crimp the sleeve according to Dixon's recommended crimping specifications for the specific hose and shank combination. Verify the crimp diameter after the process.
- Inspect Connection: Visually inspect the crimped connection for any signs of damage, improper crimping, or misalignment. The crimp should be uniform and secure.
- Test System: Before full operation, conduct a low-pressure test of the system to check for leaks. Gradually increase pressure to the operating level while monitoring for any issues.
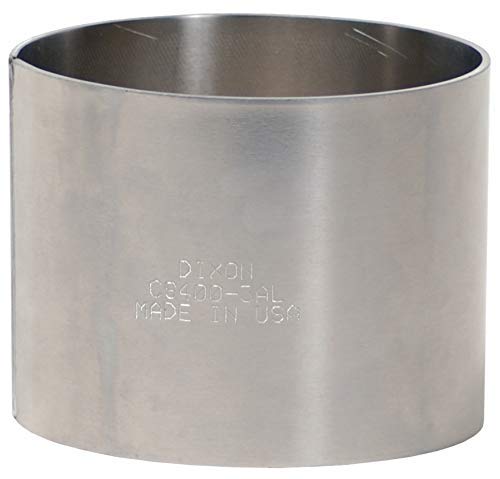
Image: A cylindrical stainless steel component, identified by engraved text as 'DIXON CS400-3AL MADE IN USA'. This image represents the general form factor of the Dixon CS400-3SS 304SS Crimp Style Sleeve.
Operating Considerations
Once installed, the Dixon CS400-3SS sleeve forms a permanent part of the hose assembly. Ensure that the operating conditions remain within the specified limits for the entire hose assembly, including pressure, temperature, and fluid compatibility.
- Pressure: Do not exceed the maximum working pressure of the hose assembly. Refer to Dixon's specifications for pressure ratings at various temperatures.
- Temperature: Operating temperatures should be within the limits of all components in the assembly (hose, shank, sleeve).
- Fluid Compatibility: Ensure the 304 Stainless Steel material is compatible with the fluid being conveyed to prevent corrosion or degradation.
Maintenance
The Dixon CS400-3SS crimp style sleeve itself requires minimal maintenance once properly installed. However, regular inspection of the entire hose assembly is recommended.
- Visual Inspection: Periodically inspect the crimped connection for any signs of wear, corrosion, cracks, or deformation.
- Leak Checks: Regularly check for leaks around the crimped area, especially during system operation.
- Environmental Factors: Protect the hose assembly from harsh environmental conditions that could accelerate wear or corrosion.
- Replacement: If any damage or degradation is observed, the entire hose assembly should be replaced immediately. Do not attempt to repair a damaged crimped connection.
Troubleshooting
Most issues related to crimp style sleeves stem from improper installation or component incompatibility.
| Problem | Possible Cause | Solution |
|---|---|---|
| Leakage at connection | Improper crimp diameter; incompatible components; damaged hose or shank; excessive pressure. | Verify crimp specifications and re-crimp if necessary (with new components). Ensure all components are compatible. Replace damaged parts. Check system pressure. |
| Hose pull-out | Insufficient crimp; incorrect hose or shank size; improper installation. | Ensure correct crimp diameter and proper seating of shank. Verify hose and shank compatibility. Re-install with new components following instructions. |
| Corrosion on sleeve | Exposure to incompatible fluids or harsh environmental conditions. | Ensure fluid compatibility with 304 Stainless Steel. Protect assembly from corrosive environments. Replace if corrosion compromises integrity. |
If troubleshooting steps do not resolve the issue, contact Dixon customer support or a qualified technician.
Specifications
| Attribute | Value |
|---|---|
| Model Number | CS400-3SS |
| Material | 304 Stainless Steel |
| Type | King Crimp Style Sleeve |
| Inner Diameter (ID) | 4.375" (111.13mm) |
| Wall Thickness | 0.09" |
| Compatible Hose ID | 4" |
| Compatible Hose OD Range | 4-21/64" to 4-24/64" |
| Item Weight | 1.4 Pounds |
| Manufacturer | Dixon |
Warranty and Support
For information regarding product warranty, technical support, or to purchase replacement parts, please contact Dixon directly through their official website or customer service channels.
Dixon Official Website: www.dixonvalve.com