
1. Introduction
Thank you for purchasing the TekPower TP3010E DC Adjustable Switching Power Supply. This high-quality, stable power supply is designed for various laboratory and industrial applications, providing continuously adjustable output from 0-30V DC and 0-10A. It features a large LCD display for precise voltage and current readings and includes an 8A fuse for protection. Please read this manual thoroughly before operation to ensure safe and efficient use of the device.
Important Note: This power supply is not designed for use in electroplating or anodizing applications.
2. Safety Information
To prevent electric shock, fire, or damage to the unit, please observe the following safety precautions:
- Always connect the power supply to a properly grounded AC outlet.
- Do not operate the unit in wet or damp conditions.
- Ensure adequate ventilation around the unit. Do not block the ventilation openings.
- Do not open the casing of the power supply. There are no user-serviceable parts inside. Refer all servicing to qualified personnel.
- Before making any connections or disconnections, ensure the power supply is turned off and disconnected from the AC mains.
- Verify the input voltage matches the power supply's requirements (110V for this model).
- Avoid short-circuiting the output terminals for extended periods.
- Keep the unit away from flammable materials and explosive gases.
3. Product Overview
The TekPower TP3010E is a compact and efficient DC switching power supply. Below are the key components and controls.
3.1 Front Panel Controls and Indicators

Figure 3.1: Front Panel of the TP3010E Power Supply.
This image displays the front panel of the TekPower TP3010E. Visible components include the large LCD digital display at the top, below which are four rotary knobs for adjusting voltage and current. The top two knobs are labeled "VOLTAGE" (Coarse and Fine adjustments), and the bottom two are labeled "CURRENT" (Coarse and Fine adjustments). At the bottom left is the "ON/OFF" rocker switch. To the right of the switch are the output terminals: a red positive (+) terminal and a black negative (-) terminal.
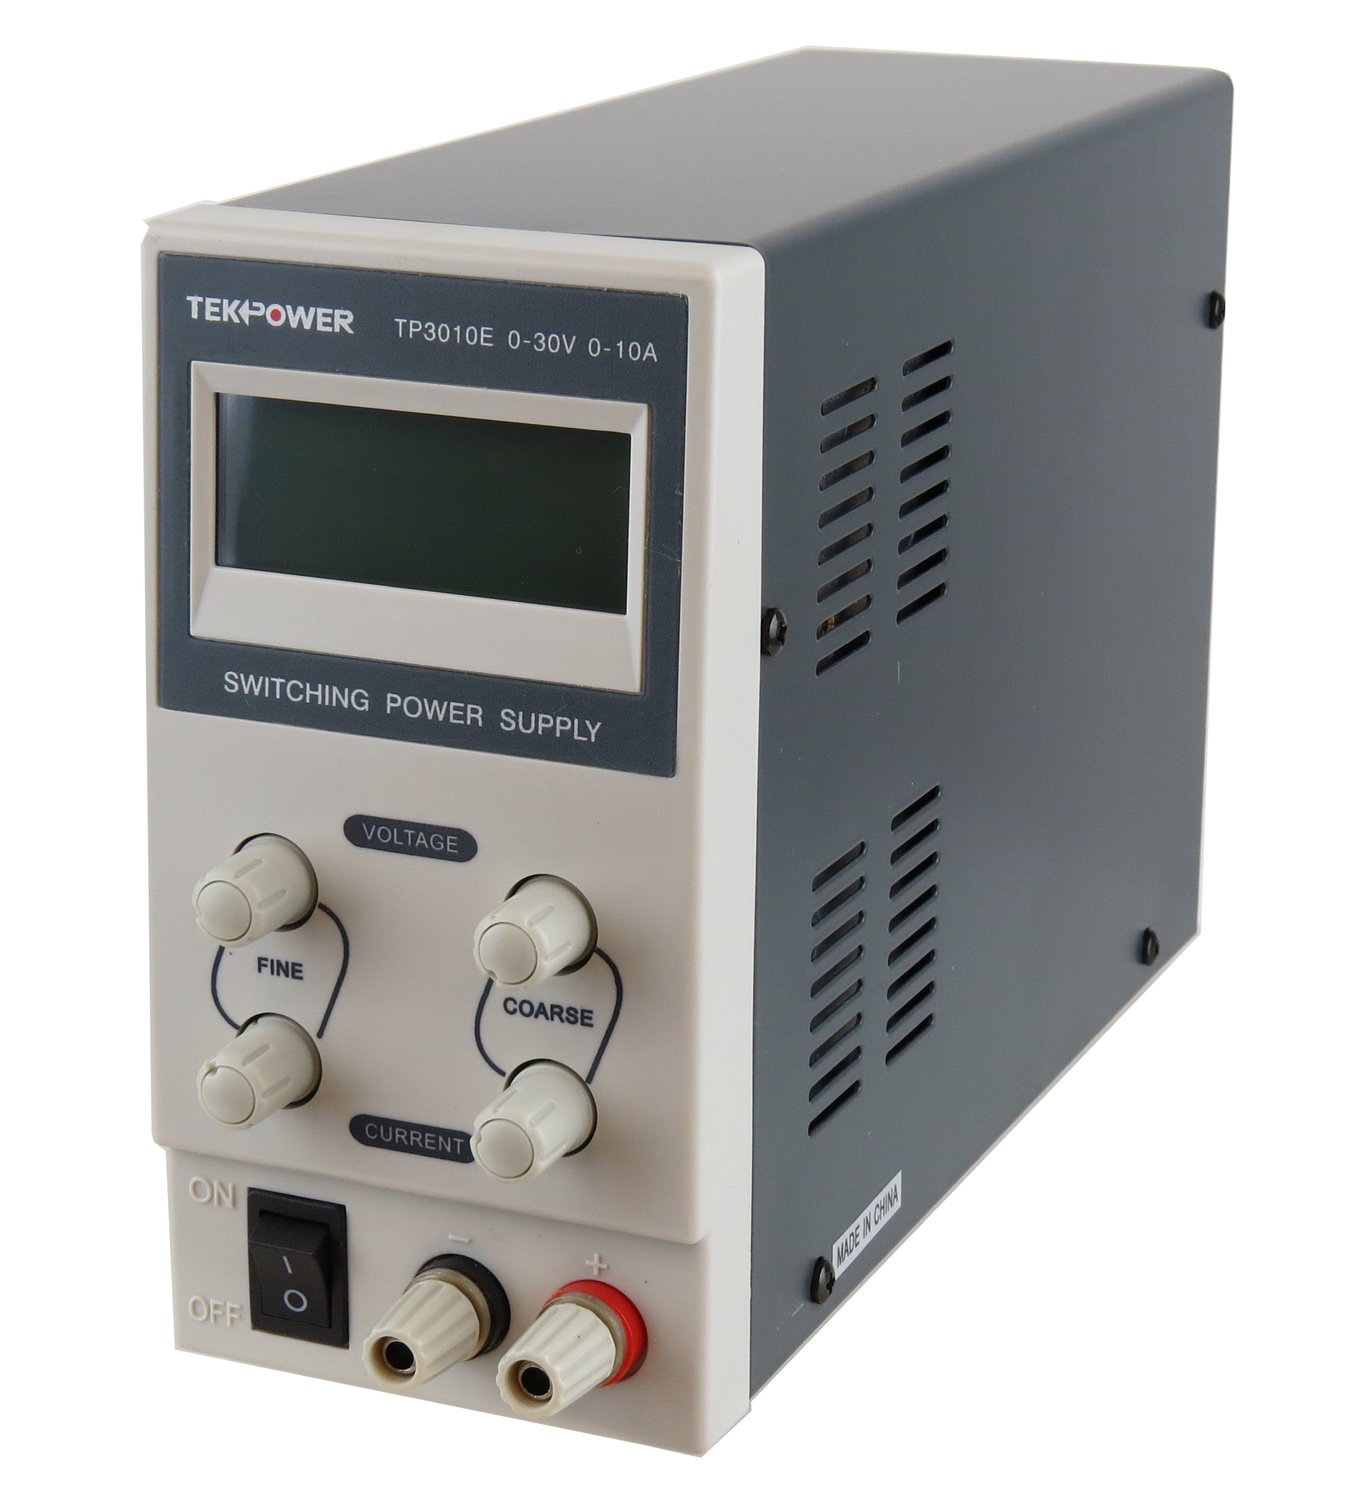
Figure 3.2: Illuminated Display of the TP3010E Power Supply.
This image shows the front panel of the TekPower TP3010E with its LCD display illuminated. The display clearly shows digital readings for voltage (V) and current (A), along with indicators for Constant Voltage (C.V) and Constant Current (C.C) modes. The voltage and current adjustment knobs, and the power switch are also visible, similar to Figure 3.1, but with the unit powered on.
- LCD Digital Display: Shows real-time voltage and current output.
- Voltage Adjustment Knobs (Coarse/Fine): Used to set the desired output voltage.
- Current Adjustment Knobs (Coarse/Fine): Used to set the desired output current limit.
- Power Switch (ON/OFF): Controls the main power to the unit.
- Output Terminals (+/-): Connect your load here. Red for positive, black for negative.
3.2 Rear Panel Components

Figure 3.3: Rear Panel of the TP3010E Power Supply.
This image displays the rear panel of the TekPower TP3010E. Prominently featured is a circular cooling fan grille in the upper center. Below the fan, there is an IEC C14 power inlet socket for the AC power cord, and to its right, a fuse holder with an 8A fuse indicated. A label provides operation instructions for the radiator fan, stating it will cool automatically when the temperature exceeds 50 degrees Celsius.
- Cooling Fan: Automatically activates when the internal temperature exceeds 50°C to dissipate heat.
- AC Power Input: Connects the power supply to the mains electricity using the provided power cord.
- Fuse Holder: Contains an 8A fuse for overcurrent protection.
- Serial Number Label: Displays the unit's unique serial number.
4. Setup
Follow these steps to set up your TekPower TP3010E power supply:
- Unpacking: Carefully remove the power supply and all accessories from the packaging. Verify that all components are present: the TP3010E unit, power cord, and user manual.
- Placement: Place the unit on a stable, level surface with adequate ventilation. Ensure that the front and rear panels, especially the cooling fan, are not obstructed.
- Power Connection:
- Ensure the power switch on the front panel is in the "OFF" position.
- Connect the provided AC power cord to the AC power input socket on the rear panel of the power supply.
- Plug the other end of the AC power cord into a grounded 110V AC outlet.
- Initial Check: Before connecting any load, turn the power switch to "ON". The LCD display should illuminate and show voltage and current readings. Turn the voltage and current knobs to observe changes in the display. Then, turn the power switch to "OFF".

Figure 4.1: TP3010E Unit with Included Accessories.
This image shows the TekPower TP3010E power supply unit alongside its included accessories. These include the AC power cord (black, three-prong plug), a set of red and black output cables with banana plugs on one end and alligator clips on the other, and the user manual. This illustrates the typical contents of the product package.
5. Operating Instructions
The TP3010E operates in two modes: Constant Voltage (CV) and Constant Current (CC). The unit automatically switches between these modes depending on the load and the set voltage/current limits.
5.1 Setting Voltage and Current Limits
- Power On: Ensure no load is connected to the output terminals. Turn the power switch to "ON".
- Set Voltage: Adjust the "VOLTAGE COARSE" knob to set the approximate desired voltage. Use the "VOLTAGE FINE" knob for precise adjustments. The LCD will display the set voltage.
- Set Current Limit (Pre-setting):
- Turn the "CURRENT COARSE" knob fully counter-clockwise (to minimum current).
- Momentarily short-circuit the output terminals using a test lead (connect positive to negative). The "C.C" indicator on the display should light up, and the current display will show the current limit.
- Adjust the "CURRENT COARSE" and "CURRENT FINE" knobs to set the desired maximum current limit for your application.
- Remove the short-circuit from the output terminals. The "C.V" indicator should light up, and the current display will drop to zero or near zero.
- Connect Load: Connect your device or circuit to the output terminals (red to positive, black to negative).
- Operation: The power supply will now deliver the set voltage up to the set current limit. If the load draws more current than the set limit, the unit will switch to Constant Current (CC) mode, and the output voltage will drop to maintain the set current. If the load draws less current, it will operate in Constant Voltage (CV) mode.
5.2 Powering Off
Before turning off the power supply, it is recommended to disconnect the load first, especially if the load is sensitive to voltage decay. The power supply's output voltage may decay slowly after the power switch is turned off due to internal capacitor discharge.
- Disconnect the load from the output terminals.
- Turn the power switch to "OFF".
- Unplug the AC power cord from the wall outlet if the unit will not be used for an extended period.
6. Maintenance
- Cleaning: Use a soft, dry cloth to clean the exterior of the unit. Do not use abrasive cleaners or solvents.
- Ventilation: Regularly check that the ventilation openings and the cooling fan on the rear panel are free from dust and obstructions. Use compressed air to clear dust if necessary.
- Fuse Replacement: If the unit fails to power on, check the 8A fuse located in the fuse holder on the rear panel.
- Ensure the power supply is disconnected from the AC mains.
- Carefully remove the fuse holder cap.
- Replace the blown fuse with a new fuse of the same type and rating (8A).
- Securely replace the fuse holder cap.
- Storage: When not in use for long periods, store the power supply in a cool, dry place, away from direct sunlight and extreme temperatures.
7. Troubleshooting
| Problem | Possible Cause | Solution |
|---|---|---|
| Unit does not power on. | No AC power; Blown fuse; Faulty power cord. | Check AC outlet and power cord connection. Replace 8A fuse if blown. |
| Display goes blank or flickers. | Internal transient condition; Loose internal connection (rare). | Turn off the unit, wait a few seconds, then turn it back on. If persistent, contact support. |
| No output voltage/current. | Output terminals not connected; Voltage/current knobs set to zero; Unit in CC mode with no load. | Ensure load is connected. Adjust voltage/current knobs. Check if the unit is in CV mode (C.V indicator lit) when no load is present. |
| Output voltage drops significantly under load. | Unit is in Constant Current (CC) mode; Load resistance too low for set current. | Increase the current limit setting. Ensure the load's current draw does not exceed the power supply's maximum output (10A). |
| Cooling fan is running constantly or loudly. | High internal temperature; Fan obstruction. | Ensure adequate ventilation. Clear any obstructions from the fan grille. This is normal operation if the unit is under heavy load. |
8. Specifications
| Parameter | Value |
|---|---|
| Output Voltage | 0-30V DC (Adjustable) |
| Output Current | 0-10A (Adjustable) |
| Input Voltage | 110V AC |
| Voltage Regulation (CV) | <= 0.02% + 10mV |
| Load Regulation (CV) | <= 0.02% + 5mV |
| Ripple Noise (CV) | <= 100mVp-p |
| Protection | Current Limit, 8A Fuse |
| Operating Environment | 0-40 °C, Relative Humidity <80% |
| Dimensions (L x W x H) | 9 x 3.4 x 6.3 inches (approx. 22.86 x 8.64 x 16.0 cm) |
| Weight | 4 lbs (approx. 1.81 kg) |
| Cooling Method | Air (Automatic Fan) |
9. Warranty and Support
The TekPower TP3010E DC Adjustable Switching Power Supply comes with a 1-year basic warranty from the date of purchase. This warranty covers defects in materials and workmanship under normal use.
For warranty claims, technical support, or service inquiries, please contact TekPower customer service. Please have your product model number (TP3010E) and serial number ready when contacting support.
Retain your proof of purchase for warranty validation.


