
Med-Fit EM6100
Med-Fit Premier Rechargeable Dual Channel TENS Machine User Manual
Model: EM6100
1. Introduction
1.1 Welcome
Thank you for choosing the Med-Fit Premier Rechargeable Dual Channel TENS Machine. This device is designed to provide effective pain relief through Transcutaneous Electrical Nerve Stimulation (TENS). Please read this manual thoroughly before use to ensure safe and proper operation.
1.2 Intended Use
This TENS machine is intended for symptomatic relief of chronic, intractable pain and for adjunctive treatment in the management of post-surgical and post-traumatic acute pain. It is suitable for home use under the guidance of a healthcare professional.
1.3 Package Contents
Upon opening your Med-Fit Premier TENS Machine package, please verify that all components listed below are present:
- 1 x Med-Fit Premier Rechargeable Dual Channel TENS Machine
- 16 x High-Quality Self-Adhesive Electrodes (5cm x 5cm)
- 2 x Lead Wires
- 1 x USB Charging Cable
- 1 x Mains Adapter
- 1 x Comprehensive User Manual and Patient Guide

Image: Complete package contents of the Med-Fit Premier TENS Machine.
2. Safety Information
2.1 Important Safety Precautions
- Always consult your doctor or healthcare professional before using this device, especially if you have pre-existing medical conditions.
- Do not use the device while driving, operating machinery, or during any activity where involuntary muscle contractions may put the user at undue risk.
- Do not apply stimulation over the carotid sinus nerves (front of the neck), transcerebrally (through the head), or over the heart.
- Keep out of reach of children.
- Use only the electrodes and accessories supplied or recommended by Med-Fit.
2.2 Contraindications
Do not use this device if you have any of the following conditions:
- Pacemaker or other implanted electronic devices.
- Pregnancy (unless advised by a medical professional).
- Epilepsy or other seizure disorders.
- Heart disease or recent heart attack.
- Cancerous lesions in the area of stimulation.
- Undiagnosed pain.
3. Device Overview
3.1 Components and Controls
The Med-Fit Premier TENS Machine features a clear digital display and intuitive buttons for easy operation.

Image: Front view of the Med-Fit Premier TENS Machine.
3.2 Display Indicators
| Indicator | Description |
|---|---|
| CH1 / CH2 | Indicates output intensity for Channel 1 and Channel 2. |
| MODE | Displays the currently selected program mode (P1-P12 or custom). |
| TENS | Indicates TENS therapy is active. |
| Battery Icon | Shows current battery level. |
| Timer | Displays remaining treatment time. |
3.3 Buttons
- Power Button (↵): Press and hold to turn the device on or off.
- MODE Button: Press to cycle through the 12 pre-set programs.
- SET Button: Used to confirm program selection or enter manual adjustment mode.
- Up/Down Arrows (▲ / ▼): Adjust intensity levels for the selected channel.
- Left/Right Arrows (◄ / ►): Select channel (CH1 or CH2) for intensity adjustment.
4. Setup
4.1 Charging the Device
Before first use, fully charge the device. Connect the USB charging cable to the device and the mains adapter, then plug into a power outlet. The battery icon on the display will indicate charging status.
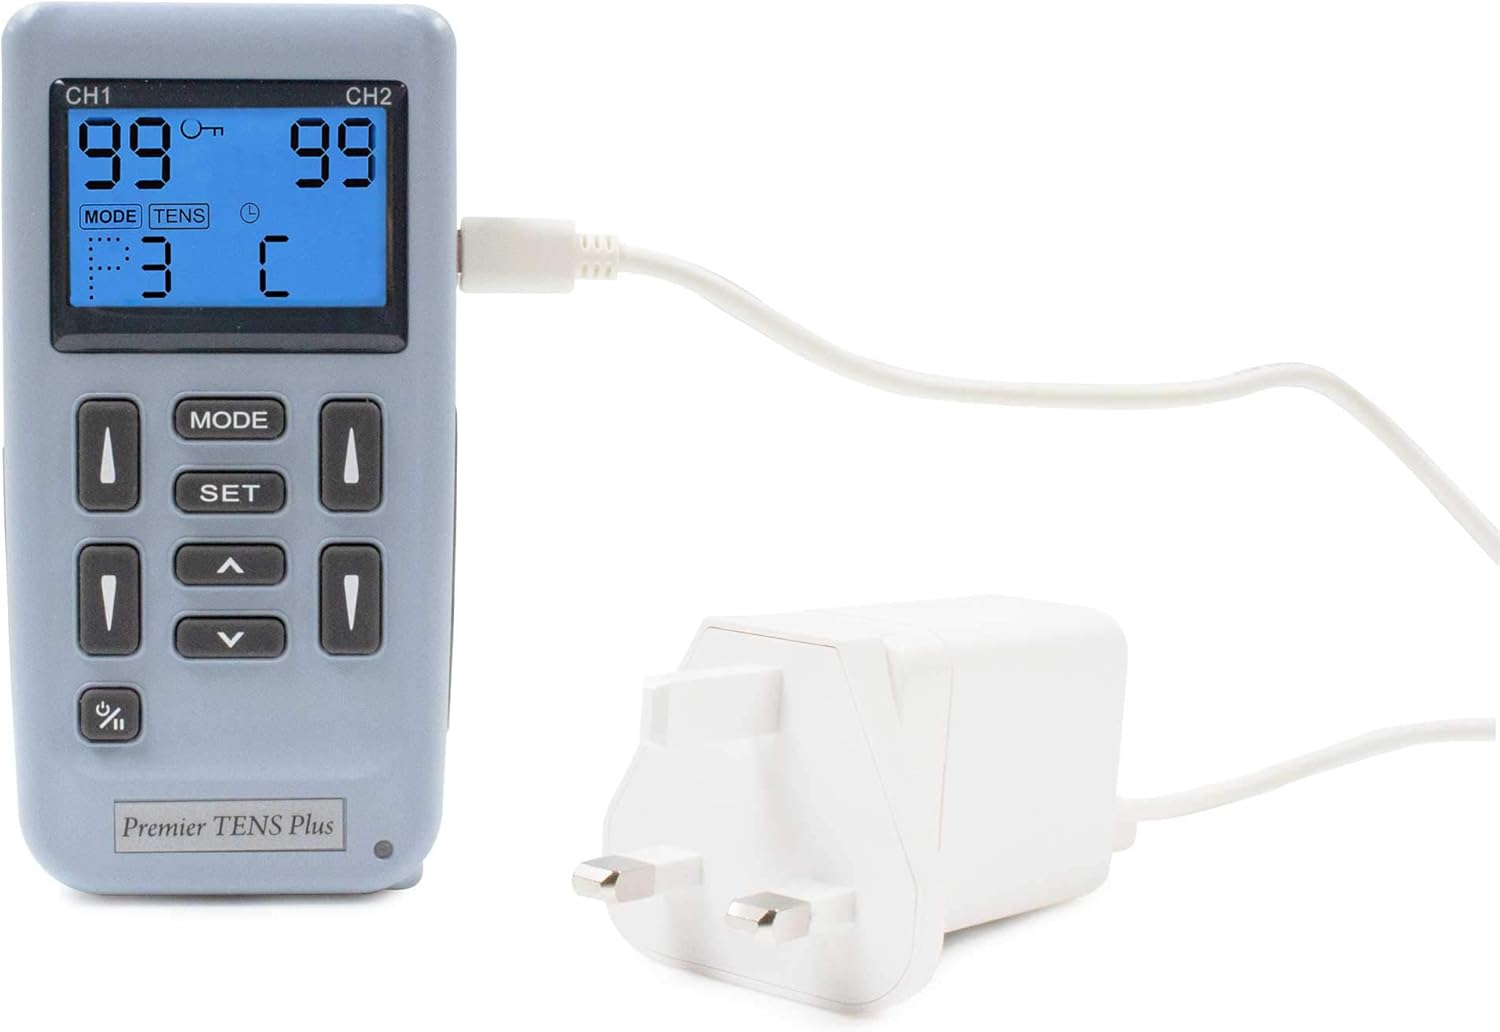
Image: Med-Fit Premier TENS Machine being charged.
4.2 Attaching Electrodes
- Ensure the device is turned off.
- Connect the lead wires to the electrode pads.
- Plug the lead wires into the output ports (CH1 and CH2) on the top of the TENS machine.
- Peel the electrode pads from their protective film.
- Apply the self-adhesive electrodes firmly to clean, dry skin in the desired treatment area.

Image: Med-Fit Premier TENS Machine with connected electrodes.
4.3 Electrode Placement
Proper electrode placement is crucial for effective treatment. Refer to the detailed patient guide included with your device for specific placement recommendations for various conditions (e.g., back pain, knee pain, sciatica). Generally, place electrodes around or on the painful area, ensuring they do not touch each other.

Image: The compact size of the Med-Fit Premier TENS Machine, suitable for portable use.
5. Operating Instructions
5.1 Turning On/Off
To turn the device on, press and hold the Power button (↵) until the display illuminates. To turn off, press and hold the Power button again until the display turns off.
5.2 Selecting a Program
The device comes with 12 clinically validated pre-set programs (P1-P12). After turning on the device, press the MODE button to cycle through the available programs. Each program is designed for specific pain relief needs. The selected program number will be displayed.
The device also allows for manual adjustments, enabling users to create personalized treatment programs. Consult the detailed user manual for instructions on manual mode customization.
5.3 Adjusting Intensity
Once a program is selected, use the Left/Right arrows (◄ / ►) to select the channel (CH1 or CH2) you wish to adjust. Then, use the Up/Down arrows (▲ / ▼) to gradually increase or decrease the intensity for that channel. Increase the intensity slowly until you feel a strong, comfortable tingling sensation, but not pain.
5.4 Treatment Duration
The pre-set programs have recommended treatment durations. The remaining treatment time will be displayed on the screen. The device will automatically turn off once the session is complete. You can manually stop a session by turning off the device.
6. Maintenance
6.1 Cleaning the Device
Wipe the device with a soft, damp cloth. Do not use abrasive cleaners or immerse the device in water. Ensure the device is turned off and disconnected from power before cleaning.
6.2 Electrode Care and Storage
After each use, reattach the electrodes to their protective film to preserve their adhesive quality. Store electrodes in a cool, dry place. Replace electrodes when they lose their stickiness or if they become damaged.
6.3 Battery Care
To prolong battery life, avoid fully discharging the device frequently. Charge the device regularly, even if not in constant use. Store the device in a cool, dry place when not in use for extended periods.
7. Troubleshooting
7.1 Common Issues and Solutions
| Problem | Possible Cause | Solution |
|---|---|---|
| Device won't turn on. | Low battery; not charged. | Charge the device fully. |
| No sensation or weak sensation. | Electrodes not properly attached; intensity too low; worn-out electrodes; lead wire issue. | Ensure electrodes are firmly on skin; increase intensity gradually; replace electrodes; check lead wire connection. |
| Electrodes not sticking. | Skin is oily/dirty; electrodes are old/worn. | Clean and dry skin before application; replace electrodes. |
| Display is blank or flickering. | Low battery; device malfunction. | Charge the device; if problem persists, contact customer support. |
8. Specifications
8.1 Technical Data
| Feature | Detail |
|---|---|
| Model Number | EM6100 |
| Brand | Med-Fit |
| Number of Channels | 2 (Dual Channel) |
| Programs | 12 Pre-set, plus manual adjustability |
| Power Supply | Rechargeable Battery (3 AAA batteries required, included) |
| Dimensions (Packaging) | 25.5 x 23.5 x 8.9 cm |
| Weight (Packaging) | 760 Grams |
| Country of Origin | Taiwan |
9. Warranty and Support
9.1 Warranty Information
Your Med-Fit Premier TENS Machine is covered by a manufacturer's warranty against defects in materials and workmanship. Please refer to the warranty card included in your package for specific terms and conditions, including the duration of coverage and how to make a claim.
9.2 Customer Support
As a UK-based medical company, Med-Fit UK Ltd is committed to providing excellent customer service. If you have any questions, require assistance with your device, or need to troubleshoot an issue not covered in this manual, please contact our customer support team. Contact details can be found on our official website or on the product packaging.
For more information and resources, visit the official Med-Fit store on Amazon: Med-Fit Amazon Store
Related documentsEM6100


Ask a question about this manual
Ask about setup, troubleshooting, compatibility, parts, safety, or missing instructions. Manuals+ will review the question and use this page’s manual context to help answer it.