1. Introduction
This manual provides detailed instructions for the setup, operation, and maintenance of your Oregon Scientific SL103 TOUCH Advanced Weather Station. This device is designed to monitor outdoor temperature, indoor humidity, and barometric pressure, offering valuable environmental data for various applications.
2. Package Contents
Please verify that all items are present in your package:
- Main Unit (Weather Station Console)
- Outdoor Sensor
- Power Adapter
- Instruction Manual (this document)
3. Product Overview
The Oregon Scientific SL103 features a touchscreen display for easy interaction and provides essential weather data. The main unit displays information received from the wireless outdoor sensor.
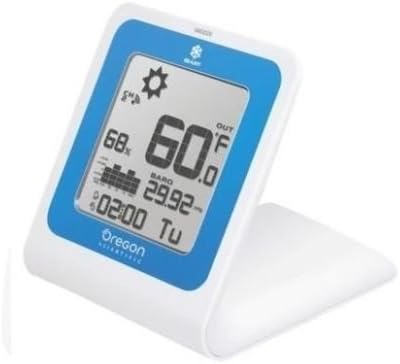
Figure 1: Oregon Scientific SL103 TOUCH Advanced Weather Station main unit, displaying outdoor temperature (60.0°F), indoor humidity (68%), barometric pressure (29.92), and time (02:00 TU). The unit is white with a blue border around the display and features a built-in stand.
Main Unit Features:
- Touchscreen display for intuitive control.
- Displays outdoor temperature and indoor humidity.
- Barometric pressure reading.
- Time display.
Outdoor Sensor Features:
- Wireless transmission of outdoor temperature data to the main unit.
- Operates on 433 MHz or 868 MHz frequency.
4. Setup
4.1. Battery Installation
The weather station and outdoor sensor are battery-powered. Ensure you have fresh batteries before proceeding.
- Main Unit: Open the battery compartment cover on the back of the main unit. Insert the required batteries (e.g., AA or AAA, refer to the compartment label for type and polarity). Close the cover securely.
- Outdoor Sensor: Open the battery compartment cover on the outdoor sensor. Insert the required batteries, observing correct polarity. Close the cover securely.
4.2. Powering On and Initial Pairing
After battery installation, the main unit will power on automatically. It will begin searching for the outdoor sensor.
- Place the outdoor sensor within close proximity (e.g., 1 meter) of the main unit during initial setup to facilitate pairing.
- The main unit display will show a signal icon or similar indicator when it successfully connects with the outdoor sensor. This process may take a few minutes.
- If pairing fails, ensure both units have fresh batteries and are within range. You may need to press a reset button on the sensor or main unit (refer to specific button labels if present).
4.3. Sensor Placement
For accurate outdoor temperature readings, proper sensor placement is crucial.
- Choose a shaded location, away from direct sunlight, as direct sun exposure will cause artificially high temperature readings.
- Ensure the sensor is protected from rain and snow.
- Avoid placing the sensor near heat sources (e.g., vents, windows, appliances) or reflective surfaces.
- Position the sensor within the effective transmission range of the main unit (typically up to 30 meters, but can vary based on obstacles).
4.4. Setting Time and Units
Use the touchscreen interface to set the time, date, and preferred measurement units (e.g., °C/°F for temperature, inHg/hPa for barometric pressure).
- Tap the relevant area on the touchscreen (e.g., time display) to enter setting mode.
- Use the on-screen arrows or buttons to adjust values.
- Confirm settings by tapping an 'OK' or 'SET' button, or by waiting for the unit to exit setting mode automatically.
5. Operation
5.1. Display Information
The main unit's display provides the following information:
- Outdoor Temperature: Current temperature measured by the outdoor sensor.
- Indoor Humidity: Current humidity level detected by the main unit.
- Barometric Pressure: Current atmospheric pressure.
- Time: Current time, typically with day of the week.
- Weather Forecast Icons: (If applicable) Icons indicating predicted weather conditions (e.g., sunny, cloudy, rainy).
5.2. Touchscreen Functions
The touchscreen allows for easy navigation and adjustment of settings.
- Viewing History: Tap specific display areas (e.g., temperature) to cycle through daily high/low records.
- Adjusting Settings: As described in Section 4.4, tap and hold or tap specific areas to enter setting modes for time, date, and units.
- Backlight: Some models feature a backlight that can be activated by tapping the screen.
6. Maintenance
6.1. Cleaning
To maintain the accuracy and appearance of your weather station:
- Wipe the main unit and sensor with a soft, damp cloth.
- Do not use abrasive cleaners or solvents, as these can damage the display or casing.
- Ensure no moisture enters the battery compartments or other openings.
6.2. Battery Replacement
Replace batteries in both the main unit and outdoor sensor when the low battery indicator appears on the display. Always replace all batteries in a unit at the same time with new ones of the same type.
6.3. Sensor Care
Periodically check the outdoor sensor for any debris or obstructions that might affect its readings. Ensure its protective casing remains intact.
7. Troubleshooting
| Problem | Possible Cause | Solution |
|---|---|---|
| No outdoor temperature reading. |
|
|
| Inaccurate temperature readings. |
|
|
| Main unit display is blank. |
|
|
8. Specifications
- Model: SL103
- Brand: Oregon Scientific
- Power Source (Main Unit): Battery Powered (type not specified, typically AA or AAA) or Power Adapter
- Power Source (Outdoor Sensor): Battery Powered (type not specified, typically AA or AAA)
- Connectivity: Wireless (433 MHz, 868 MHz)
- Measurement Functions: Outdoor Temperature, Indoor Humidity, Barometric Pressure
- Special Features: Touchscreen, Advanced Features
- Dimensions (Main Unit): Approximately 15.24 x 14.99 x 14.99 cm (as per package dimensions, actual unit may vary slightly)
- Weight: Approximately 453.59 g (as per package weight, actual unit may vary slightly)
9. Warranty and Support
For warranty information, please refer to the warranty card included with your product or visit the official Oregon Scientific website. For technical support or service inquiries, please contact Oregon Scientific customer service through their official channels. Keep your purchase receipt as proof of purchase for warranty claims.


