
APEX AL-A300ATX
APEX AL-A300ATX 300W ATX12V Power Supply User Manual
Model: AL-A300ATX
1. Introduction
This manual provides essential information for the safe and efficient installation, operation, and maintenance of your APEX AL-A300ATX 300W ATX12V Power Supply. Please read this manual thoroughly before installation and retain it for future reference.
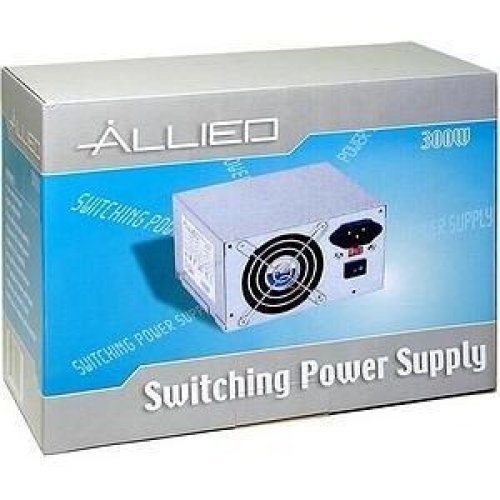
Image: The AL-A300ATX 300W ATX12V Power Supply shown in its retail packaging, indicating it is a "Switching Power Supply" from "ALLIED".
2. Safety Information
Always observe the following safety precautions to prevent injury or damage to the power supply or other components:
- Ensure the power supply is disconnected from the AC outlet before installation or removal.
- Do not open the power supply casing. High voltages are present inside, even when disconnected. There are no user-serviceable parts.
- Install the power supply in a well-ventilated area. Do not block ventilation openings.
- Avoid exposing the power supply to moisture or extreme temperatures.
- Use only the cables provided or approved for use with this power supply.
- If the power supply is damaged or malfunctioning, discontinue use immediately and contact support.
3. Package Contents
Verify that all items are present in the package:
- APEX AL-A300ATX 300W ATX12V Power Supply Unit
- AC Power Cord (may vary by region)
- Mounting Screws
- User Manual (this document)
4. Setup and Installation
Follow these steps to install the power supply into your computer system:
- Preparation:
- Turn off your computer and unplug the AC power cord from the wall outlet.
- Open your computer case. Refer to your computer case manual for specific instructions.
- If replacing an existing power supply, disconnect all cables from the old PSU and remove it from the case.
- Mounting the PSU:
- Carefully slide the AL-A300ATX power supply into the designated PSU bay in your computer case.
- Align the screw holes on the power supply with those on the case.
- Secure the power supply using the provided mounting screws.
- Connecting Cables:
- 24-Pin ATX Main Power Connector: Connect this large connector to the corresponding port on your motherboard. Ensure it clicks into place.
- CPU Power Connector (4-pin or 8-pin): Connect the appropriate CPU power cable to the CPU power port on your motherboard.
- SATA Power Connectors: Connect these flat connectors to your SATA hard drives, SSDs, and optical drives.
- Molex (Peripheral) Connectors: Connect these 4-pin connectors to older drives or case fans if needed.
- PCI-E Power Connectors (if applicable): If your graphics card requires additional power, connect the appropriate PCI-E power cable from the PSU to the graphics card. This model is listed with a "24 Pin" PCI-Express Connector Configuration, implying the main ATX connector.
- Cable Management: Route cables neatly to improve airflow and aesthetics within your case.
- Final Check: Double-check all connections to ensure they are secure.
- Close Case: Close your computer case and secure it.
5. Operating Instructions
After successful installation, follow these steps to power on your system:
- Connect AC Power: Plug the AC power cord into the power supply's inlet and then into a grounded wall outlet or surge protector.
- Power Switch: Locate the power switch on the back of the power supply (usually a rocker switch labeled "I" for ON and "O" for OFF). Ensure it is in the "ON" (I) position.
- Power On Computer: Press the power button on your computer case. The system should now power on.
To turn off your computer, always use the operating system's shutdown procedure. Do not use the power supply's switch for regular shutdowns, as this can lead to data loss or system instability.
6. Maintenance
Proper maintenance helps ensure the longevity and optimal performance of your power supply:
- Dust Cleaning: Periodically (every 3-6 months, depending on environment) clean dust from the power supply's fan and ventilation grilles using compressed air. Ensure the computer is powered off and unplugged before cleaning.
- Airflow: Ensure that the computer case has adequate airflow and that the power supply's fan is not obstructed.
- Cable Management: Maintain tidy cable routing to prevent obstruction of airflow.
7. Troubleshooting
If you encounter issues with your power supply, refer to the following common problems and solutions:
| Problem | Possible Cause | Solution |
|---|---|---|
| Computer does not power on. |
|
|
| System powers on but shuts down immediately. |
|
|
| Fan is noisy or not spinning. |
|
|
If the problem persists after attempting these solutions, contact APEX customer support or a qualified technician.
8. Specifications
| Feature | Detail |
|---|---|
| Model Name | AL-A300ATX |
| Brand | APEX |
| Output Wattage | 300 Watts |
| Form Factor | ATX12V |
| Compatible Devices | Personal Computer |
| Connector Type | ATX (24 Pin PCI-Express Connector Configuration) |
| Cooling Method | Air |
| Minimum Input Voltage | 110 Volts (AC) |
| Item Weight | 3.64 pounds |
| Package Dimensions | 9.6 x 7.2 x 4.1 inches |
| Date First Available | April 22, 2014 |
9. Warranty and Support
For information regarding warranty coverage, technical support, or service, please refer to the official APEX website or contact their customer service directly. Keep your purchase receipt as proof of purchase.
APEX Contact Information: Please visit the official APEX website for the most current contact details and support resources.
Related documentsAL-A300ATX


Ask a question about this manual
Ask about setup, troubleshooting, compatibility, parts, safety, or missing instructions. Manuals+ will review the question and use this page’s manual context to help answer it.