
Introduction
This manual provides detailed instructions for the safe installation, operation, and maintenance of your Munchkin Push to Close Hardware Baby Gate. Please read all instructions carefully before assembly and use. Keep this manual for future reference.
The Munchkin Push to Close Hardware Baby Gate is designed to provide a secure barrier for children aged 6 to 24 months. It features a natural hardwood construction with a walnut-style finish and a unique tilting spring mechanism to reduce stress on walls. The gate can be quickly removed and replaced using its quick-release fittings.
Important Safety Warnings
- WARNING: Read all instructions before installation and use. Failure to follow these warnings and instructions could result in serious injury or death.
- This safety gate is intended for use with children from 6 months through 24 months.
- NEVER use at the top of stairs without the hardware mounting cups.
- NEVER leave child unattended.
- This product will not necessarily prevent all accidents.
- Periodically check all fasteners to ensure they are tight and secure.
- Do not use this gate if any components are missing or damaged.
- Ensure the gate is securely latched before leaving your child unattended.
- Install the gate away from heat sources, windows, and blinds.
Parts List
Before beginning assembly, ensure all parts are present. Refer to the diagram below for identification.
- Gate Panel (Main section)
- Extension Panel(s) (if applicable, for wider openings)
- Wall Mounting Brackets (Hinges and Catches)
- Mounting Screws
- Allen Key (for fine-tuning)
- Mounting Templates
- Clamps (to secure gate sections)
Setup and Installation
This gate is a hardware-mounted gate, requiring drilling into your wall or door frame for secure installation. Follow these steps carefully:
1. Measure the Opening
Measure the width of the opening where you intend to install the gate. Ensure your gate, including any extensions, is wide enough to span the entire opening. This gate fits openings 28" - 46.5" wide.

Image: Gate dimensions. The gate is 30 inches tall and extends up to 46.5 inches wide.
2. Assemble Gate Sections
If using extension panels, set your gate sections to your desired width. Allow for approximately 1.5 inches on each side for the mounting hardware. Secure the sections together using the provided clamps. Ensure the angled ends of the gate are positioned correctly.

Image: Assembled gate installed in a doorway.
3. Position Mounting Templates
Decide which side you would like your gate to hinge from. Tape the mounting templates to the wall or door frame accordingly. Ensure the templates are level and at the correct height.

Image: Woman demonstrating opening the gate while holding a child.
4. Install Hinges and Catches
Mark where the hinges and catches should be mounted to the wall using the templates. Drill pilot holes as indicated on the template. Secure the wall mounting brackets (hinges and catches) to the wall using the provided screws. Ensure they are firmly attached.

Image: Close-up of a hand adjusting a screw on the gate's mounting hardware.
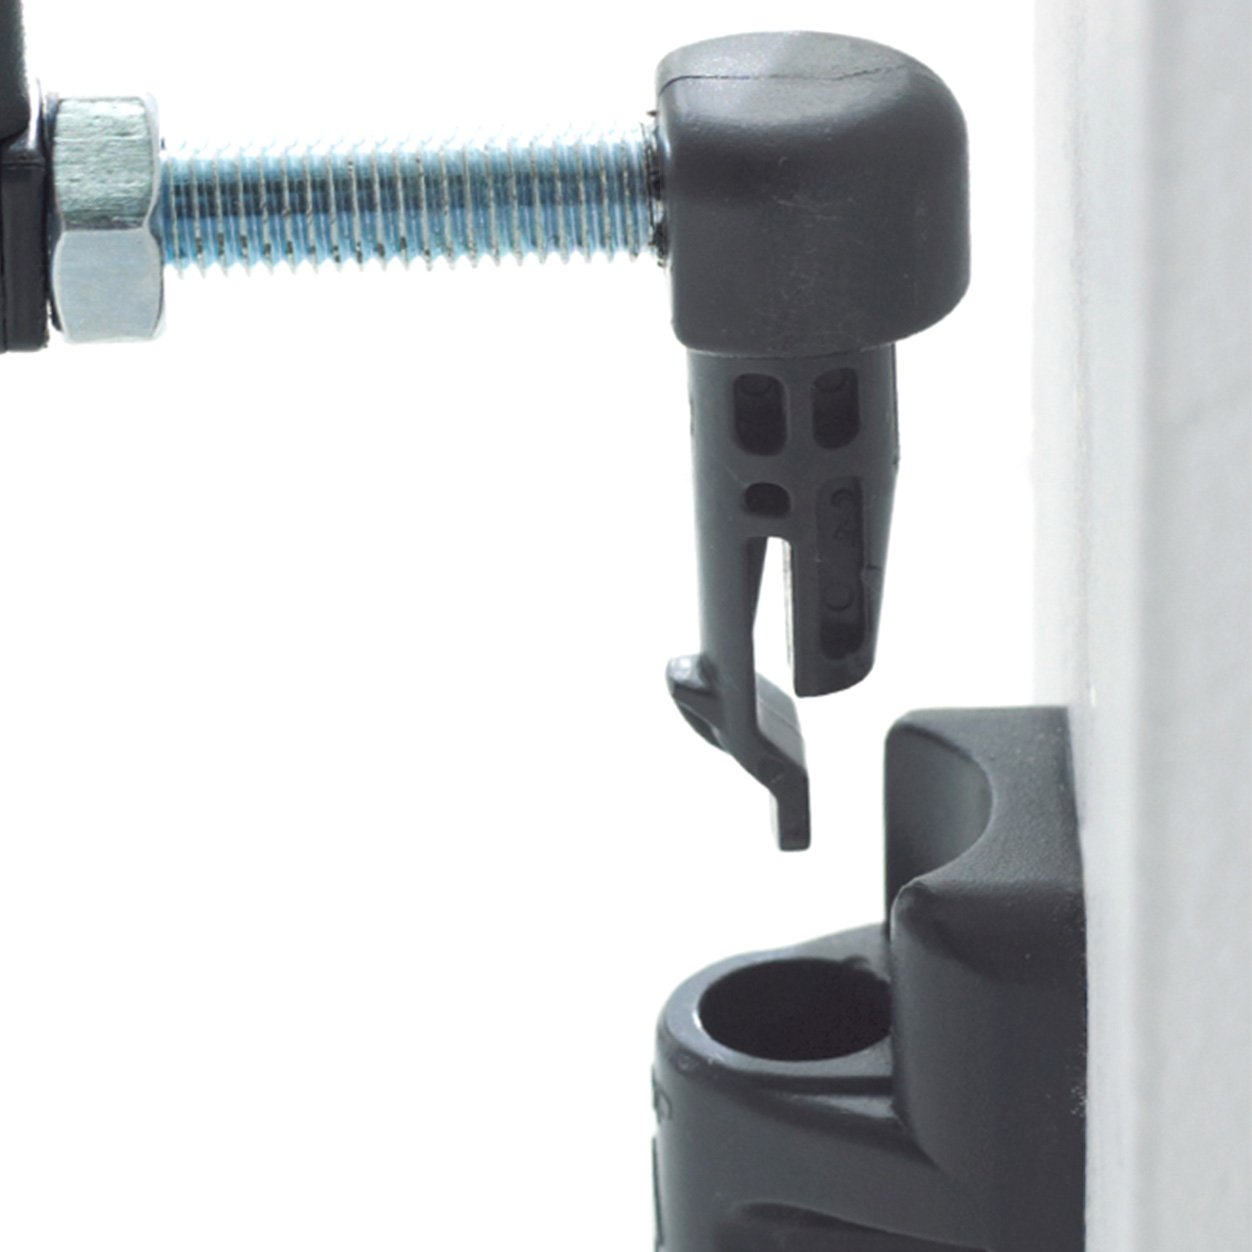
Image: Quick-release fitting for easy gate removal.
5. Hang the Gate
Insert the gate into the installed hinges. Make sure your gate aligns properly with the catches. If the floor is not level, adjustments may be needed.
6. Fine-Tune the Gate
Remove your gate from the hinges. Using the provided Allen key, unscrew the upper hinge bar out of your gate so that your gate hangs centrally. Lock the position of the nuts on the hinge and catch bars. Re-hang your gate and test to ensure it is in proper working order and latches securely.
Installation Video Guide
Video: This video illustrates basic steps for installing a hardware mount gate. Please refer to your manual for complete instructions.
Operating Instructions
Opening the Gate:
- To open the gate, firmly push down on the latch mechanism.
- While holding the latch down, lift the gate slightly to disengage it from the bottom catch.
- Swing the gate open in the desired direction. The gate supports one-way opening for use at the top and bottom of stairs, and two-way opening for use in doorways.
Closing the Gate:
- Swing the gate back into the closed position.
- Ensure the gate panel engages securely with both the top and bottom catches. You should hear a click, indicating it is properly latched.
- Always check that the gate is securely closed and latched before leaving your child unattended.
Maintenance
- Cleaning: Clean the gate with a soft, damp cloth and mild soap. Do not use abrasive cleaners or harsh chemicals, as these may damage the finish or components.
- Inspection: Regularly inspect the gate for any signs of damage, loose parts, or wear. Pay close attention to the mounting hardware, hinges, and latch mechanism.
- Tightening: Periodically check and tighten all screws and fasteners to ensure the gate remains securely mounted.
- Storage: If the gate is to be stored for an extended period, ensure it is clean and dry. Store in a cool, dry place away from direct sunlight.
Troubleshooting
- Gate does not latch securely:
- Ensure the gate is properly aligned with the catches. Adjust the hinge bar using the Allen key to center the gate if necessary. Check that the mounting hardware is securely fastened to the wall.
- Gate is difficult to open/close:
- Check for any obstructions. Ensure the latch mechanism is clean and free of debris. Verify that the gate is not binding against the wall or floor. Lubricate moving parts with a silicone-based lubricant if needed, avoiding contact with child-accessible areas.
- Gate feels wobbly after installation:
- Re-check all mounting screws and ensure they are tightened firmly. Confirm that the gate is installed into a solid surface (wood stud or appropriate wall anchors for drywall). If installing into drywall, ensure proper wall anchors are used and can support the gate's weight and force.
Specifications
| Brand: | Munchkin |
| Model Number: | 34149 (MK0016) |
| Dimensions (W x H): | 28" - 46.5" W x 30" H |
| Material Type: | Wood |
| Color: | Dark Wood |
| Mounting Type: | Hardware Mount |
| Intended Age Range: | 6 months to 24 months |
| Item Weight: | 10.8 pounds |
Warranty and Support
For warranty information or customer support, please refer to the manufacturer's official website or contact their customer service department. Keep your purchase receipt as proof of purchase.
Munchkin Customer Service: Please visit Munchkin's Amazon Store or their official website for contact details and further assistance.


