
1. Introduction
This manual provides comprehensive instructions for the installation, operation, and maintenance of your Heliatos 5 Panel Freeze Protected Hybrid Solar Water Heater Kit. This system is designed to integrate with your existing water heater, utilizing solar energy to provide hot water while offering freeze protection down to -30 degrees Fahrenheit.
The kit includes components for a complete solar water heating solution, designed for ease of installation without the need for soldering. Please read this manual thoroughly before beginning installation or operation to ensure safe and efficient use of your system.
Kit Contents:
- 5 SW-38 Solar Panels
- 1 Grade A 25W PV panel with wire and mounting kit
- 1 Heliatos HS-21 Pump
- 1 TopsFlo TD5 Stainless Pump
- 1 Glycol Fill Valve
- 1 Bottom Feed Connector
- 1 Stainless Steel (Alloy 316) Heat Exchanger
- 1 Extrol Expansion Tank
- 1 Complete Set of Fittings and Adapters
- 2 Quarts Food Grade Propylene Glycol Heat Transfer Fluid
- Installation Instructions (this manual)
Items Not Included (User Supplied):
- 1/2" Pipe from panels to water heater (Copper, CPVC, or PEX)
- Fasteners to attach panels to the roof
- Insulation for the pipes
- Your existing Water Heater (Note: Will NOT work with Marathon non-metallic (plastic) water heaters)
2. Safety Information
WARNING: Failure to follow these safety instructions could result in property damage, serious injury, or death.
- Always disconnect power to the existing water heater before beginning any plumbing or electrical work.
- Wear appropriate personal protective equipment (PPE) including gloves and eye protection during installation.
- Working on roofs can be dangerous. Ensure proper fall protection and secure footing.
- Handle propylene glycol with care. Although food-grade, avoid ingestion and prolonged skin contact. Refer to the Material Safety Data Sheet (MSDS) for more information.
- Ensure all electrical connections are made by a qualified individual and comply with local electrical codes.
- Do not operate pumps dry. Ensure the system is filled with fluid before powering on.
- This system is designed for freeze protection down to -30°F. In areas with colder temperatures, additional precautions may be necessary.
- Consult local building and plumbing codes before installation.
3. Components Overview
Familiarize yourself with the components included in your kit:

Figure 3.1: Overall system diagram showing the connection of solar panels, PV panel, glycol fill valve, expansion tank, pumps, and heat exchanger to the water heater. Components within the blue area are included in the kit.
3.1. SW-38 Solar Panels
Lightweight and efficient solar thermal collectors designed to absorb solar radiation and transfer heat to the circulating glycol fluid. Each panel measures 24" by 24" and weighs approximately 12 lbs.
3.2. 25W PV Panel
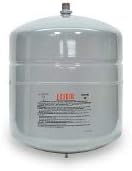
Figure 3.2: The 25W photovoltaic panel and associated electrical kit, used to power the circulation pumps independently of the grid.
A small photovoltaic panel that generates electricity to power the circulation pumps, eliminating the need for a grid connection for pump operation.
3.3. Heliatos HS-21 Pump

Figure 3.3: The Heliatos HS-21 pump, responsible for circulating fluid within the solar loop.
One of two circulation pumps included, designed for the solar fluid loop.
3.4. TopsFlo TD5 Stainless Pump

Figure 3.4: The TopsFlo TD5 stainless steel pump, used for circulating water from the existing water heater through the heat exchanger.
The second circulation pump, made of stainless steel, used for circulating water from your existing water heater through the heat exchanger.
3.5. Glycol Fill Valve

Figure 3.5: The glycol fill valve, essential for safely filling and maintaining the glycol fluid in the solar loop.
A valve assembly used for filling the solar loop with propylene glycol and for system maintenance.
3.6. Stainless Steel Heat Exchanger

Figure 3.6: The stainless steel (Alloy 316) plate heat exchanger, which transfers heat from the glycol loop to the domestic hot water.
A compact plate heat exchanger (Alloy 316) that facilitates the transfer of heat from the solar glycol loop to your domestic hot water supply without mixing the fluids.
3.7. Extrol Expansion Tank

Figure 3.7: The Extrol expansion tank, designed to absorb the expansion of the glycol fluid as it heats up, maintaining system pressure.
Manages the thermal expansion of the glycol fluid within the closed solar loop, preventing excessive pressure buildup.
3.8. Fittings and Adapters

Figure 3.8: A complete set of fittings and adapters for connecting the various components of the solar water heating system.
A comprehensive set of connectors and adapters to facilitate the plumbing connections between all system components.
4. Setup and Installation
This section outlines the general steps for installing your solar water heater kit. Refer to the system diagram (Figure 3.1) for visual guidance. Professional installation is recommended.
4.1. Site Selection and Panel Mounting
- Choose a roof location that receives maximum direct sunlight throughout the day, free from significant shading.
- Mount the 5 SW-38 solar panels securely to the roof structure using appropriate fasteners (user supplied). Ensure proper spacing and orientation for optimal solar exposure.
- Mount the 25W PV panel near the solar thermal panels, ensuring it also receives direct sunlight to power the pumps.
4.2. Plumbing Connections (Solar Loop)
- Connect the 5 SW-38 panels in series or parallel as per your system design, using 1/2" piping (user supplied).
- Install the Heliatos HS-21 pump in the solar loop, typically on the return line from the panels to the heat exchanger.
- Connect the Glycol Fill Valve to the solar loop at an accessible point for filling and maintenance.
- Install the Extrol Expansion Tank in the solar loop, typically on the suction side of the pump or as indicated in the diagram.
- Connect the solar loop to one side of the Stainless Steel Heat Exchanger.
- Ensure all connections are tight and leak-free using the provided fittings and adapters.
- Insulate all solar loop piping to minimize heat loss.
4.3. Plumbing Connections (Domestic Hot Water Loop)
- IMPORTANT: Turn off the power/gas supply to your existing water heater and shut off the main water supply.
- Drain a portion of your water heater to allow for connections.
- Connect the TopsFlo TD5 Stainless Pump to the cold water inlet or drain valve of your existing water heater, using the Bottom Feed Connector and appropriate fittings.
- Connect the outlet of the TopsFlo TD5 pump to the other side of the Stainless Steel Heat Exchanger.
- Connect the outlet of the heat exchanger back to the hot water outlet or a suitable port on your existing water heater.
- Ensure all connections are secure and leak-free.
4.4. Electrical Connections
- Connect the 25W PV panel to both the Heliatos HS-21 pump and the TopsFlo TD5 pump using the provided wire and electrical kit.
- Ensure correct polarity (+ to + and - to -) for both pumps.
- Secure all electrical connections and protect them from weather elements.
4.5. Filling the System
- Solar Loop: Using the Glycol Fill Valve, slowly fill the solar loop with the provided 2 quarts of Food Grade Propylene Glycol Heat Transfer Fluid. Ensure all air is purged from the system. This may require temporarily running the HS-21 pump while filling.
- Domestic Hot Water Loop: Restore main water supply and allow the domestic hot water loop to refill. Check for leaks.
5. Operating Instructions
The Heliatos Hybrid Solar Water Heater Kit operates automatically once properly installed and filled.
5.1. Initial Startup
- After ensuring all connections are secure and the system is filled, restore power/gas to your existing water heater.
- As the sun shines on the PV panel, the circulation pumps (HS-21 and TD5) will automatically activate.
- The HS-21 pump will circulate the glycol through the solar panels, where it absorbs heat.
- The heated glycol then passes through the heat exchanger, transferring its heat to the domestic water circulated by the TD5 pump.
- The heated domestic water returns to your existing water heater.
5.2. Hybrid Operation
This system is designed to supplement your existing water heater. On sunny days, the solar system will pre-heat your water, reducing the load on your conventional heater. During cloudy periods or when solar gain is insufficient, your existing water heater will continue to provide hot water as usual, ensuring a continuous supply.
5.3. Freeze Protection
The use of propylene glycol in the solar loop provides freeze protection down to -30°F. This allows for year-round operation without the need to drain the system during winter months, provided temperatures do not drop below this threshold.
6. Maintenance
Regular maintenance ensures the longevity and efficiency of your solar water heating system.
6.1. Annual Checks
- Inspect Solar Panels: Annually inspect the solar panels for any debris, dirt, or shading. Clean panels as needed with water and a soft brush to maintain efficiency.
- Check Glycol Level and Quality: Periodically check the level of propylene glycol in the solar loop. If the level is low, top up using the Glycol Fill Valve. It is recommended to test the glycol's freeze protection properties every 2-3 years and replace if necessary.
- Inspect for Leaks: Visually inspect all plumbing connections for any signs of leaks. Address any leaks promptly.
- Pump Operation: Ensure both the HS-21 and TD5 pumps are operating quietly and efficiently when the PV panel is exposed to sunlight.
- Electrical Connections: Check all electrical connections for corrosion or loose wiring.
6.2. Cleaning
Clean the surface of the solar panels periodically to remove dust, pollen, and other accumulated debris that can reduce efficiency. Use only water and a soft cloth or brush. Avoid abrasive cleaners or high-pressure washers.
7. Troubleshooting
This section addresses common issues you might encounter with your solar water heating system.
7.1. No Hot Water from Solar System
- Check Sunlight: Ensure solar panels and PV panel are receiving direct sunlight and are not shaded.
- Check Pumps: Verify that both the HS-21 and TD5 pumps are running when the PV panel is exposed to sunlight. Listen for pump operation or check for vibrations. If not running, check electrical connections from the PV panel.
- Check Glycol Level: Ensure the solar loop is adequately filled with glycol and there are no airlocks.
- Inspect for Leaks: A significant leak in the solar loop can prevent proper circulation and heat transfer.
7.2. Leaks in the System
- Identify Source: Visually inspect all fittings, connections, and components for drips or wet spots.
- Tighten Connections: For minor drips, carefully tighten the associated fitting. Do not overtighten.
- Sealant: Ensure pipe thread sealant was properly applied during installation.
- Component Damage: If a component is cracked or damaged, it may need replacement.
7.3. Pumps Not Running
- PV Panel Exposure: Ensure the 25W PV panel is clean and receiving direct sunlight.
- Electrical Connections: Check all wiring from the PV panel to the pumps for secure connections and damage.
- Pump Failure: If power is confirmed to the pumps but they are not operating, a pump may have failed and require replacement.
8. Specifications
| Specification | Detail |
|---|---|
| Brand | Heliatos |
| Model Number | 077.0076 |
| ASIN | B00IM1PNGK |
| Material | Stainless Steel, Plastic |
| Item Weight | 108 Pounds (total kit) |
| Efficiency | High Efficiency |
| Maximum Power (PV Panel) | 25 Watts |
| Freeze Protection | Down to -30°F |
9. Warranty and Support
This product is sold by Heliatos Solar. For specific warranty information, please refer to the documentation provided at the time of purchase or contact Heliatos Solar directly.
Return Policy: The product is eligible for a 30-day return for refund/replacement. Please refer to the retailer's return policy for full details.
For technical support or inquiries, please contact Heliatos Solar customer service. Contact information can typically be found on their official website or through your purchase documentation.
