1. Introduction
This user manual provides essential information for the safe and efficient operation, installation, and maintenance of your Neff MR 1342 N integrated induction hob. Please read these instructions carefully before using the appliance for the first time and keep them for future reference. Proper use ensures optimal performance and longevity of your hob.
2. Safety Information
Important Safety Warning:
This Neff MR 1342 N induction hob is designed for integrated installation and requires connection to a compatible Neff oven. It cannot be installed or operated independently. Attempting to install or operate this hob without a compatible Neff oven may result in malfunction, damage, or safety hazards. Consult a qualified technician for installation.
- Electrical Safety: Ensure the appliance is correctly earthed and connected to a suitable power supply (220-240V, 50/60Hz). The total connected load is 7800W.
- Children and Vulnerable Persons: This appliance can be used by children aged 8 years and above and persons with reduced physical, sensory or mental capabilities or lack of experience and knowledge if they have been given supervision or instruction concerning use of the appliance in a safe way and understand the hazards involved.
- Hot Surfaces: The hob surface will become hot during and after use. Do not touch hot surfaces. Use oven mitts or pot holders.
- Overheating: Do not leave cooking unattended. Overheated fats and oils can ignite.
- Cleaning: Disconnect the appliance from the power supply before cleaning.
- Repairs: Only qualified personnel should perform repairs. Incorrect repairs can lead to significant hazards.
3. Product Overview
The Neff MR 1342 N is an integrated induction hob featuring a sleek black ceramic glass surface and four high-speed cooking zones. It is designed for efficient and precise cooking.

Image 1: Top-down view of the Neff MR 1342 N induction hob, showcasing its four cooking zones and ceramic glass surface.
Cooking Zones:
- Zone 1 (Front Left): Ø 210 mm / 145 mm, 1 kW / 2.2 kW (Double Circuit Zone)
- Zone 2 (Rear Left): Ø 145 mm, 1.2 kW
- Zone 3 (Rear Right): Ø 180 mm, 2 kW
- Zone 4 (Front Right): Ø 265 mm / 170 mm, 2.4 kW / 1.6 kW (Roasting Zone)
The hob also features residual heat indicators for each cooking zone, enhancing safety by showing which zones are still hot after use.

Image 2: Close-up of the hob's ceramic glass surface, highlighting the Neff logo and the intuitive control markings.
4. Setup and Installation
Installation of the Neff MR 1342 N induction hob must be performed by a qualified technician in accordance with local regulations and the provided installation instructions. As noted in the safety section, this hob requires connection to a compatible Neff oven.
4.1. Unpacking
Carefully remove the hob from its packaging. Inspect for any damage during transit. Retain packaging materials for potential future transport or service.
4.2. Dimensions and Cut-out
The hob is designed for integrated installation into a countertop. Ensure the countertop cut-out dimensions match the specifications below.
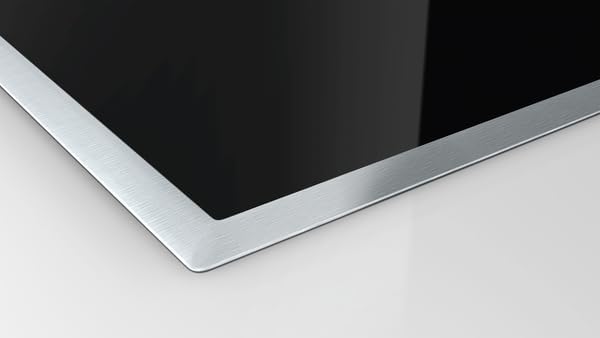
Image 3: Technical drawing illustrating the hob's dimensions (583mm width, 513mm depth, 43mm height) and the required countertop cut-out (560mm width, 490-500mm depth).
- Hob Dimensions (L x W x H): 58.3 cm x 51.3 cm x 4.6 cm
- Cut-out Dimensions (W x D): Approximately 56 cm x 49-50 cm
- Minimum Clearance: Ensure adequate clearance around the hob for ventilation and safety, as specified in the installation guide.
4.3. Electrical Connection
The electrical connection must be carried out by a qualified electrician. The appliance requires a 220-240V, 50/60Hz power supply with a total connected load of 7800W. This hob is designed to be connected to a compatible Neff oven, which then manages the power supply to the hob.

Image 4: The Neff MR 1342 N hob seamlessly integrated into a kitchen countertop, positioned above a matching Neff oven.
5. Operating Instructions
The Neff MR 1342 N induction hob offers intuitive controls for precise cooking.
5.1. Turning On/Off
To turn on the hob, press the main power button. To turn off, press the main power button again. Individual cooking zones can be activated and deactivated separately.
5.2. Selecting a Cooking Zone and Adjusting Power
- Place a suitable induction-compatible pan on the desired cooking zone.
- Select the cooking zone using its dedicated control.
- Adjust the power level using the touch controls, typically a slider or plus/minus buttons. Power levels range from 1 (low) to 9 (high).
5.3. Using Special Zones
- Double Circuit Zone: For larger pots, activate the outer ring of the double circuit zone by pressing the corresponding control.
- Roasting Zone: This elongated zone is ideal for oval roasting pans. Activate the full zone for even heat distribution.
5.4. Residual Heat Indicator
After a cooking zone is switched off, the residual heat indicator (usually an 'H' symbol) will illuminate if the zone is still hot enough to cause burns. Do not touch the zone until the indicator turns off.
6. Maintenance and Cleaning
Regular cleaning and maintenance will keep your hob in excellent condition.
6.1. Daily Cleaning
After each use, allow the hob to cool down. Wipe the ceramic glass surface with a damp cloth and a small amount of mild dish soap. For stubborn stains, use a specialized ceramic hob cleaner. Rinse thoroughly and dry with a clean cloth to prevent water marks.
6.2. Removing Burnt-on Food
For burnt-on food residues, use a hob scraper designed for ceramic glass surfaces. Hold the scraper at a shallow angle and gently push to remove the residue. Follow up with a ceramic hob cleaner.
6.3. Avoiding Damage
- Do not use abrasive cleaners, scouring pads, or harsh chemicals, as these can scratch or damage the glass surface.
- Avoid dropping heavy or sharp objects on the hob.
- Do not slide rough-bottomed pans across the surface.
7. Troubleshooting
Before contacting customer service, please refer to the following common issues and their solutions.
| Problem | Possible Cause | Solution |
|---|---|---|
| Hob does not turn on. | No power supply; hob not correctly connected to a compatible oven. | Check the circuit breaker. Ensure the hob is correctly installed and connected to a compatible Neff oven. |
| Cooking zone not heating. | Pan not induction-compatible; pan too small or not centered; error code displayed. | Use induction-compatible cookware. Ensure the pan covers at least 70% of the zone. Refer to the display for error codes and consult the full manual. |
| Unusual noises during operation. | Normal induction hum; pan material. | A slight humming or buzzing sound is normal for induction hobs. This can vary with cookware type. |
| Residual heat indicator (H) remains on. | Zone is still hot. | This is normal. Wait for the zone to cool down. |
If the problem persists after attempting these solutions, please contact Neff customer service or a qualified technician.
8. Specifications
Detailed technical specifications for the Neff MR 1342 N induction hob.
| Feature | Specification |
|---|---|
| Brand | Neff |
| Model Number | MR 1342 N (Reference: M13R42N2) |
| Type of Hob | Integrated Induction Hob |
| Surface Material | Ceramic Glass |
| Number of Cooking Zones | 4 |
| Power Supply | 220 - 240 V, 50/60 Hz |
| Total Connected Load | 7800 W |
| Dimensions (W x D x H) | 58.3 cm x 51.3 cm x 4.6 cm |
| Weight | 7 kg |
| Special Features | Double Circuit Zone, Roasting Zone, Residual Heat Indicators |
| Color | Black |
9. Warranty and Support
For warranty information, please refer to the documentation provided with your purchase or visit the official Neff website. In case of technical issues or if you require professional assistance, please contact Neff customer support. Ensure you have your model number (MR 1342 N) and serial number ready when contacting support.
You can find more information and support on the official Neff website: www.neff-home.com


