
Introduction
This manual provides essential instructions for the safe and effective use of your Sony H400 Digital Camera. Please read this manual thoroughly before operating the camera and retain it for future reference.
What's in the Box
Verify that all items are present in the package:
- Sony Cyber-shot DSC-H400 Digital Camera
- Sony NP-BX1 Rechargeable Lithium Ion Battery
- AC Adaptor AC-UB10C
- Multi USB Cable
- Shoulder Strap
- Lens Cap
- Instruction Manual (this document)
- Warranty Information
Setup
1. Attaching the Shoulder Strap
Attach the provided shoulder strap to the camera's strap lugs. Ensure it is securely fastened to prevent accidental drops.
2. Inserting the Battery
- Open the battery/memory card cover located on the bottom of the camera.
- Insert the NP-BX1 rechargeable battery with the correct orientation, ensuring the terminal matches the camera's battery compartment. Push until it clicks into place.
- Close the battery/memory card cover securely.
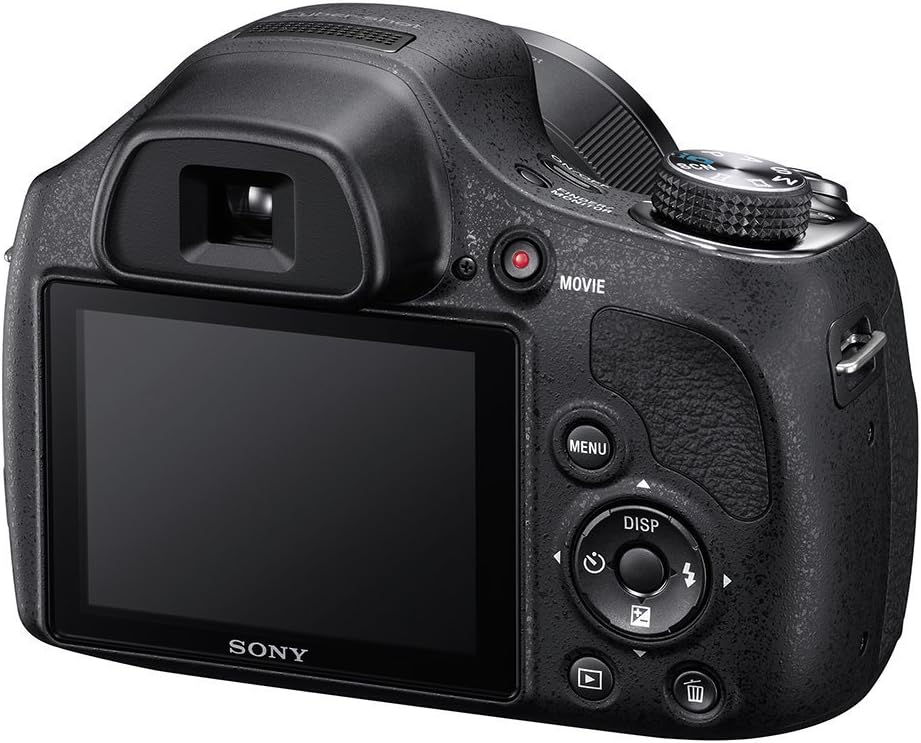
Image: Rear view of the camera, illustrating the battery/memory card compartment location (bottom, not visible in this specific image but implied by general camera design) and main controls.
3. Inserting a Memory Card
The camera supports SD, SDHC, SDXC, Memory Stick PRO Duo, and Memory Stick PRO-HG Duo cards.
- Open the battery/memory card cover.
- Insert the memory card into the slot with the correct orientation until it clicks.
- Close the battery/memory card cover securely.
4. Charging the Battery
Use the supplied AC Adaptor AC-UB10C and Multi USB Cable to charge the NP-BX1 battery while it is in the camera.
- Connect the Multi USB Cable to the camera's USB port.
- Connect the other end of the USB cable to the AC Adaptor.
- Plug the AC Adaptor into a wall outlet. The charge lamp will light up.
- Charging is complete when the charge lamp turns off.
Operating the Camera
Power On/Off
Press the ON/OFF button to power the camera on or off.
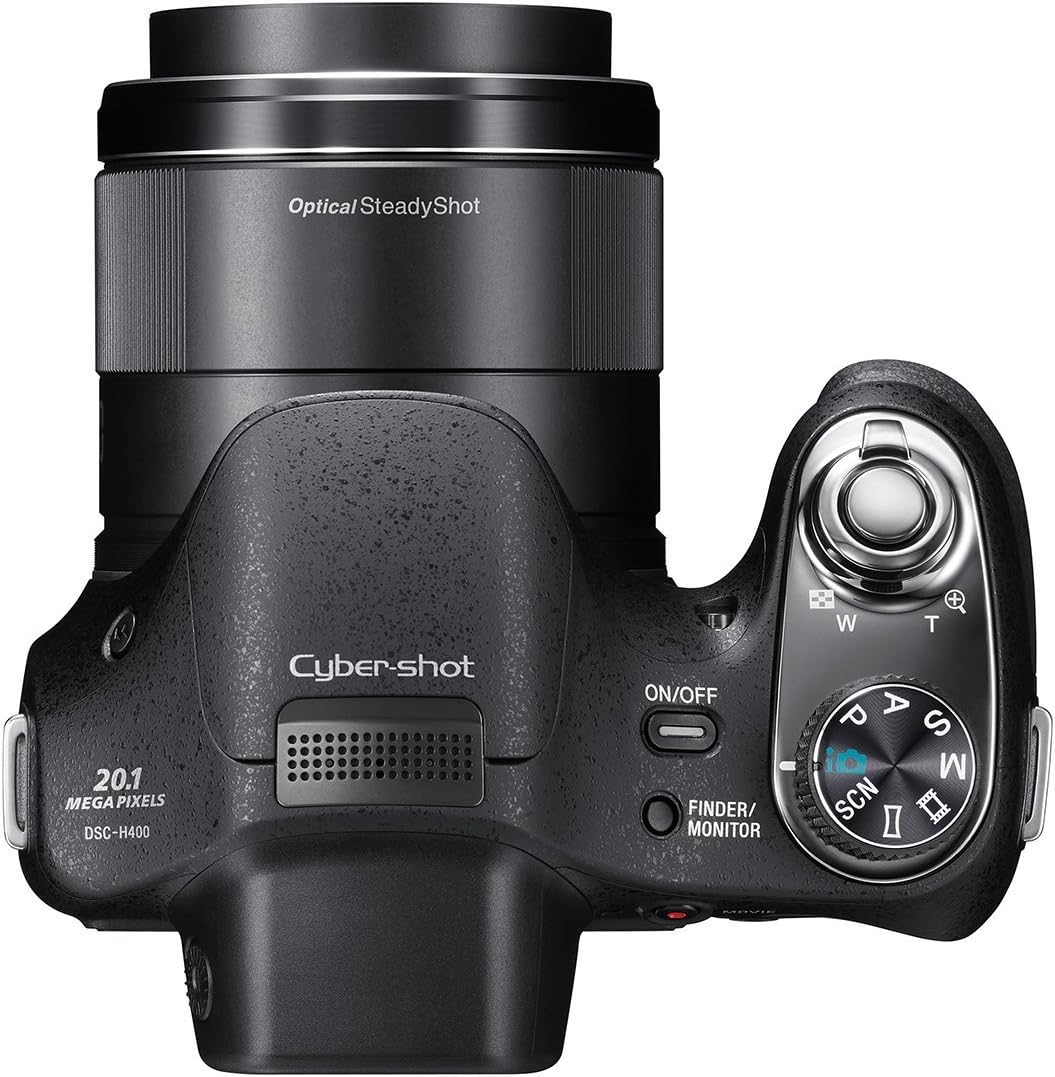
Image: Top view of the camera, highlighting the ON/OFF button, shutter button with zoom lever, and mode dial.
Shooting Still Images
- Select a Shooting Mode: Rotate the mode dial to select your desired shooting mode (e.g., Intelligent Auto, Program Auto, Manual, Scene Selection).
- Frame Your Shot: Use the LCD monitor or electronic viewfinder to compose your image.
- Zoom: Use the zoom lever around the shutter button to adjust the 63x optical zoom.
- Focus: Press the shutter button halfway down to autofocus. The camera will confirm focus.
- Capture: Press the shutter button fully down to take the picture.

Image: Front view of the camera, showcasing the lens with "63x Optical Zoom" text.
Recording Movies
The camera can record movies in HD 720p resolution.
- Press the MOVIE button to start recording.
- Press the MOVIE button again to stop recording.
Image: Rear view of the camera, indicating the location of the dedicated MOVIE record button.
Using the Flash
The built-in flash operates in automatic mode. The camera will determine if flash is needed based on lighting conditions.
Playback
Press the Playback button (usually indicated by a triangle icon) to view your captured images and videos.
Connecting to a Computer
Use the Multi USB Cable to connect the camera to your computer for transferring photos and videos.
- Connect the camera to your computer using the USB cable.
- The camera will appear as a removable drive on your computer.
- Drag and drop files to transfer them.
Maintenance
Cleaning the Camera
- Camera Body: Wipe with a soft, dry cloth. For stubborn dirt, use a cloth lightly dampened with water and then wipe dry.
- Lens: Use a lens brush to remove dust, then gently wipe with a lens cleaning cloth. Avoid touching the lens surface with your fingers.
- LCD Screen: Gently wipe with a soft, dry cloth.
Battery Care
- Store the battery in a cool, dry place when not in use.
- Avoid exposing the battery to extreme temperatures.
- Charge the battery fully before extended storage and periodically during storage to maintain its life.
Storage
When storing the camera for an extended period, remove the battery and memory card. Store the camera in a dry, dust-free environment, preferably in a camera bag or case.
Troubleshooting
Camera Does Not Power On
- Ensure the battery is correctly inserted and fully charged.
- Check if the battery terminals are clean.
Images Are Blurry
- Ensure the lens is clean and free from smudges.
- Press the shutter button halfway to allow the camera to focus before fully pressing it.
- Use Optical SteadyShot image stabilization, especially when zooming or in low light.
- Check your shooting mode; some modes may have different focusing characteristics.
Shutter Lag
- In some shooting conditions, there might be a slight delay. Try anticipating the moment you want to capture.
- Ensure sufficient lighting for faster autofocus.
LCD Screen Too Bright/Dim
- Adjust the brightness settings in the camera's menu.
- Use the electronic viewfinder in bright outdoor conditions if the LCD is difficult to see.
Cannot Transfer Files to Computer
- Ensure the USB cable is securely connected to both the camera and the computer.
- Try a different USB port on your computer.
- Restart both the camera and the computer.
Specifications
| Brand | Sony |
| Model Name | Sony H400 |
| Model Number | DSCH400/B |
| Photo Sensor Resolution | 20 MP |
| Optical Zoom | 63x |
| Image Stabilization | Optical |
| Screen Size | 3 Inches |
| Video Resolution | HD 720p |
| Connectivity Technology | USB |
| Supported File Format | JPEG (Stills), MPEG-4, H.264 (Video) |
| Compatible Flash Memory Type | SD/SDHC/SDXC/Memory Stick PRO Duo/Pro-HG Duo |
| Item Weight | 1.4 Pounds |
| Viewfinder | Electronic |
| Maximum Focal Length | 1550 Millimeters |
| Minimum Focal Length | 25 Millimeters |
| Maximum Aperture | 3.4 f |
Warranty Information
This product is covered by a 90-day Limited Hardware Warranty. Please refer to the provided warranty document for full terms and conditions.
Support
For further assistance, please visit the official Sony support website or contact their customer service. Keep your model number (DSCH400/B) and serial number ready when seeking support.


