Introduction
This manual provides instructions for the proper installation, operation, and maintenance of your Jones Stephens A01-021 Aerators. Please read these instructions carefully before installation and retain them for future reference. These aerators are designed to regulate water flow and conserve water in compatible faucets.
Safety Information
- Always turn off the water supply to the faucet before attempting any installation or maintenance.
- Use appropriate tools and avoid over-tightening to prevent damage to the aerator or faucet.
- Keep small parts away from children to prevent choking hazards.
- Ensure proper disposal of old aerators and packaging materials.
Package Contents
Verify that all components are present before beginning installation:
- Six (6) Jones Stephens A01-021 Aerators
- Clear plastic storage tube
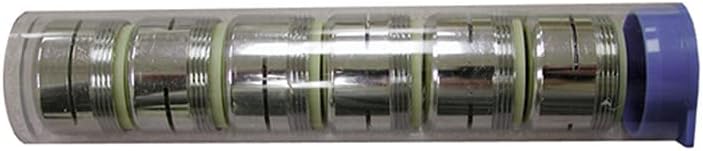
This image displays six Jones Stephens A01-021 aerators, each featuring a metallic body with a light green O-ring, neatly arranged inside a transparent plastic tube. The tube is sealed with a purple cap on one end. These aerators are designed for faucet installation to regulate water flow.
Setup and Installation
Follow these steps to install your new aerator:
- Turn off Water Supply: Locate the shut-off valves under your sink and turn them clockwise to completely stop the water flow to the faucet.
- Remove Existing Aerator: Most aerators can be unscrewed by hand. If it is too tight, use an aerator wrench or pliers with a cloth to avoid scratching the faucet finish. Turn counter-clockwise to remove.
- Clean Faucet Spout: Inspect the faucet spout for any debris or mineral buildup. Clean thoroughly to ensure a proper seal with the new aerator.
- Identify Thread Type: The Jones Stephens A01-021 aerators feature dual threads: 15/16"-27 male x 55/64"-27 female. Determine if your faucet has male or female threads and select the appropriate side of the aerator for installation.
- Install New Aerator: Screw the new aerator onto the faucet spout clockwise. Hand-tighten only. Do not use tools to over-tighten, as this can damage the aerator or faucet.
- Restore Water Supply: Slowly turn the water supply valves counter-clockwise to restore water flow.
- Check for Leaks: Turn on the faucet and check for any leaks around the aerator connection. If a leak occurs, gently tighten the aerator a small amount until the leak stops.
Operating Instructions
Once installed, the aerator operates automatically with your faucet. Simply turn on the faucet as usual. The aerator will mix air into the water stream, providing a consistent, splash-free flow while conserving water.
Maintenance
Regular cleaning of your aerator is recommended to maintain optimal water flow and prevent mineral buildup.
- Cleaning Frequency: Clean the aerator every 3-6 months, or more frequently in areas with hard water.
- Cleaning Steps:
- Turn off the water supply to the faucet.
- Unscrew the aerator from the faucet spout.
- Disassemble the aerator components (screen, washer, flow restrictor).
- Rinse all components under running water to remove loose debris.
- For stubborn mineral deposits, soak the components in a solution of equal parts white vinegar and water for 30 minutes to an hour.
- Use a small brush (like an old toothbrush) to gently scrub away any remaining deposits.
- Rinse thoroughly and reassemble the aerator, ensuring all components are correctly seated.
- Screw the cleaned aerator back onto the faucet spout and restore water supply.
Troubleshooting
| Problem | Possible Cause | Solution |
|---|---|---|
| Low water flow | Clogged aerator screen due to mineral buildup or debris. | Remove and clean the aerator as described in the Maintenance section. |
| Water leaks around the aerator | Aerator not tightened sufficiently, damaged washer, or incorrect installation. | Gently tighten the aerator. If leaking persists, remove, inspect the washer for damage, and re-install carefully. Replace the washer if damaged. |
| Aerator does not fit | Incorrect thread size for your faucet. | Verify your faucet's thread type and size. The A01-021 features 15/16"-27 male x 55/64"-27 female dual threads. |
Specifications
- Model Number: A01021
- Brand: Jones Stephens
- Thread Type: Dual thread (15/16"-27 male x 55/64"-27 female)
- Quantity: 6 aerators per tube
- Material: Lead-Free construction
- Item Weight: Approximately 0.16 ounces (per tube)
- Product Dimensions: Approximately 8 x 6 x 6 inches (packaging)
Warranty
Jones Stephens products are manufactured to high-quality standards. For specific warranty information, please refer to the official Jones Stephens website or contact their customer support directly. Keep your purchase receipt as proof of purchase.
Support
For further assistance, technical support, or to inquire about replacement parts, please contact Jones Stephens customer service through their official website or the contact information provided with your purchase. When contacting support, please have your product model number (A01-021) available.


