
1. Introduction
The MikroTik CRS125-24G-1S-2HnD-IN is a versatile networking device that integrates the functionalities of a fully manageable Layer 3 router, a Gigabit Ethernet switch, and a 2.4GHz wireless access point. This device operates on MikroTik's RouterOS, providing extensive configuration options for various network environments. It is designed for small to medium-sized businesses and offices requiring a comprehensive networking solution in a single unit.
2. Safety Information
- Always connect the device to a power source within the specified voltage range (10-28V DC).
- Ensure proper ventilation to prevent overheating. Do not block ventilation openings.
- This device is intended for indoor use only.
- Avoid exposing the device to water, moisture, or extreme temperatures.
- For advanced configurations, it is recommended to have a basic understanding of networking principles or consult a qualified professional.
3. Package Contents
The standard package for the MikroTik CRS125-24G-1S-2HnD-IN includes the following items:
- MikroTik CRS125-24G-1S-2HnD-IN Cloud Router Gigabit Switch unit
- Power Adapter (12V DC)
- Micro USB Cable
- Quick Guide (not included in this digital manual)
4. Device Overview
4.1 Front Panel
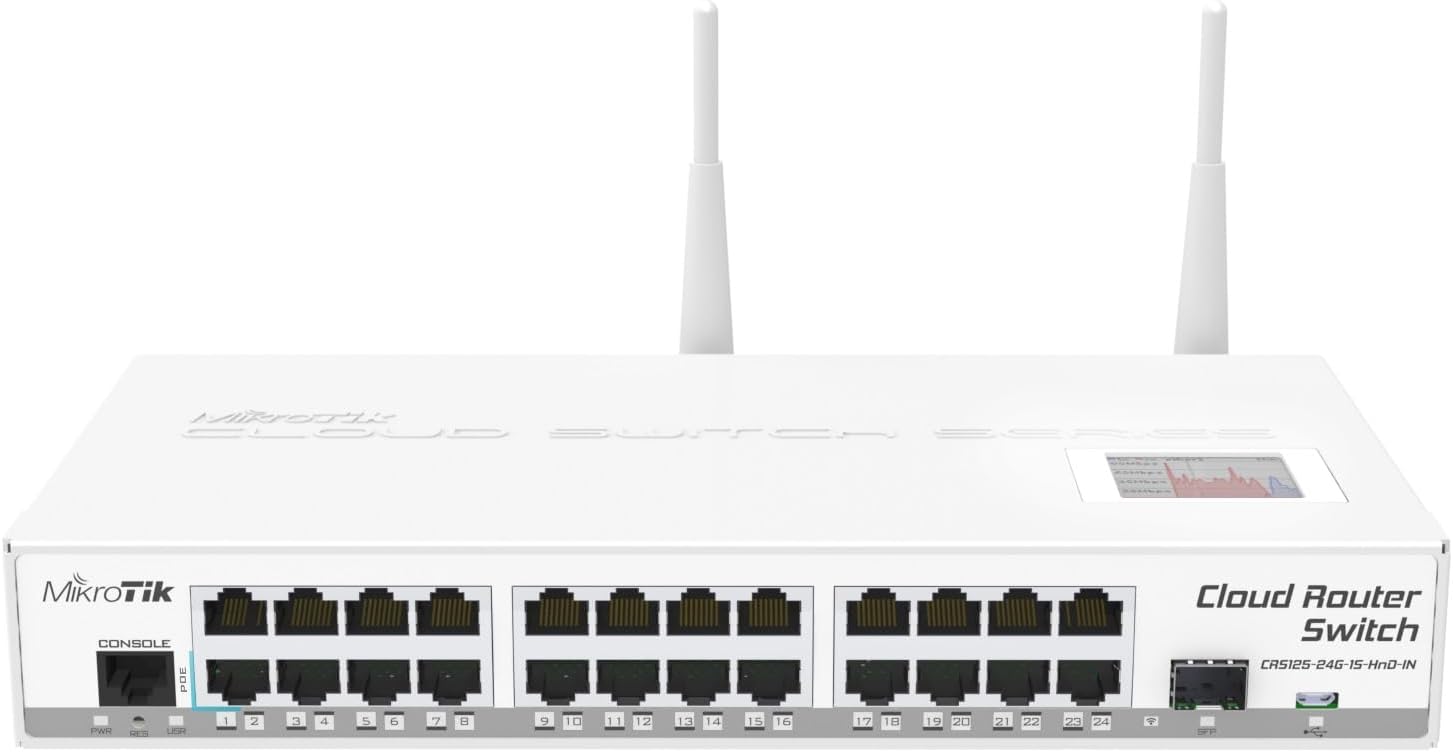
Figure 1: Front view of the MikroTik CRS125-24G-1S-2HnD-IN device. This image displays the 24 Gigabit Ethernet ports, the SFP cage, console port, microUSB port, and LED indicators.
The front panel of the CRS125-24G-1S-2HnD-IN features 24 Gigabit Ethernet ports (numbered 1-24), a dedicated SFP (Small Form-Factor Pluggable) cage for fiber optic connections, a console port for serial access, and a microUSB port. LED indicators for power, user-defined functions, and link/activity status for each port are also present.
4.2 Rear Panel
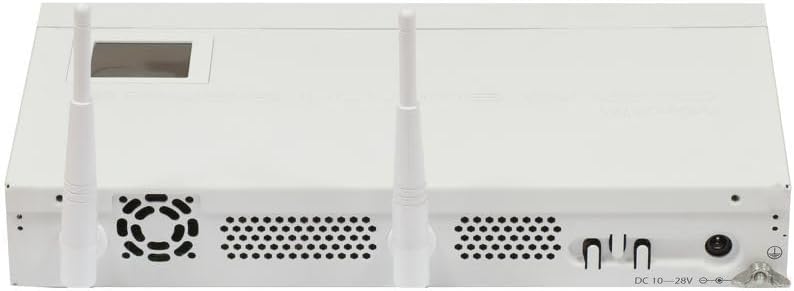
Figure 2: Rear view of the MikroTik CRS125-24G-1S-2HnD-IN device. This image shows the power input, grounding screw, and ventilation openings.
The rear panel includes the DC power input jack (10-28V), a grounding screw for electrical safety, and ventilation grilles to dissipate heat. The two external antennas for the 2.4GHz wireless access point are also visible on the top rear of the unit.
5. Setup
5.1 Hardware Installation
- Connect Power: Plug the provided power adapter into the DC power input jack on the rear of the device, then connect it to a power outlet. The device will power on automatically.
- Connect Network Cables: Connect your internet source (e.g., modem) to the first Gigabit Ethernet port (Port 1). Connect your computers or other network devices to the remaining Gigabit Ethernet ports (Ports 2-24).
- Initial Access: For initial configuration, connect a computer directly to any of the LAN ports (e.g., Port 2) using an Ethernet cable.

Figure 3: The power adapter for the MikroTik CRS125-24G-1S-2HnD-IN.
5.2 Initial Configuration
The device comes pre-configured with a default setup that functions as a basic router. The default IP address for management is 192.168.88.1. The default username is admin, and the password field is initially blank.
- Open a web browser on the connected computer and navigate to http://192.168.88.1.
- Log in using the default credentials (username: admin, password: leave blank).
- Upon first login, you will be prompted to change the default password. It is critical to set a strong, unique password immediately for security.
- Alternatively, you can use the MikroTik WinBox utility for Windows, which provides a graphical interface for RouterOS configuration.
6. Operating Instructions
6.1 RouterOS Overview
RouterOS is the operating system for MikroTik RouterBOARD products. It offers extensive features for routing, switching, firewall, VPN, QoS, and wireless management. The interface can be accessed via WebFig (web browser), WinBox (Windows utility), or command-line interface (CLI) via SSH/Telnet or serial console.
6.2 Basic Network Configuration
- WAN Configuration: Port 1 is typically configured as the WAN (Internet) interface. Ensure it receives an IP address from your ISP (via DHCP or static IP).
- LAN Configuration: Ports 2-24 are part of a bridge by default, acting as LAN ports. You can configure IP addresses, DHCP server settings, and firewall rules for your local network.
- DHCP Server: The device includes a DHCP server to automatically assign IP addresses to devices on your local network. This can be configured under IP > DHCP Server.
6.3 Wireless Access Point Setup
The CRS125-24G-1S-2HnD-IN features a built-in 2.4GHz 802.11b/g/n wireless access point.
- Navigate to Wireless in RouterOS.
- Enable the wireless interface.
- Configure the Mode (e.g., ap bridge), SSID (network name), and Frequency.
- Set up wireless security under Security Profiles, typically using WPA2-PSK with a strong passphrase.
6.4 Switch Configuration
While functioning as a router, the device also offers advanced Layer 3 switch capabilities.
- Access switch-specific settings under the Switch menu in RouterOS.
- You can configure VLANs (Virtual Local Area Networks) to segment your network traffic.
- Port isolation and mirroring features are also available for advanced network management.
7. Maintenance
7.1 Firmware Updates
Regularly updating RouterOS firmware is crucial for security, stability, and access to new features.
- Download the latest RouterOS package for your device model from the official MikroTik website.
- Upload the package to the device using WinBox or FTP.
- Reboot the device to apply the update.
7.2 Resetting to Factory Defaults
If you encounter severe configuration issues or forget your password, you can reset the device to its factory default settings. Warning: This will erase all your configurations.
- With the device powered on, press and hold the RESET button (located on the front panel) for approximately 5 seconds until the user LED starts flashing.
- Release the button. The device will reboot with factory default settings.
8. Troubleshooting
- No Power: Ensure the power adapter is securely connected to both the device and a working power outlet. Check the power LED on the front panel.
- No Network Connectivity: Verify Ethernet cables are properly connected. Check link/activity LEDs on the ports. Ensure correct IP configuration on your computer and the device.
- Cannot Access Web Interface/WinBox: Confirm your computer's IP address is in the same subnet as the device (e.g., 192.168.88.x). Try pinging 192.168.88.1. Disable any firewall on your computer temporarily.
- Wi-Fi Issues: Check if the wireless interface is enabled and configured correctly (SSID, security). Ensure your wireless client is within range and using the correct password.
- Forgotten Password: Perform a factory reset as described in Section 7.2.
For more detailed troubleshooting and advanced configurations, refer to the official MikroTik Wiki and support forums.
9. Specifications
| Feature | Specification |
|---|---|
| Product Model | CRS125-24G-1S-2HnD-IN |
| CPU | 600MHz |
| RAM | 128 MB |
| Storage | 128 MB NAND |
| Ethernet Ports | 24x 10/100/1000 Gigabit Ethernet |
| SFP Ports | 1x SFP cage |
| Wireless | 2.4 GHz 802.11b/g/n, 2 chains |
| Antenna Gain | 4 dBi |
| Operating System | RouterOS, Level 5 license |
| Power Input | 10-28V DC (Passive PoE supported) |
| Dimensions | 285 x 167 x 44 mm (11.2 x 6.6 x 1.7 inches) |
| Weight | 1400g (3.09 lbs) |
| Case Material | Metal |
| UPC | 701748269000 |
10. Warranty and Support
This MikroTik product is covered by a manufacturer's warranty. For specific warranty terms and conditions, please refer to the documentation provided with your purchase or visit the official MikroTik website.
For technical support, additional documentation, and community forums, please visit the official MikroTik website: mikrotik.com/support.


