
1. Introduction
This manual provides essential information for the Perlick C17511-1EP Epoxy Evaporator Coil. This component is a genuine Original Equipment Manufacturer (OEM) replacement part designed to ensure compatibility and optimal performance within Perlick bar and beverage systems. Using genuine OEM parts helps maintain the integrity and warranty of your equipment.
The Perlick C17511-1EP Epoxy Evaporator Coil is engineered to meet the same high-quality standards as the original components, contributing to the reliability and safety of your system. It is crucial to handle and install this part correctly to ensure proper function and longevity.
2. Product Overview
The Perlick C17511-1EP is an epoxy-coated evaporator coil, a critical component in refrigeration systems. Its primary function is to absorb heat from the surrounding environment, facilitating the cooling process. The epoxy coating provides enhanced durability and corrosion resistance.
Included Components:
- One (1) Perlick C17511-1EP Epoxy Evaporator Coil replacement part.

Image 1: Top-down view of the Perlick C17511-1EP Epoxy Evaporator Coil, showing the finned heat exchange surface and the U-bend refrigerant lines at one end.

Image 2: Side view of the Perlick C17511-1EP Epoxy Evaporator Coil, highlighting the dense array of fins that maximize heat transfer efficiency.
3. Setup and Installation
The Perlick C17511-1EP Epoxy Evaporator Coil is a specialized refrigeration component. Installation should only be performed by a qualified and certified refrigeration technician. Improper installation can lead to system malfunction, refrigerant leaks, property damage, or personal injury.
Safety Precautions:
- Always disconnect power to the appliance before beginning any installation or service work.
- Ensure proper handling of refrigerants according to local and national regulations.
- Wear appropriate personal protective equipment (PPE), including gloves and eye protection.
- Refer to the original equipment manufacturer's service manual for specific installation procedures and torque specifications.
Installation Steps (General Guidance - Consult Appliance Manual):
- Safely remove the old evaporator coil, ensuring all refrigerant lines are properly disconnected and sealed.
- Carefully position the new Perlick C17511-1EP coil in the designated location within the appliance.
- Connect the refrigerant lines to the new coil, ensuring a leak-free seal. This typically involves brazing or flaring, which requires specialized tools and expertise.
- Perform a leak test on the newly installed connections.
- Evacuate the refrigeration system to remove non-condensable gases and moisture.
- Recharge the system with the correct type and amount of refrigerant as specified by the appliance manufacturer.
- Restore power and test the system for proper operation.

Image 3: Angled view of the Perlick C17511-1EP Epoxy Evaporator Coil, showing the intricate U-bend connections for refrigerant flow.
4. Operating Instructions
The Perlick C17511-1EP Epoxy Evaporator Coil is a passive component within a larger refrigeration system. It does not have direct user operating controls. Its function is integral to the overall cooling cycle of the appliance it is installed in.
For operating instructions related to your Perlick bar or beverage system, please refer to the specific user manual provided with your appliance. This will detail how to power on/off the unit, adjust temperature settings, and other operational aspects that control the evaporator coil's function indirectly.
5. Maintenance
Regular maintenance of the evaporator coil is essential for efficient operation and longevity of your refrigeration system. While the epoxy coating provides protection, routine inspection and cleaning are recommended.
Recommended Maintenance Practices:
- Periodic Inspection: Visually inspect the coil for any signs of damage, corrosion, or excessive frost buildup.
- Cleaning: Over time, dust, debris, and biological growth can accumulate on the fins, reducing heat transfer efficiency. With the power disconnected, carefully clean the coil fins using a soft brush or a vacuum cleaner with a brush attachment. For stubborn dirt, a mild, non-corrosive coil cleaner specifically designed for evaporator coils may be used, followed by thorough rinsing (ensure proper drainage).
- Defrosting: Ensure the appliance's defrost cycle is functioning correctly to prevent excessive ice accumulation on the coil, which can impede airflow and cooling performance.
- Professional Service: For comprehensive cleaning, leak checks, or any repairs, it is highly recommended to contact a qualified refrigeration technician.
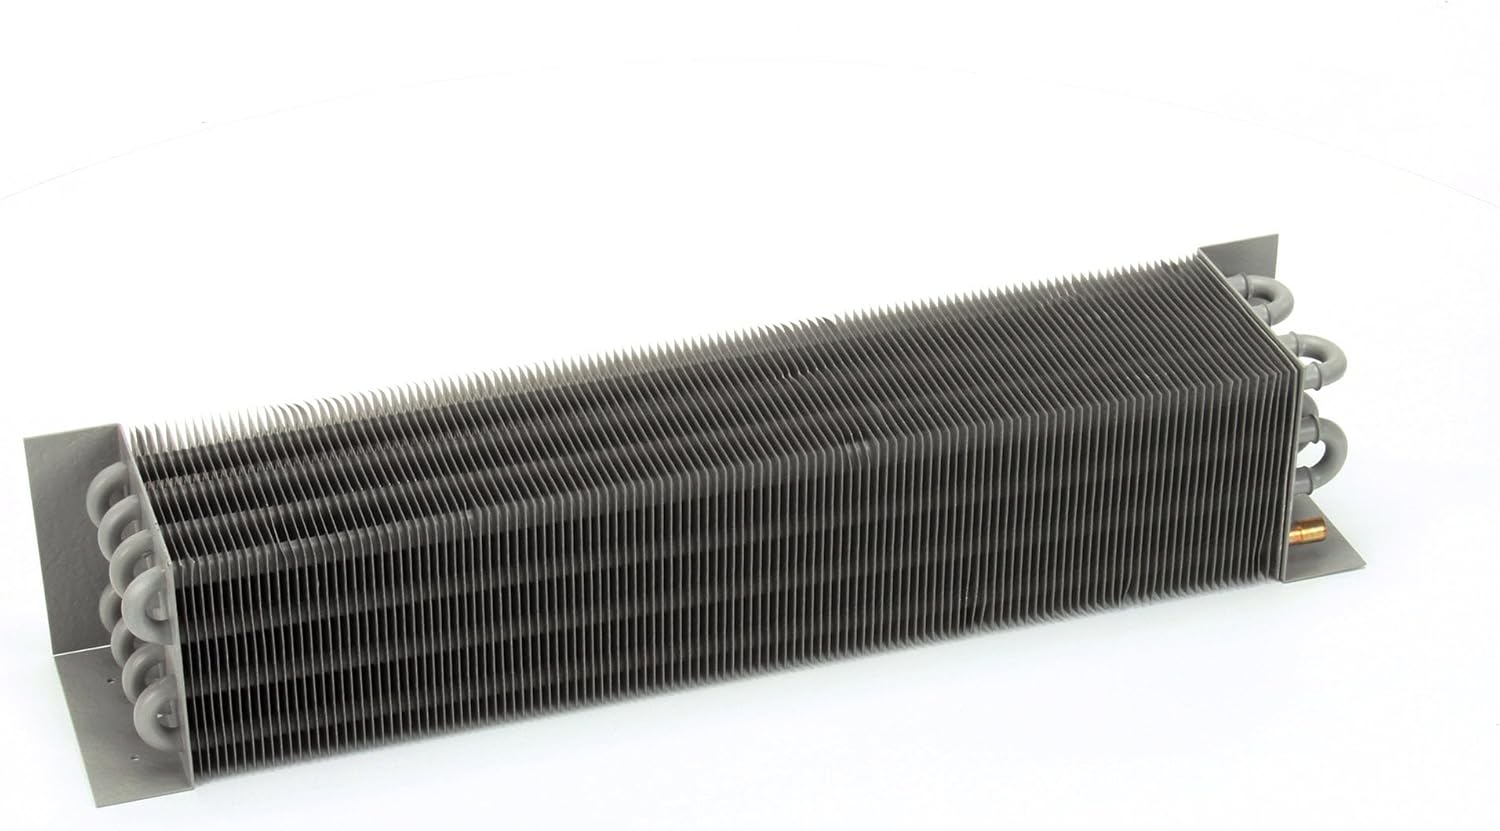
Image 4: Another side view of the Perlick C17511-1EP Epoxy Evaporator Coil, showing the fin structure and refrigerant line entry points.
6. Troubleshooting
Issues related to the evaporator coil often manifest as reduced cooling capacity, unusual noises, or visible frost/ice buildup. Due to the complex nature of refrigeration systems, troubleshooting should ideally be performed by a qualified technician.
Common Symptoms and Potential Causes:
- Reduced Cooling: May indicate a dirty coil, insufficient airflow, low refrigerant charge (due to a leak), or a faulty compressor.
- Excessive Frost/Ice Buildup: Can be caused by a malfunctioning defrost system, restricted airflow over the coil, or low refrigerant.
- Refrigerant Leaks: Indicated by oily residue on or around the coil, or a noticeable drop in cooling performance. Leaks require immediate professional attention.
If you suspect a problem with your evaporator coil or refrigeration system, contact a certified HVAC/R technician for diagnosis and repair. Attempting repairs without proper training and tools can be dangerous and may void your appliance's warranty.
7. Specifications
| Attribute | Value |
|---|---|
| Brand Name | Perlick |
| Model Info | C17511-1EP |
| Item Weight | 1 pounds |
| Product Dimensions | 24 x 6 x 6 inches |
| Item Model Number | C17511-1EP |
| Part Number | C17511-1EP |
| Included Components | Replacement Part |
| Batteries Required? | No |
| Thickness | 5 Inches |
| ASIN | B00HV0OL5M |
| Date First Available | January 14, 2014 |
8. Warranty Information
Using genuine Perlick OEM parts, such as the C17511-1EP Epoxy Evaporator Coil, is crucial for maintaining the warranty of your Perlick equipment. Non-OEM parts may void existing warranties and could lead to performance issues not covered by the manufacturer.
For specific warranty details pertaining to your Perlick appliance and replacement parts, please refer to the warranty documentation that accompanied your original equipment purchase or contact Perlick customer support directly.
9. Support and Service
If you require technical assistance, service, or have questions regarding the Perlick C17511-1EP Epoxy Evaporator Coil or your Perlick appliance, please contact Perlick customer support or a qualified service technician.
Perlick Contact Information:
- Please visit the official Perlick website for the most current contact details, including phone numbers and service request forms.
- When contacting support, please have your appliance model number, serial number, and the part number (C17511-1EP) readily available.