Introduction
The Leviton SureSlide Dimmer Switch provides smooth, full-range dimming for various lighting types, including dimmable LED, CFL, and incandescent bulbs. This manual provides essential information for the safe installation, operation, and maintenance of your dimmer switch.

Image: Two white Leviton SureSlide Dimmer Switches, front view, showcasing their design and controls.
Safety Information
WARNING: To avoid fire, shock, or death; turn off power at circuit breaker or fuse and test that power is off before wiring!
- This product must be installed in accordance with all national and local electrical codes.
- If you are unsure about any part of these instructions, consult a qualified electrician.
- Do not use with non-dimmable light sources.
- For indoor use only.
Package Contents
Your package should contain the following items:
- 2 x Leviton SureSlide Dimmer Switches (Model: 06674-754-2PK)
- Installation Instructions (this manual)
- Mounting Screws

Image: Retail packaging for the Leviton SureSlide Dimmer Switch, indicating a 2-pack.
Features
- 2-Pack: Conveniently includes two dimmer switches.
- Versatile Control: Supports single pole or 3-way lighting control when used with a 3-way switch.
- Integrated Slide Control: Features a linear full-range slide control for precise dimming.
- Preset ON/OFF Switch: A separate ON/OFF switch preserves your selected brightness setting.
- Broad Compatibility: Backwards compatible with incandescent lamps, and designed for dimmable LED and CFL lamps.

Image: A detailed view of the dimmer switch highlighting its key features: the integrated slider for dimming, the separate ON/OFF switch, and the dimming range modification switch.
Specifications
| Attribute | Value |
|---|---|
| Product Dimensions | 7.62 x 4.39 x 10.46 cm; 45.36 g |
| Manufacturer | Leviton |
| Item Model Number | 06674-754-2PK |
| Country of Origin | China |
| Operation Mode | ON-OFF-ON |
| Current Rating | 15 Amps |
| Operating Voltage | 120 Volts (AC) |
| Contact Type | Normally Open |
| Connector Type | Screw |
| Switch Type | Dimmer Switch |
| Material | Polycarbonate |

Image: Technical drawing showing the precise dimensions of the Leviton SureSlide Dimmer Switch in inches.
Installation Guide
Before You Begin
- Turn Off Power: Locate the circuit breaker or fuse box that controls the light fixture you are working on. Turn off the power completely. Verify power is off using a voltage tester.
- Remove Old Switch: Carefully remove the wallplate and unscrew the existing switch from the electrical box. Gently pull the switch out to expose the wiring.
- Identify Wires: Note the wiring configuration of your existing switch. Common wires include:
- Line (Hot) Wire: Usually black, brings power from the circuit breaker.
- Load Wire: Usually black, goes to the light fixture.
- Ground Wire: Bare copper or green, connects to the electrical box or ground wire in the box.
- Neutral Wire: Usually white (not always present in switch boxes, especially for older installations).
- Traveler Wires: (For 3-way installations) Usually red or black, connect between two 3-way switches.
Wiring Your Dimmer Switch
The Leviton SureSlide Dimmer Switch can be installed in single-pole or 3-way applications. Refer to the wiring diagram on the back of the dimmer or consult a qualified electrician if unsure.
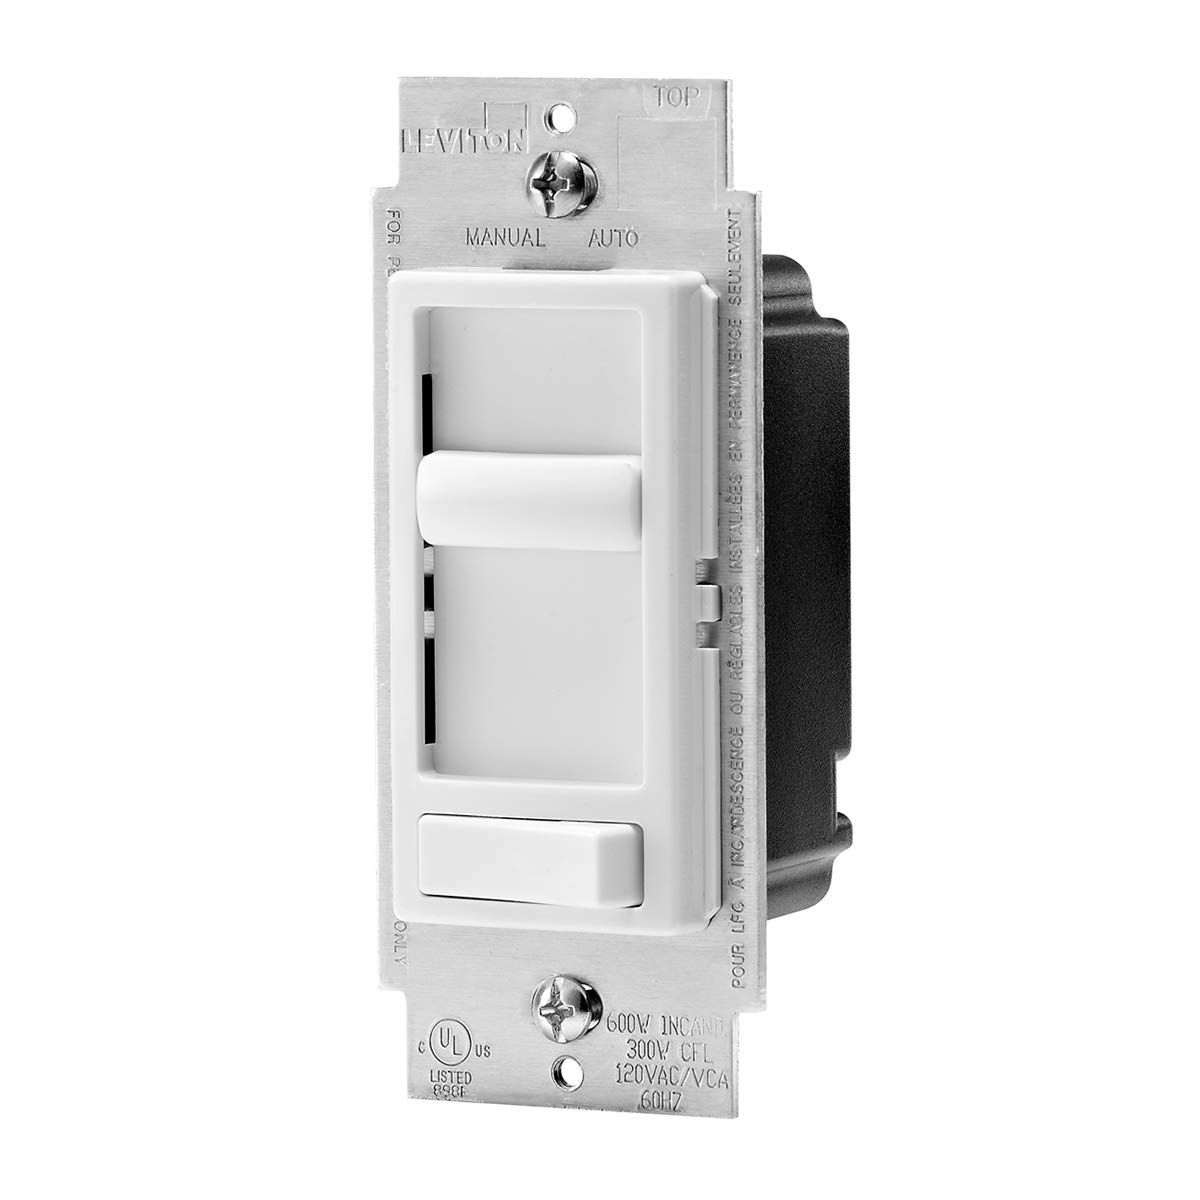
Image: The rear view of the dimmer switch, illustrating the screw terminals for electrical connections. This view is crucial for understanding wiring.
- Connect Ground Wire: Connect the green or bare copper ground wire from the electrical box to the green ground screw on the dimmer switch.
- Connect Line/Load Wires:
- Single-Pole: Connect the Line (hot) wire and the Load wire to the two black wires on the dimmer switch. It does not matter which black wire connects to Line or Load.
- 3-Way: Connect the common (often black) wire from the 3-way circuit to one of the black wires on the dimmer. Connect the two traveler wires to the remaining black wire and the red wire on the dimmer.
- Secure Connections: Ensure all wire connections are secure using wire nuts.
Mounting and Finishing
- Position Dimmer: Carefully push the wired dimmer switch into the electrical box.
- Secure Dimmer: Use the provided screws to secure the dimmer to the electrical box.
- Attach Wallplate: Install the decorative wallplate over the dimmer switch.
- Restore Power: Turn the power back on at the circuit breaker or fuse box.
- Test: Test the dimmer switch to ensure it functions correctly.
Operation
The Leviton SureSlide Dimmer Switch is designed for intuitive control of your lighting.
- ON/OFF Control: Press the bottom button to turn the lights ON or OFF. This button acts as a preset switch, remembering your last dimming level.
- Dimming Control: Use the vertical slide bar to adjust the brightness level. Slide up for brighter lights, and down for dimmer lights.
- Dimming Range Adjustment: For optimal performance with certain LED bulbs, you may need to adjust the minimum and maximum light levels. A small "MODE" selector switch is located on the side of the dimmer behind the wallplate. Refer to the image below for its location.
Image: A close-up view of the dimmer switch, specifically showing the small 'MODE' selector switch used to fine-tune the dimming range for different bulb types.
Maintenance
Your Leviton SureSlide Dimmer Switch requires minimal maintenance.
- Cleaning: To clean the dimmer switch and wallplate, wipe with a soft, damp cloth. Do not use abrasive cleaners or solvents.
- No User Serviceable Parts: There are no user-serviceable parts inside the dimmer. Do not attempt to open or repair the unit.
Troubleshooting
| Problem | Possible Cause | Solution |
|---|---|---|
| Lights do not turn ON or OFF. | No power to the dimmer; loose wiring; faulty bulb. | Check circuit breaker. Ensure all wire connections are secure. Replace bulb. |
| Lights flicker or do not dim properly. | Incompatible bulb type; dimming range not optimized; loose connection. | Ensure bulbs are "dimmable" type. Adjust the "MODE" selector switch. Check wiring connections. |
| Dimmer is warm to the touch. | Normal operation; overloaded circuit. | Slight warmth is normal. If excessively hot, reduce load or consult an electrician. Ensure proper ventilation in the electrical box. |
Warranty and Support
Leviton products are manufactured to the highest quality standards. For information regarding warranty coverage or technical support, please visit the official Leviton website or contact their customer service directly. Keep your purchase receipt for warranty claims.
You can find more information and support at the Leviton Store on Amazon.


