
1. Introduction
This manual provides detailed instructions for the safe and effective setup, operation, and maintenance of your Eurmax USA Premium 10x10 Pop-up Canopy Tent. Please read all instructions carefully before assembly and use to ensure proper functionality and longevity of your product.
1.1 Safety Warnings
- Read and follow all instructions before use.
- Ensure stability before entering the tent.
- Do not use near open flames or electrical equipment.
- Keep away from children.
- Do not use in severe weather conditions, including heavy winds, rain, or snow.
- Always secure the canopy with sandbags or tie-downs to prevent tipping or collapse.
2. Package Contents
Verify that all components listed below are present in your package:
- 10x10 Commercial Pop-up Canopy Frame (Pre-Steel)
- 10x10 Canopy Tent Top Cover (White)
- 10x10 Canopy Tent Roller Bag
- Spare Parts Kit
- 4 Sand Bags

Figure 2.1: Complete package contents including the canopy frame, top cover, roller bag, and four sandbags.

Figure 2.2: The robust internal truss structure of the canopy frame, indicating its strength and stability.
3. Setup Instructions
The Eurmax USA Premium Pop-up Canopy Tent is designed for quick and easy setup by one or two people without the need for tools. Follow these steps for proper assembly:
- Step 1: Position the Frame. Place the folded frame in the desired setup location. With a partner, grasp two opposite outer legs and slightly pull the frame apart, extending it about halfway.
- Step 2: Attach the Top Cover. Drape the canopy top cover over the partially opened frame. Ensure the corners of the cover align with the corners of the frame. Secure the cover to the frame using the hook-and-loop fasteners or straps provided.
- Step 3: Fully Extend the Frame. Continue pulling the outer legs apart until the frame is fully extended and the truss bars are locked into place. You may need to push up on the center of the canopy to fully extend the frame.
- Step 4: Adjust Leg Height. Press the thumb button release levers on each leg and extend the legs to your desired height. There are three height positions available. Ensure all four legs are set to the same height for stability.
- Step 5: Secure the Canopy. Fill the four included sandbags with sand or other suitable weight. Attach one sandbag to each leg of the canopy. For additional stability, especially in windy conditions, use ropes and stakes (not included) through the steel D-rings located on each corner of the canopy top.

Figure 3.1: Visual guide for the three main stages of canopy setup, from folded frame to fully assembled.

Figure 3.2: Detail of the thumb button release lever, used for comfortable and reliable height adjustment.
4. Operating the Canopy
4.1 Height Adjustment
Your Eurmax canopy features three adjustable height positions. To change the height, locate the thumb button release levers on each leg. Press the lever and slide the inner leg up or down to the desired position. Ensure the button clicks securely into place at the chosen height. Always adjust all four legs evenly.
- Clearance Height Options: 6.4 ft, 6.7 ft, 7 ft
- Peak Height Options: 10.5 ft, 10.8 ft, 11.1 ft

Figure 4.1: Diagram detailing the three available height settings for the canopy, including both leg clearance and overall peak height.
4.2 Securing the Canopy
Properly securing your canopy is crucial for safety and stability, especially in outdoor conditions.
- Sandbags: Utilize the provided sandbags by filling them with sand and attaching one to each leg. These add essential weight to prevent uplift.
- D-Rings: Steel D-rings are located on each corner of the canopy top. These can be used with ropes and stakes (not included) to anchor the canopy to the ground, providing additional wind resistance.
- Truss Muscle Straps: Straps with Truss Muscle are located on each valance to help keep the canopy fabric securely attached to the frame, particularly in windy conditions.

Figure 4.2: A steel D-ring on the canopy corner, designed for attaching ropes or tie-downs to secure the tent.
5. Maintenance
5.1 Cleaning the Canopy Top
The canopy top cover is made from CPAI-84, NFPA 701 & ULC S109 fire retardant certified polyester with PU coating, designed to block 99% UV rays and be water resistant. To clean, gently wipe with a damp cloth and mild soap. Rinse thoroughly and allow to air dry completely before folding and storing. Do not use harsh chemicals or abrasive cleaners.
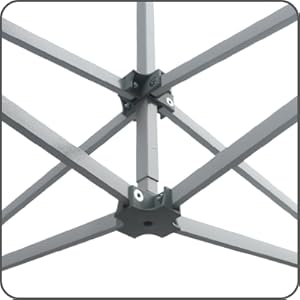
Figure 5.1: The water-resistant fabric of the canopy top, showing how water beads on the surface.
5.2 Frame Care
The frame features a hammertone powder-coated finish for rust resistance. Periodically inspect the frame for any signs of wear or damage. Clean any dirt or debris from the frame with a damp cloth. Lubricate moving parts as needed to ensure smooth operation of the thumb button release levers and sliding mechanisms.
5.3 Storage
After each use, ensure the canopy top is clean and completely dry before folding the frame. The unique L-shaped roller bag is oversized, allowing for storage of the top cover while still attached to the frame. This eliminates the need to remove the top after every use, simplifying takedown and storage. Store in a cool, dry place.

Figure 5.2: The included Eurmax Signature Roller Bag, designed for easy transport and storage of the canopy.
6. Troubleshooting
- Canopy is unstable or tips over: Ensure all legs are fully extended and locked at the same height. Always use the provided sandbags and additional tie-downs (ropes/stakes) in windy conditions. Do not use in severe weather.
- Water leaks through the canopy top: The canopy top features seam-sealed stitching to prevent water penetration. If leaks occur, inspect the seams for damage. Ensure the canopy is taut and water is not pooling on the surface.
- Frame difficult to open or close: Check for any obstructions in the frame's moving parts. Ensure thumb button release levers are fully depressed when adjusting. Lubricate joints if necessary.
- Damaged or missing parts: Refer to the "Warranty & Support" section for information on obtaining replacement parts.
7. Specifications
| Brand | Eurmax |
| Model | canopy |
| Material | Alloy Steel, Aluminum, Polyester |
| Style | Pre-Steel |
| Product Dimensions (L x W x H) | 120"L x 120"W x 133.2"H (10ft x 10ft x 11.1ft max height) |
| Frame Material | Metal (1.6" hexagon shaped leg) |
| Water Resistance Level | Water Resistant |
| Shape | Hexagonal (leg shape) |
| Ultraviolet Light Protection | UV Protection (blocks 99% UV rays) |
| Assembly Required | No (Pop-up design) |
| Color | White |
| Floor Area | 100 Square Feet |
| Item Weight | 79.8 pounds |
| UPC | 609679013733 |
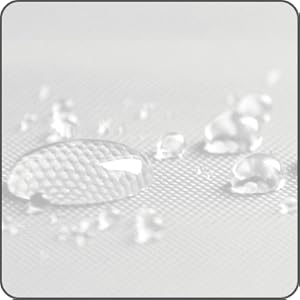
Figure 7.1: Detail of the thickened hexagonal leg, highlighting the robust construction of the frame.
8. Warranty & Support
Eurmax provides a one-year after-sale protection for your canopy tent. Additionally, lifetime accessories and parts supply are available to ensure the continued functionality of your product.
For any problems, questions, or to inquire about replacement parts, please contact Eurmax customer support. Your satisfaction is 100% guaranteed.
You can visit the official Eurmax store for more information and support: Eurmax Store on Amazon


