
1. Introduction
This manual provides essential information for the proper installation, use, and maintenance of the Complete Tractor 3013-1480 Lift Arm Repair End. This component is designed for Category I tractor lift arms, offering a durable and reliable solution for repair.
Please read this manual thoroughly before installation and operation to ensure safety and optimal performance of your equipment.
2. Safety Information
WARNING: Always prioritize safety when working with agricultural machinery. Failure to follow safety instructions can result in serious injury or death.
- Always wear appropriate personal protective equipment (PPE), including safety glasses and gloves, when handling or installing this part.
- Ensure the tractor is turned off, the engine is cool, and all moving parts are stationary before beginning any installation or maintenance.
- Use proper lifting techniques and tools to avoid strain or injury.
- Consult your tractor's specific service manual for detailed instructions on lift arm removal and installation procedures.
- Keep children and bystanders away from the work area.
Proposition 65 Warning: This product may contain chemicals known to the State of California to cause cancer, birth defects, or other reproductive harm. Wash hands after handling.
3. Product Overview
The Complete Tractor 3013-1480 is a straight, forged lift arm repair end designed for Category I applications. It is engineered to meet or exceed OEM quality standards for durability and fit.
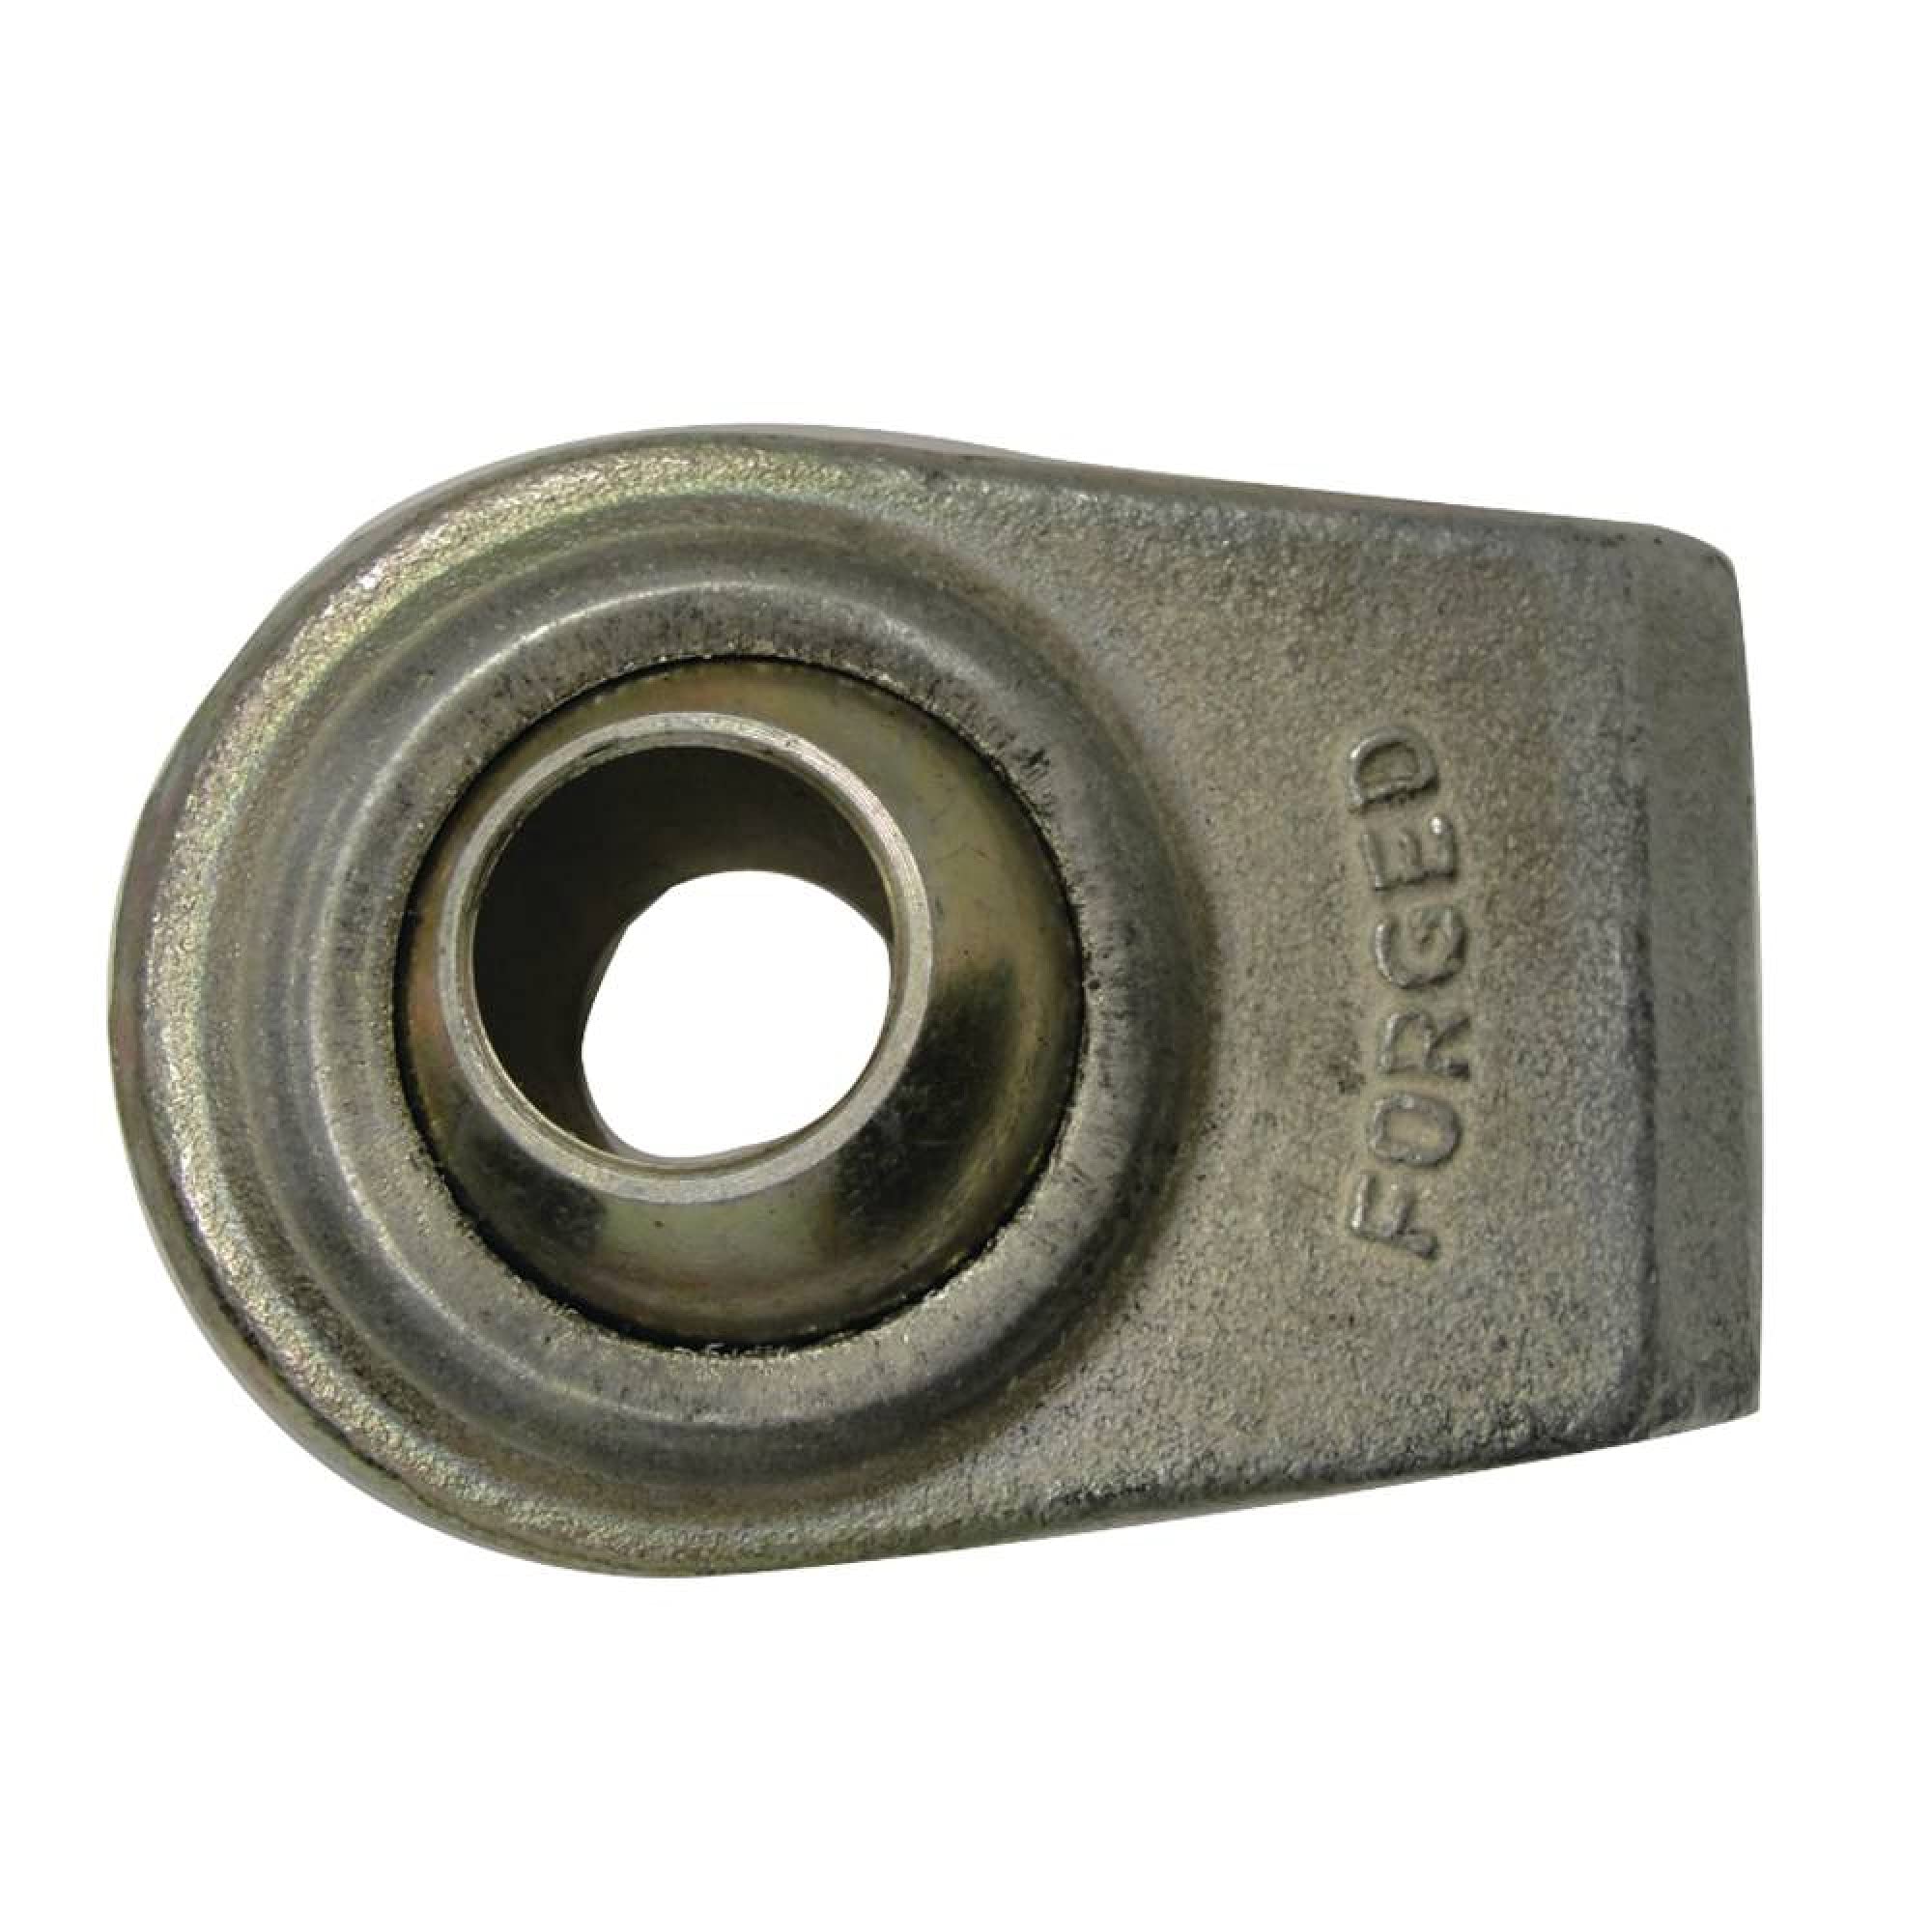
Figure 1: Complete Tractor 3013-1480 Lift Arm Repair End. This image shows the straight, forged design of the repair end, highlighting its robust construction and pin hole.
Key Features:
- Type: Lift Arm Repair End, Straight, Forged
- Category: I
- Pin Hole Diameter: 7/8 inch
- Width at Weld End: 2-3/8 inches
- Overall Length: 4 inches
- OEM Compatibility: Replaces OEM part number LA3322
4. Setup and Installation
Proper installation is crucial for the safe and effective operation of the lift arm repair end. If you are unsure about any step, consult a qualified mechanic.
Required Tools:
- Welding equipment (MIG, TIG, or Stick welder)
- Grinder or cutting tool
- Measuring tape or caliper
- Clamps
- Safety glasses, welding helmet, gloves
Installation Steps:
- Prepare the Tractor: Park the tractor on a level surface, engage the parking brake, and turn off the engine. Ensure the lift arms are in a stable, lowered position or properly supported.
- Remove Damaged End: Carefully cut off the damaged end of the existing lift arm using a grinder or cutting tool. Ensure a clean, straight cut perpendicular to the arm's length.
- Clean and Prepare: Clean both the cut end of the lift arm and the weld end of the new repair end. Remove any rust, paint, or debris to ensure a strong weld.
- Fit the Repair End: Slide the new 3013-1480 repair end onto the lift arm. Ensure it fits snugly and is aligned correctly. The 2-3/8" width at the weld end should match the lift arm.
- Secure for Welding: Use clamps to firmly hold the repair end in place, ensuring proper alignment and preventing movement during welding.
- Weld the Joint: Perform a strong, continuous weld around the entire circumference of the joint. Follow best welding practices for the material type and thickness. Allow the weld to cool slowly.
- Inspect Weld: After cooling, inspect the weld for any cracks, porosity, or incomplete fusion. Grind smooth if necessary and re-weld any imperfections.
- Test Functionality: Once the weld is secure and cooled, carefully test the lift arm's movement and ensure the new repair end functions correctly with implements.

Figure 2: Example of a lift arm component. This image illustrates a component similar to the repair end, demonstrating the type of part being installed onto a tractor's lift arm.
5. Operating Considerations
Once installed, the lift arm repair end functions as an integral part of your tractor's three-point hitch system. No specific "operation" of the repair end itself is required beyond its proper installation and integration into the lift arm.
- Ensure the 7/8" pin hole is clear and free of debris before attaching implements.
- Always use appropriate pins and clips to secure implements to the lift arm.
- Regularly inspect the weld joint and the repair end for any signs of wear or damage during routine tractor checks.
6. Maintenance
To ensure the longevity and reliable performance of your Complete Tractor 3013-1480 Lift Arm Repair End, follow these maintenance guidelines:
- Regular Inspection: Periodically inspect the repair end and the weld joint for any signs of corrosion, cracks, bending, or excessive wear. Pay close attention to the pin hole for elongation or damage.
- Cleaning: Keep the repair end clean from dirt, mud, and corrosive materials. A simple wash with water and mild detergent, followed by drying, is usually sufficient.
- Lubrication: While the repair end itself does not require lubrication, ensure that any pins or bushings used with it are properly greased according to your implement's or tractor's recommendations.
- Storage: If the tractor is stored for extended periods, ensure the lift arms are clean and protected from the elements to prevent rust.
7. Troubleshooting
This section addresses common issues that may arise with lift arm components. Since the 3013-1480 is a repair end, most troubleshooting will relate to its installation or general wear.
| Problem | Possible Cause | Solution |
|---|---|---|
| Pin does not fit through hole | Debris in hole, incorrect pin size, or minor manufacturing tolerance. | Clean the pin hole. Verify pin is 7/8 inch. If slightly tight, a light reaming or filing may be necessary, but avoid enlarging significantly. |
| Weld joint shows cracks | Improper welding technique, insufficient penetration, or excessive stress. | Grind out the cracked weld and re-weld using proper techniques. Ensure adequate penetration and consider pre-heating if necessary. Reduce excessive loads on the lift arm. |
| Excessive wear on pin hole | Lack of lubrication, abrasive conditions, or prolonged heavy use. | Ensure pins are properly lubricated. Replace worn pins. If the hole is significantly elongated, the repair end may need replacement. |
For issues not covered here, or if problems persist, contact Complete Tractor customer support or a certified agricultural equipment technician.
8. Specifications
| Feature | Detail |
|---|---|
| Model Number | 3013-1480 |
| Part Type | Lift Arm Repair End |
| Design | Straight, Forged |
| Category | I |
| Pin Hole Diameter | 7/8" (0.875 inches) |
| Width at Weld End | 2-3/8" (2.375 inches) |
| Overall Length | 4 inches |
| Item Weight | 1.91 pounds |
| Product Dimensions | 5.3 x 3.2 x 1.9 inches |
| Manufacturer | Complete Tractor |
| OEM Replacement | LA3322 |
9. Warranty and Support
Warranty Information:
The Complete Tractor 3013-1480 Lift Arm Repair End comes with a 1-year warranty. This warranty covers manufacturing defects and ensures the product meets OEM quality standards throughout planting and harvesting seasons. For specific terms and conditions, please refer to the warranty documentation provided with your purchase or contact Complete Tractor customer service.
Customer Support:
For technical assistance, warranty claims, or any questions regarding your Complete Tractor product, please visit the official Complete Tractor website or contact their customer service department. Contact information can typically be found on the product packaging or the manufacturer's website.